Choosing the Best Travel Tripod
Tripods are a great tool for quality night and low light photos, but when traveling, carrying a bulky tripod is generally not an option. This guide will help you choose the best travel tripod, and help you weigh the variables to determine which tripod might be best for you. Unfortunately, there are trade-offs with these variables…something that’s lightweight and very stable is likely to cost a small fortune. Something that’s cheap is likely to be bulky. Unless money is no concern, you have to make a compromise somewhere with your travel tripod.
Unfortunately, finding the tripod that makes the fewest compromises and is best for your needs and travel is incredibly difficult. You could always just spend $0, rest your tripod on a garbage can, and call it a day…but that’s probably not the best solution, either.
For the last several years, I’ve been using the same tripod, but have been looking for a marginal improvement over it for greater stability. I’ve combed photo forums, reviews, Amazon, and even local camera stores to find something. (Tip: Best Buy’s tripods are absolute garbage, and unless you live in a large city with a really nice camera shop (like B&H in New York City!), chances are your local camera shop sells garbage tripods, too.) My recommendations in this article are a result of reading about and inspecting DOZENS of tripods.
Obviously, I’m approaching this guide as someone who most often carries a tripod around Walt Disney World, Disneyland, or other Disney properties. However, I also carry my tripod in National Parks and when we travel to other destinations. I’ve found that these same principles apply to all of those destinations. In each case, I do a lot of walking (or hiking) while carrying a tripod.
Here’s what you want to consider when looking for a tripod for Walt Disney World, Disneyland, or travel in general.

68 second exposure…you won’t get shots like this without a tripod!
Variables
1. Weight
The reasons for wanting a lightweight travel tripod are two-fold. First, you want something that won’t weigh down your luggage (side note since I get asked this question a lot: tripods ARE acceptable carry-on items). Second, and more importantly, you want something that won’t weigh you down when you’re carrying it.
On an average day in the parks, I walk several miles carrying a camera bag with a tripod attached to the back of it. The total weight of the bag exceeds 20 pounds, and that’s with a several lenses including a bulky Nikon 70-200mm f/2.8. If my tripod were any heavier than it is, I’d have to rent a locker each day for it. So by having a lighter tripod in essence “saves” me $7 per day. I recommend factoring this savings into your tripod budget, because not spending that $7/day amounts to spending substantially less over the life of your tripod. It will be cheaper in the long run to get a $200 tripod that weighs 3 pounds and is compact rather than a $50 bulky one that weighs 5 pounds. Trust me on this.
If you’re planning on using a tripod for travel beyond Disney, you’ll want that lighter tripod, anyway. Last time I checked, there were no storage lockers in the Rocky Mountains.
2. Stability
This concerns not only how stable the tripod is on its own, but also how much weight it can support. If you’re only using a point & shoot camera or an entry level DSLR with a kit lens, you have a great advantage here. Your equipment is lighter and thus you don’t need a tripod that can support a lot of weight. This means it’s much easier for you to find a stable tripod for your camera that will be lightweight and won’t cost a small fortune. Consider this a major victory!
If you use more than the kit lens with your DSLR, or plan to upgrade your camera or lenses in the future, you will want to look at tripods that can support more weight. Now, just because your camera only weighs 2 pounds and your heaviest lens only weighs 1 pound doesn’t mean that you want a tripod that supports 3 pounds. It’s best to play it safe and get one that can support a bit more than your heaviest camera and lens combination.
3. Size
For traveling, you want a tripod that is tall when extended, but collapses to a compact package when folded (folded height is NOT the same as minimum height…you want to look at folded height). I would highly recommend a tripod that has a maximum height of no less than 59 inches (the taller, the better) and folds down to less than 17 inches. A tripod with a maximum height of only 50 inches will not be over to “see” over crowds, so you can forget about fireworks photos. Every inch is important when it comes to height.
This is where you’re most likely to get in trouble with cheap tripods from Best Buy or your local camera shop. These tripods can usually support a decent amount of weight (although they probably weigh a bit on their own), chances are that they are incredibly bulky. I’ve frequently seen these tripods with folded heights of 24 inches and maximum heights of 55 inches. This is no good.
4. Cost
Some professional photographers spend just as much on their tripods as they do their cameras and lenses. I know a couple of guys who have tripods that cost them well over $1,000. Personally, I find this to be a little ridiculous. There are plenty of great tripods that cost significantly less than this. That said, if you want a tripod that is light, stable, and well-sized for travel, you are going to spend over $100, unless you are exclusively using a point and shoot. I’ve tried to find budget tripods and “hidden gems” in this area before…and they simply do not exist.
5. Ease of Use
This is a factor that is frequently overlooked, and one thing that is difficult to judge when buying online (which you almost certainly will be doing). How quickly you can setup and take down the tripod is important, especially if you are not on a trip that is dedicated solely to photography. Don’t test the patience of your family members on vacation with a tripod that takes forever to set up and break down. Things like twist lock legs, quick release plates, and easy to use ball-heads all factor into the mix here.
The last two variables here concern the tripod head rather than the tripod itself (yep, you’ll likely need to purchase two things for a good tripod set-up). Luckily, tripod heads are far simpler than tripod legs…we’ll get to tripod heads below.

This 56 second photo would’ve been impossible without a tripod!
Recommendations
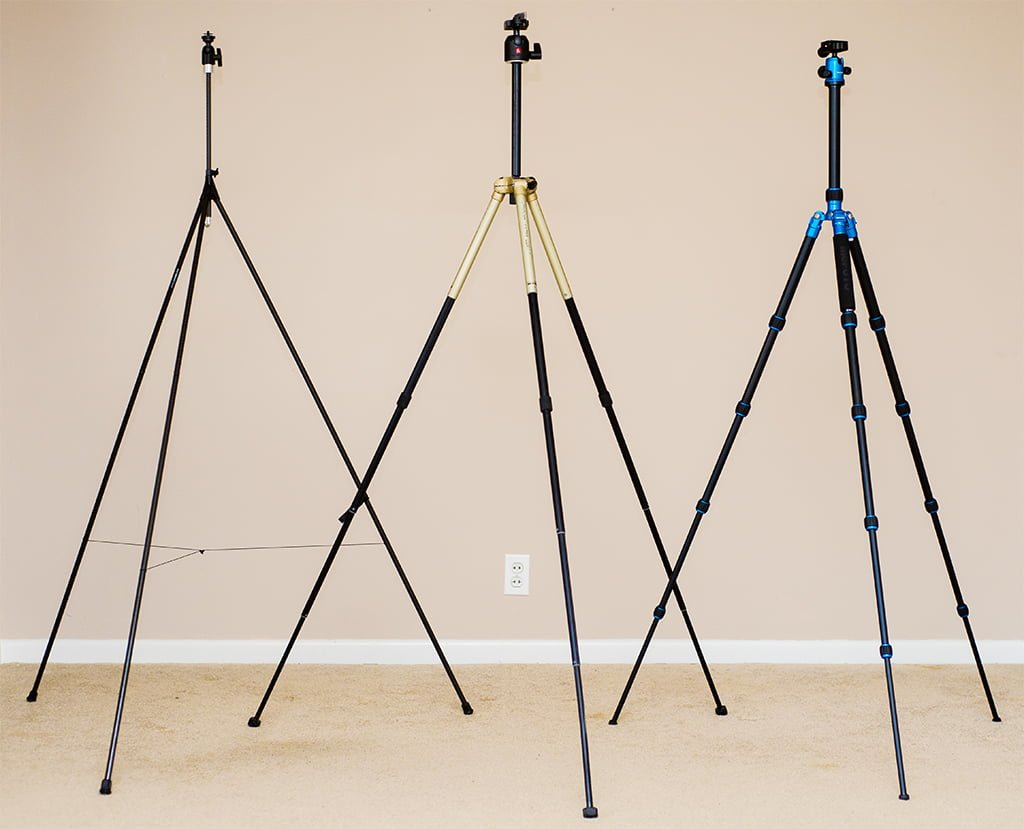
As mentioned, I’ve read about, tested, and used a number of tripods. There is no one-size fits all recommendation, and there are a few options within each class that offer their own nuances (i.e. they fold up differently or use a unique system) that some people like. Personally, I’ve found that “unique style” of tripod is generally code for “gimmicky.” I’ve been burned on these “unique” tripods a couple of times in the past (see the left-most tripod in the top photo on this page? That’s the Fat Gecko Tripod. It’s one of the biggest pieces of garbage I’ve ever purchased), so I don’t recommend them. I like traditional tripods the best, and here are my recommendations for point & shoot, entry level DSLRs, and advanced DSLRs.
Point & Shoot Cameras
For point & shoot or anything smaller than a DSLR, a good option is the Velbon Ultra Maxi-L tripod, which costs $147. Sarah has this tripod, although she doesn’t really use it much because she’d rather do iPhoneography at night…and because carrying a tripod, no matter how light, can still be a hassle.
Upsides here are maximum height (60 inches), folded height (14.2 inches), and weight (2.2 pounds). It also has twist lock legs for easy set-up and take down, and includes a carrying case.
The downsides are stability and price. Velbon claims that this tripod can support 4.4 pounds, which is about what a full frame DSLR and decent pro grade lens weigh. However, I wouldn’t trust it with anything more than an entry level DSLR and kit lens. It’s also more expensive than the Luxi L tripod (below), and Maxi’s compactness is only barely smaller than the Luxi L. Basically, its only big advantage is the .7 pound weight difference. Still, I have a very difficult time recommending a tripod that many photographers are going to grow “outgrow” quickly. Unless intend to never buy a DSLR (in which case it’s worth it to pay a premium for this tripod), consider the next level up–the Velbon Luxi L.
Entry Level DSLR Cameras
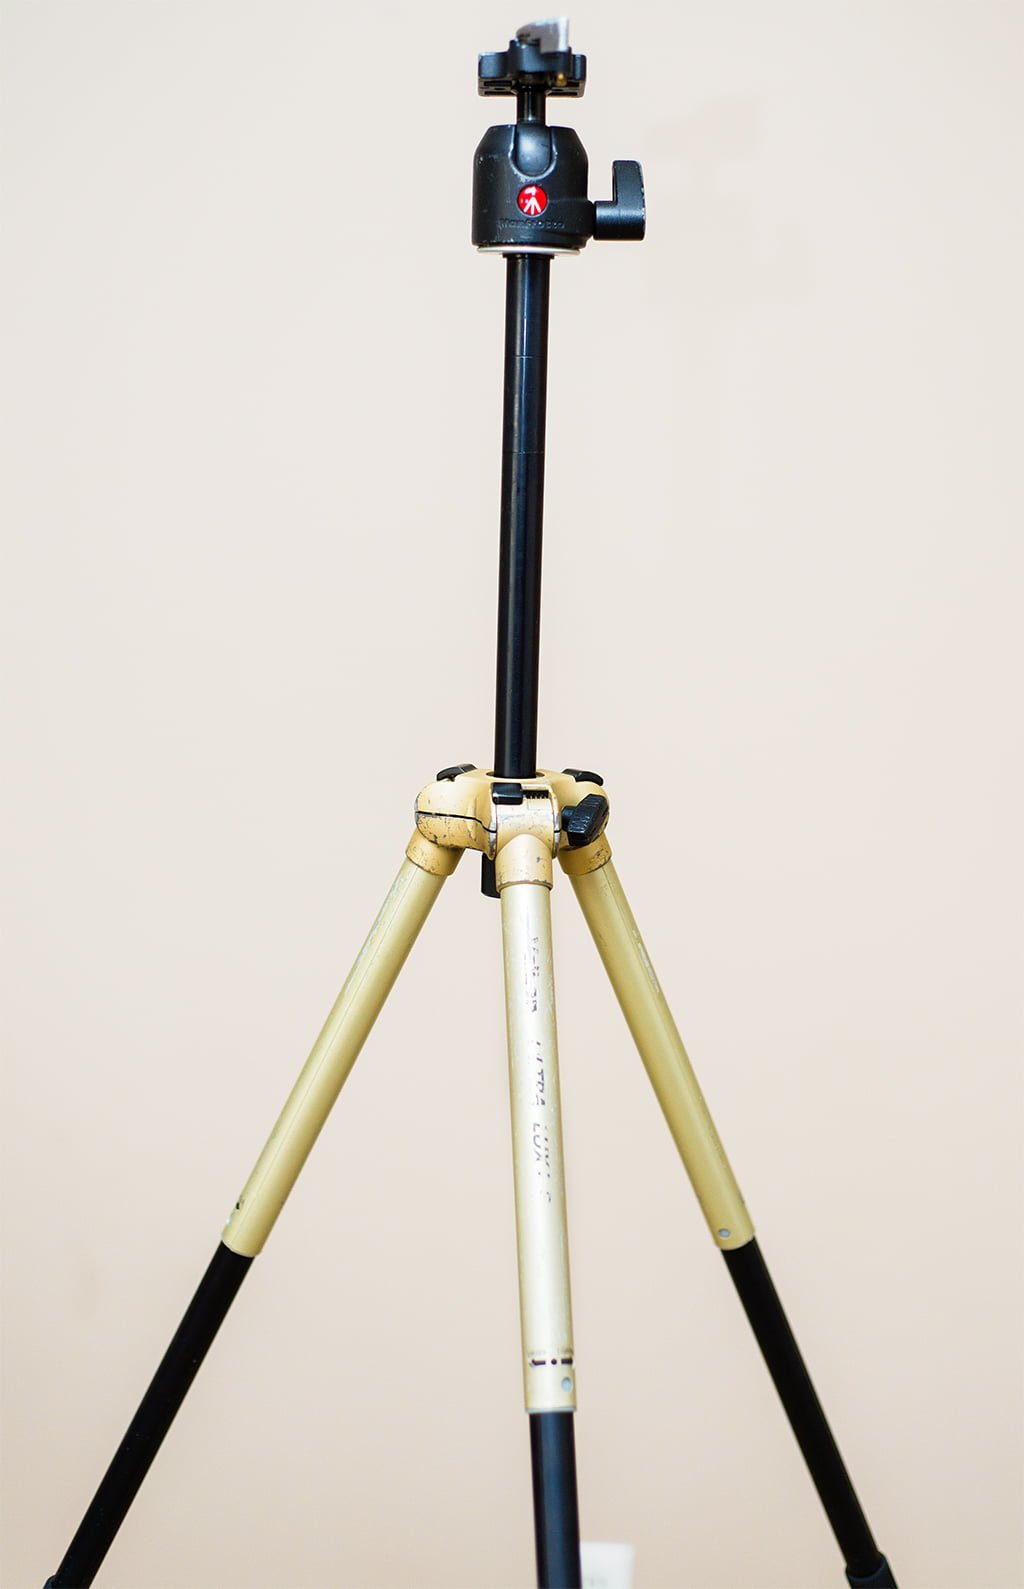
My recommendation here is the Velbon Ultra LUXi-L Tripod![]() (SEE UPDATE BELOW). I got this tripod (actually, I have the Luxi F, which is an earlier model that was a different color) when I bought my Nikon D40 back in 2008, and I’ve been using it since.
(SEE UPDATE BELOW). I got this tripod (actually, I have the Luxi F, which is an earlier model that was a different color) when I bought my Nikon D40 back in 2008, and I’ve been using it since.
Upsides to this tripod are maximum height (63.4 inches), folded height (15.35 inches), and weight (2.91 pounds). It also has twist lock legs for easy set-up and take down, and includes a carrying case.
The downside to this tripod is stability. It can support 5.5 pounds, which is all most photographers will need. I’ve used it with my full frame Nikon D600 (read my review) camera and pro grade lenses without issue. With bigger lenses, I have been a little nervous, though. Not so much because I thought the tripod would fail, but because it was definitely more top heavy, and would be more prone to falling if someone bumped it. My heaviest camera/lens combination is right at 5 pounds (and thus less than its rating), so unless you have some serious equipment, this will probably be a sufficient travel tripod for you.
Given the height, weight, load weight, and price combination, this is probably THE BEST tripod option for 95% of photographers who want a travel tripod. It gives you latitude if you want to step up from a point & shoot quality camera, better height than the point and shoot option, and supports enough weight for most photographers.
A lot of “serious” photographers scoff at this tripod. I’ve been set-up next to professionals with tripods that were clearly much more expensive than mine, and I could tell the Luxi was getting some looks–and not looks of envy. But it performed, and my shots were tack sharp. The coolest looking gear does not a good photographer make. Just mentioning it in case you’re concerned about other photographers not taking your tripod seriously for some reason…
Also important to note with both the Luxi and Maxi tripods. You want the “L” version or the (older) “F” version of these tripods. The “M” version or (older) “SF” versions are significantly shorter and are not recommended.
UPDATE: I just purchased a new version of this tripod for lightweight travel when I don’t want to carry the MeFoto–it’s called the Luxi L III. It’s my understanding that it just came out, and the only places I’ve seen it are some sketchy store called “holgacamera.com” and a couple of sellers on eBay. The usual suspects like B&H Photo and Amazon do not have this version, only the older ones. I purchased my Luxi L III on eBay from this seller for $170. That might seem like a lot, but it comes with a great ballhead that negates the need to purchase the ballhead I recommend below (the Manfrotto is still superior, but this one is perfectly fine if cost is an issue). My tripod shipped from Hong Kong and took about 8 days to arrive.
So far I’m loving this tripod. I definitely recommend this tripod over the earlier Luxi L models as it has a taller maximum height (64.5 inches), lighter weight (2.68 pounds), can support more weight (7.7 pounds). This last one is the big stat, as the additional 2.2 pounds it can support make it suitable for heavier DSLRs! The only downside to this version is that it’s slightly taller when folded: 16.5 inches. Definitely worth that extra inch in folded height given the impressive gains elsewhere, in my opinion. I would recommend this new Luxi L III tripod to everyone except those who will be shooting in wind and other intense conditions, where I think the MeFoto retains a clear advantage.
You can read my full review of the new Velbon Luxi L III tripod here.
Advanced DSLR Cameras
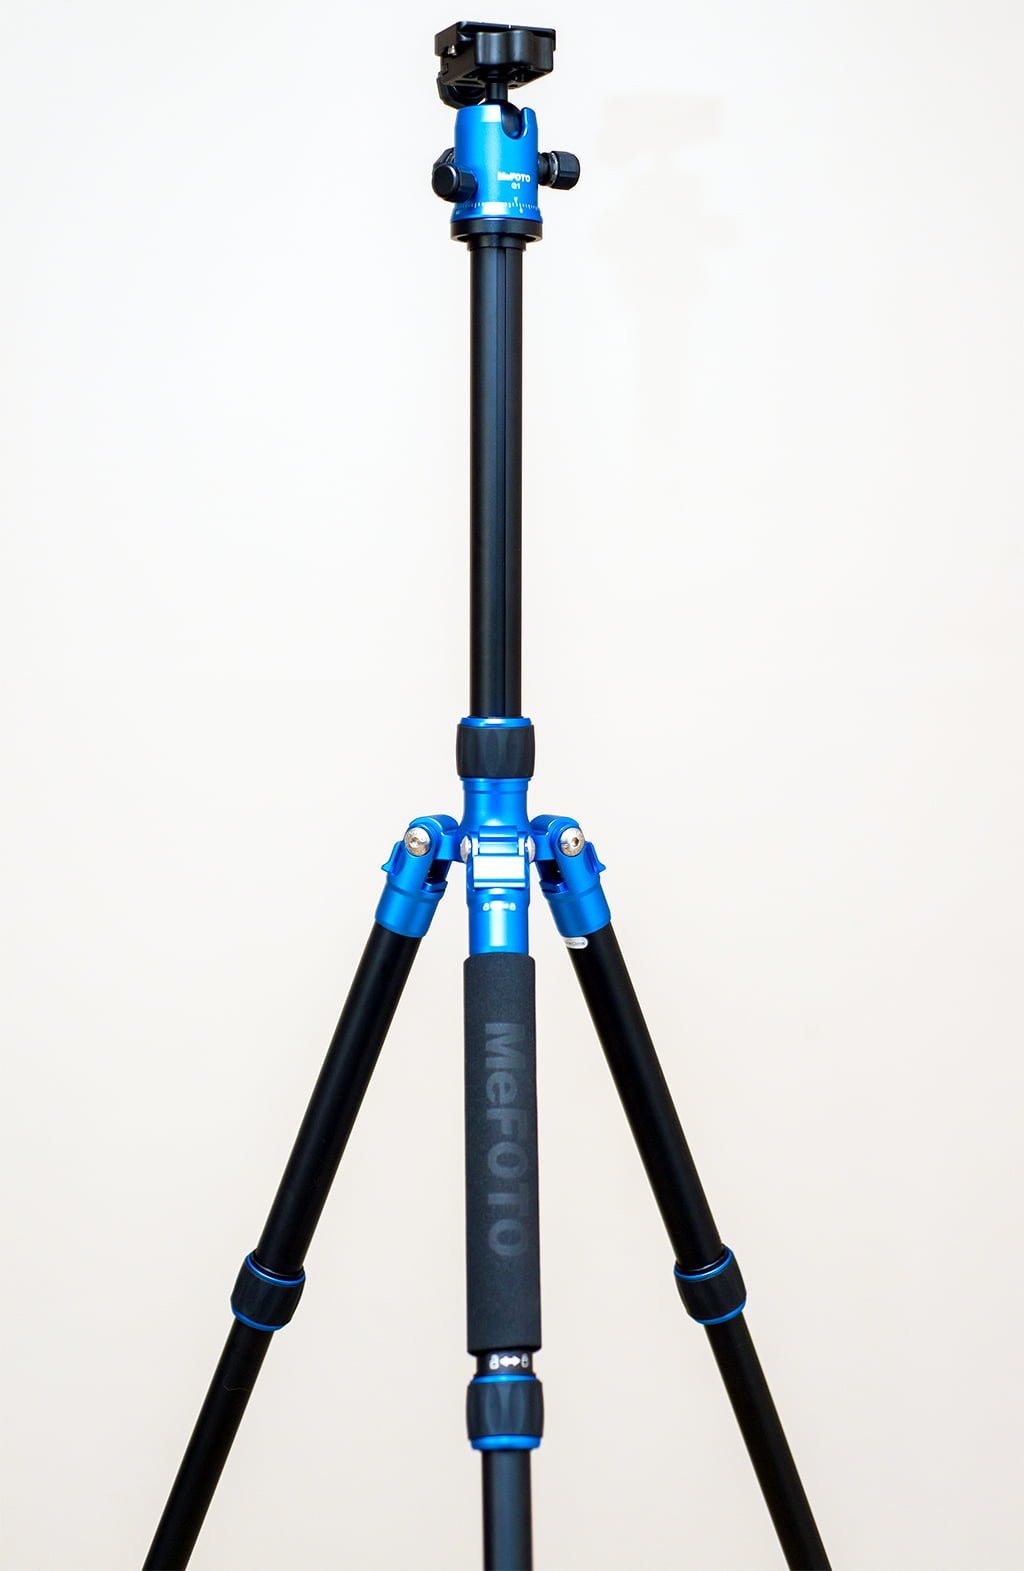
After months of searching for a tripod with just a bit more stability, a reader tipped me off to the MeFoto RoadTrip Travel Tripod, which costs $189. This tripod was recently released (March 1, 2013) by Benro, but from what I understand, it has been sold under other brand names for significantly more in the past.
The upsides to this tripod are its maximum height (61.6 inches), folded height (15.4 inches), weight (3.6 pounds), and load weight (17.6 pounds). For DSLR users with prosumer/pro bodies and pro grade lenses, the load weight here is the most important factor, and what might tip the scales in its favor over the Luxi. It also converts to a monopod, has incredible build quality, a great padded case, a hook for hanging your camera bag (for added stability), and a 5-year warranty. The ball-head is also pretty nice, although I am such a fan of my Manfrotto ball-head that I immediately replaced it with that. Price is another upside here, and although $189 might seem like a lot of money, for a high quality Benro tripod, it’s a steal. The Benro “Angel” series tripod to which it’s most comparable costs $237. The MeFoto RoadTrip has better specs (besides twist lock legs) and costs less.
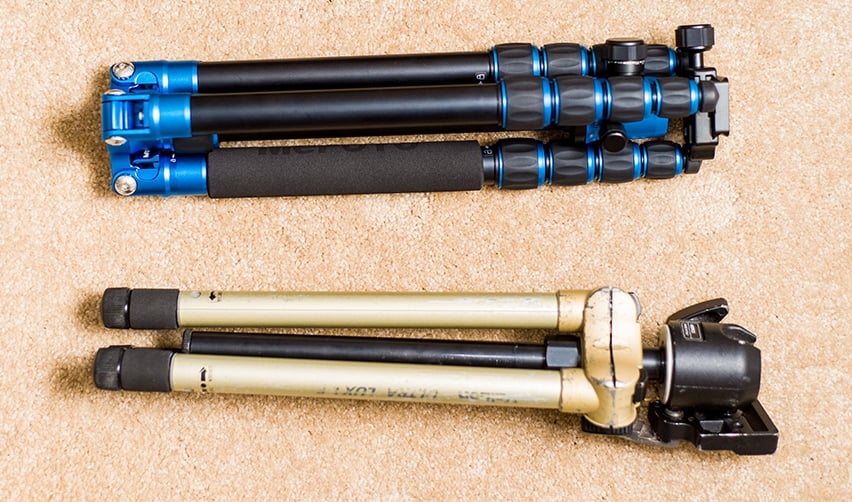
The downside to this tripod is its ease of use. It doesn’t have twist legs, which means more set-up and take down time. It’s still pretty easy to set-up and take-down, but I’d plan on spending about 30 seconds longer with the individual twist system. Likewise, the inverse folding system makes it more compact, but makes it a tad more difficult to attach to my LowePro Flipside camera bag. Because of these potential “ease of use” issues, I brought both this tripod and my Velbon Luxi tripod with me on our last trip to Walt Disney World, thinking I’d switch to the Luxi if the MeFoto were too inconvenient after the first night. I ended up using the MeFoto the entire trip, as the added stability/load weight gave me a lot of peace of mind with my heavier lenses.
UPDATE: After using this for a few months, I stumbled upon the Luxi L III mentioned above and decided to order that. My reasons were because the set-up and take-down time were really a factor when photographing in the Disney parks, where time is of the essence, and also because I like to travel light (only carry-ons) and this tripod takes up more room in a suitcase. Since the Luxi L III supports more weight, I’m comfortable using my full frame DSLR and pro-grade lenses with it.
I’ll still be keeping the MeFoto, but purely for when shooting in the National Parks, where wind and other severe weather can be an issue, for added stability. If you are primarily shooting travel landscapes outside of a Disney environment, I recommend the MeFoto RoadTrip. If you’re primarily shooting Disney parks or want to travel lighter, I recommend the Luxi L III discussed above.
Sure, there are better options out there if you want to drop $500 to $2,000, but based upon my testing, these three travel tripods offer the best in stability, weight, height, quality, and ease of use for their prices. A tripod is a critical element of achieving good photos at night, so if you do want to take better nighttime photos, I strongly encourage you to get one of these tripods! It can be a chore to carry a tripod around all day, but the results make it totally worth it.
Finally, as indicated above, I highly recommend swapping out whichever head comes with your tripod for the Manfrotto 486RC2, which Manfrotto recently replaced with the Manfrotto 496RC2 (this one comes with an extra quick release plate, which you’ll want) in its product lineup. There are a lot of options for tripod heads and I’ve tried most of them (pistol grips, pan heads, etc.) and nothing beats the simplicity and quality of the Manfrotto ball-heads. Nothing.
If you get the Manfrotto head and one of the Velbon Maxi/Luxi tripods, you’ll also need a bushing screw, as the threads on the Manfrotto head aren’t the same size as those on the Maxi/Luxi tripods. This might seem complicated, but it’s incredibly simple in practice, and swapping out the heads takes about 30 seconds and requires no tools.
If you’re looking for other photography equipment recommendations or photography tips in general check out a few of my top photography blog posts:
Photography Buying Guide: Everything from Underwater Cameras to Software
Best Books for Improving Your Photography
5 Indispensable Tips for Better Vacation Photos
Infrared Photography Guide & Tips
Choosing the Best Camera Bag for Travel
Your Thoughts…
Do you own any of these tripods? If so, what do you think? If you own some other travel tripod that you’d recommend, share your thoughts about! If you have any other questions or comments, please leave them below.
Peak Designs has an excellent travel tripod now. It is not inexpensive, but it is very well designed, well manufactured, has integrated ball head, comes with a case, and was specifically designed to fit in the water bottle holders on the sides of backpacks (diameter-wise). It even includes a mount for a cell phone if that is your camera of choice at times. There are aluminum- and carbon fiber -legged versions, the latter of course costing more, but otherwise the same.
What do you use now that there is a limit of 6 ft for tripods?
This question is 3 years old, but I thought I’d point out that the ones that were rec9mmended were under 6 feet, so the policy wouldn’t have changed anything. All were mid-60’s or below, and 6 ft is 72 inches.
What’s your opinion on a Gorillapod for a mid-range DSLR with telephoto?
Thanks!