Christmas Photography Tips
Light Bokeh

There’s one main reason why I love photography at Christmas-time, and that’s CHRISTMAS LIGHT BOKEH! This bokeh is best achieved with a fast lens, say the Sigma 30mm f/1.4 (check out my review of the Sigma 30mm f/1.4 here) or the ever-popular 50mm f/1.8 lenses. Even f/2.8 lens, like my Tamron 24-70mm f/2.8 VC work.
However, if you don’t have a fast lens, the long end of a telephoto lens (say a 18-250 lens at 150mm or above) will work. Better yet, reach for a fast telephoto lens for the ULTIMATE BOKEH MACHINE.
The ‘intensity’ of the bokeh will depend upon the distance between your subject and the lights behind it, your aperture, and the focal length of your lens. The greater the distance between subject and lights, the more intense the bokeh. The wider the aperture, the more intense the bokeh.
The longer the focal length, the more prominent the bokeh (due to compression). For this reason, my preferred combination is a subject with lights at least 5 feet behind it, an f/1.4 to f/2.8 lens, and a focal length of 70mm or above. Compromises can be made (I don’t have a 70mm+ f/1.4 lens, so I either have to go with a shorter focal length or a slower lens), but that’s my ideal scenario.
Your mileage may vary…

You can also get even more creative with Christmas light bokeh photos. We recently did a post on creating custom bokeh, which is a really fun (and rewarding!) method, but requires some DIY crafting effort. If that’s not your style, consider setting up Christmas lights specifically for a bokeh shoot!

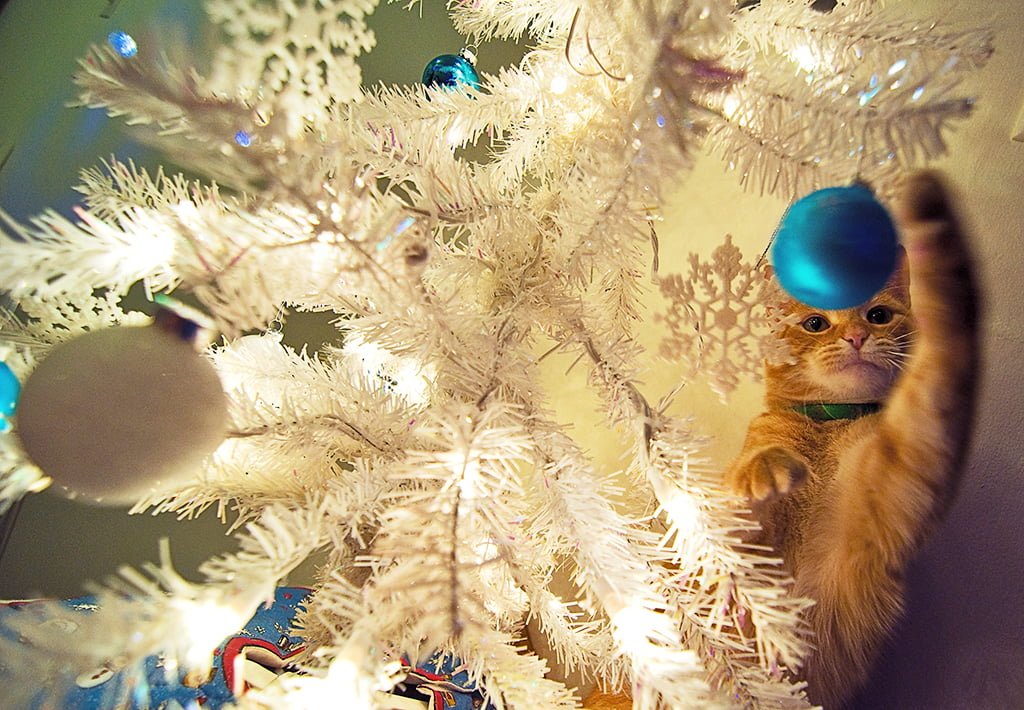
You can also put the bokeh in front of your subject, or make bokeh the subject itself by manually adjusting the focus until it’s entirely out of focus (this works particularly well with Christmas trees and other objects with that will still have identifiable shapes when out of focus). If I manage to make it onto the “nice” list, I might be playing with a macro lens this Christmas, which should make for great ornament/bokeh possibilities.
Star Filter Effect
Fantasyland'it's a small world' holidayBoats zoom past the load area of 'it's a small world' holiday. For more 'it's a small world' holiday, check out this page, which includes my video of the attraction! https://www.disneytouristblog.com/its-a-small-world-holiday-photos-video-review/")
I mentioned in the settings section that I usually use an aperture of f/11 to f/16 for photos of lights. One reason for this is because (on the lenses I own, at least), these higher apertures have the effect of producing a natural star effect. As with all things science related, I don’t know why this happens, but here is some proof that it does. I love the look this gives to Christmas photos. It’s like a more natural and less over-the-top version of a star filter. Note that in the photo above, the effect is only really noticeable in the foreground bushes; with an actual filter, there’d be streaks in the actual ‘it’s a small world’ facade, too.
The exact aperture you need to use for this depends upon the lens. I have one lens that creates stars on points of light at f/8. Another of my lenses doesn’t do it until f/20. It’s usually somewhere in between. Be warned that as you stop down, you’ll notice a slight drop in image quality. With some lenses at f/20 or f/22, this can be quite noticeable.

The alternative to this is an actual star filter. These filters were really popular in the 1980s (if you have any Disney souvenir book from then, I guarantee you’ll find at least one star filter photo in it), but since have sort of faded away. They were a photography fad, to be sure (I wonder how many things today will be cringe-worthy in an decade?), but I think they can still be fun in small doses. Part of this is probably my nostalgia for Christmases then, but I think these photos have a warm, home-y feel to them. Sort of like a Campbell’s Soup commercial from back then just made you feel warm.
Photos produced with a star filter definitely have a different look than photos produced with the aperture technique. Star filter photos generally have longer streaks of light, with this light often having a bit of color to it. I recently bought a cheap star filter set (4 point, 6 point, and 8 point) to play around with, and I’ve enjoyed the results. If you are going to get a star filter, cheap is definitely the way to go. There will be a loss in image quality, but no one should be getting enough use out of a star filter to justify spending $60-100 on one.
Storytelling Details

Up to this point, this article has mostly focused on Christmas lights. This is for good reason, as the lights are probably the most photogenic aspect of Christmas. However, the story is told through the details. Ornaments, gifts being wrapped, table settings, stockings, etc., all make great photo subjects.
We spend a lot of money and put a lot of effort into making things “just perfect” for Christmas (I know my family never uses nice table settings any other time of year!), and the upside to that is that is that virtually every aspect of Christmas is like a perfectly-staged photo op. Think of it this way: virtually everything that you spend money on as part of Christmas is a potential photo subject.
One storytelling detail that is priceless is the family moments that happen around Christmas. Due to all of the excitement of Christmas, people often let down their guard and allow for some great candid moments. People sleeping next to the fire, opening presents, and baking holiday treats are just a few examples. (Tip: think twice before posting that photo of your wife while opening presents in her PJs after she just woke up…not that I know from experience or anything!) These great moments in the pretty Christmas environments can make for exceptional photos, so don’t overlook the people that make Christmas so special!

Hopefully this guide gives you an idea of how to improve your photography for Christmas with some new techniques and ideas to try. Like I wrote at the top, I think Christmas is the most photogenic time of year, with so many great scenes and details to shoot, and nearly infinite ways to get creative. This article just scratches the surface on those–if you have other creative ideas for Christmas photography or tips, please share them in the comments!
If you’re interested in improving your Disney photography, check out a few of my top photography blog posts:
Photography Buying Guide: Everything from Underwater Cameras to Software
Best Books for Improving Your Photography
5 Indispensable Tips for Better Vacation Photos
Choosing the Best Travel Tripod
Choosing the Best Camera Bag for Travel
For trip planning tips and comprehensive advice, make sure to read our Walt Disney World Trip Planning Guide and Disneyland Trip Planning Guide.
For updates on Walt Disney World, the latest news, discount information, and tips, sign up for our free monthly newsletter!
Your Thoughts…
Do you have any questions about taking photos at Christmas? Have any tips of your own? Please share your own tips and any photos you’ve taken! Hearing from you is half the fun, so share your thoughts in the comments!
I appreciate your tips, thanks for sharing..
Great article and Disney picture tips to capture all the Christmas Magic in clarity1 @EdArt9~~ sho buz~~~
Let me start out by saying that I absolutely LOVE your blog/website. I was just wondering if you have any specific apps that you recommend for photography at Disney World. I like how you kind of take fish-eye photos, and I have that option on my phone (I have a Samsung Galaxy S6). However, my fisheye photos don’t always turn out good. This will be my first time in Disney World for Christmas time, and I want to be sure that I take awesome pictures. We aren’t going to the Merry Christmas Party though, which bums me out. Any apps or things like that which you recommend would be awesome! Thanks!
Any tips for photographing the parades with moving characters and awesome Christmas lights?
Great tips and great pictures. This season is picture time so its very important to know different good angles.
Thanks for the great post! We leave Sunday for our first trip to WDW during the holidays, and I’m really excited to see all the decorations. I was wondering…do you set your camera to auto white balance when you’re taking pictures of Christmas lights, or do you set it to something else?
Thanks!
ALWAYS auto white balance. Shooting in raw, so it doesn’t matter. I never, ever set white balance in camera. It’s a waste of time.
Wonderful post! Wish it came after our trip (we just got back the 14th) but I will bookmark this for our next trip in future holidays. We had a lot of fun camping out for the end of main street spot during MVMCP and talking photography shop with other enthusiasts. Your wonderful blog came up quite a few times. 🙂
This blog came up in conversation? Uh oh!
Hopefully you weren’t too hard on us! 😉
“All good things! All good things!” – Olaf
How late past park close do you normally stay to get a empty main street? An hour or so past park close and it still was pretty busy a couple weeks ago.
Also – everything I have read says the Monorail/Boat/Resort Busses stop running an hour after park close. Is this actually true? I am mainly concered about getting to the TTC at MK – since I drive. The other parks are not a big deal.
There is no hard time for the buses, but I think there is for the monorail and boat. In any case, a bus should be able to take you back to the TTC. Buses don’t stop running until after the park is cleared.
I’ve now had the chance to try my hand at photographing Disney World during the fabulous Christmas season.
I have a few suggestions to add:
Sure, Christmas light Bokeh is awesome. But how about some festive poinsettia bokeh? https://www.facebook.com/photo.php?fbid=566061966033&l=8c9be2e1f5
And… this post needs more OLAF
https://www.facebook.com/photo.php?fbid=566054126743&l=83637d90ad
Sorry that these posts got hit by the spam filter. Facebook links seem to do that….
Anyway, I love poinsettia bokeh. Nice work there.
I can’t say the same about Olaf! 😉
Do you have any tips for photographing Christmas lights with people in the foreground (aside from use a flash)? I manged to get one good shot of my wife and daughter dancing in the Osborne lights a couple years ago, but that was mostly luck.
As an aside – I really like that shot of Sleeping Beauty’s Winter Castle with the Matterhorn in the background.
Kevin- I’m sure Tom has some great tips, but here are mine.
Try to get to a as bright of an area as possible, take extra time and make sure your family is solidly in focus and not the lights behind them, shoot with a wide open aperature, bump up the ISO a bit, and use as slow of a shutter speed as you can get away with hand held. In post processing do a curves adjustment to to brighten faces.
Even with doing all those things personally, I didn’t have much luck getting great photos without flash. Plus, that area tends to be insane and doesn’t lend itself to really taking your time to get everything right =)
No flash: https://www.facebook.com/photo.php?fbid=566055204583&l=23263fbbf0
No flash, but you can see my camera back-focused: https://www.facebook.com/photo.php?fbid=566055573843&l=21e1e69efa
Flash: https://www.facebook.com/photo.php?fbid=566055573843&l=21e1e69efa
Oops okay here is the photo that back focused: https://www.facebook.com/photo.php?fbid=566054830333&l=2754568759
This one is alright, but the composition isn’t so wonderful: https://www.facebook.com/photo.php?fbid=566054670653&l=81ef9c21e4
Aside from Mitch’s tips (which are great), I’d recommend using a “fill flash.” There should be a setting for that on your camera. It’ll give you less intense light for a balanced photo. Other than that, look for places that cast a nice, natural front light on people.
The canopy of lights in Osborne Lights would be good for this when its lit in white.
Thanks for the tips. So, with flash basicaly similar camera settings as you would use for a normal picture, but dial back the flash exposure a bit?
Exactly. In an ideal world, flash won’t alter the exposure. Artificial constraints (your camera’s minimum and maximum sync speeds, etc.) might cause it to change, but the goal should be to keep the exposure the same for a natural looking photo.
In auto mode, most cameras use flash as a way to compensate for it being too dark out. This leads to photos were the background is dark, and your subject is the only thing lit. This is what you want to avoid.
Thanks again. I have a strong feeling (since my wife had me order it) that I’m getting my first off-camera flash for Christmas this year. So I’m looking forward to learning to use it in situations like this.
There are actually several Disney M&G’s where flash would come in handy. (Some, like Enchanted Tales with Belle have really weird lighting.) As well as pictures of the family after dark.
I guess I never understood what “fill flash” meant before now! Guess I’ll have to see where that is on the camera and test it out on doggie models in front of our tree!
Man do I wish you published this a few weeks ago! I appreciate your time in sharing your talents!
I just wanted to thank you for all the time and effort you put in to trying to enlighten and educate us on how to get our own great pix! You are incredibly well-versed and knowledgable and your work is inspiring! Too bad it reads reads well but when it comes to applying it in the parks, you’d swear I read greek. I swear, I’m hopeless!
Just keep practicing and reading. This blog has some good (I think) tips, but books and photo-centric blogs are also really helpful!