Disney Monorail Photography Tips

Every serious Disney photographer has spent their share of time waiting…and waiting…for a monorail. In fact, one of the maxims of Disney photography is that if you are waiting to photograph a monorail, one will not show up, and if you don’t have your camera out as you pass a track, one will fly by overhead. I’m not totally convinced the monorail pilots adjust their schedules to account for individual photographers in the Disney Parks, but it sure seems like they do sometimes!
When it comes to Disney photography, few subjects are more popular than the monorails. I think this is for a couple of reasons: 1) since they are a moving target, they can provide an added challenge to photographing a scene, and; 2) even though monorails can be found elsewhere, they are about as iconic to Disneyland and Walt Disney World as the castles and Spaceship Earth. To me, nothing says “Disney” like the Highway in the Sky.
Given this popularity, I thought it would be fun to do a quick post covering my favorite spots for photographing the monorails at Walt Disney World, Disneyland, and Tokyo Disney Resort, plus some techniques for achieving unique photos with the monorails in the frame.
Before we get to the monorails themselves, let’s talk camera settings…

Exposure settings will be basic (we highly recommend the book Understanding Exposure if you aren’t familiar with the basics of exposure), but if you want the monorail to be crisp, you’ll want to make sure your shutter speed is above 1/200th of a second. In broad daylight, this should be no problem.
At sunset, you’ll have to crank up the ISO a bit to make this possible. If you’re shooting with an ultra wide angle lens at sunset into dusk, I’d recommend slowing down the shutter speed a bit more. So long as you don’t pixel-peep, you can safely shoot in the 1/50th of a second range. No one on Instagram will be able to tell.
If you’d otherwise have to push the ISO into ‘unusable’ territory, just lower that shutter speed instead. Just don’t go too low. Remember, you can always reduce noise in post processing, but you cannot make a monorail crisp in post processing.
Alternatively, you can make a conscious effort for motion blur. How long of an exposure you use will depend upon how much blur you want.
If to want the monorail to still be identifiable as a monorail, an exposure of less than 1/2 second is ideal. If you want smooth blurring, go for 3-10 seconds. Basically, your shutter should not be open after the monorail leaves your frame, so time accordingly.
In terms of equipment, the majority of the time, I use an ultra wide angle lens, like the Tokina 11-16mm f/2.8 (read my review of this lens) or my Nikon 14-24mm f/2.8 (read my review of this lens).
Ultra wide angle lenses really “make it a super stretch” monorail and give a unique, sleek look to the monorail. Really, you can use any lens for photographing the monorail (I’ve used everything from fisheye to telephoto), though.

As far as meaningful photography locations go, your only options at Disneyland Resort are in Disneyland (park). The monorail does pass through Disney California Adventure and Downtown Disney, but it’s incredibly difficult to get decent photos of it in these locations.
My favorite spot for photographing the monorail in Disneyland is around the Submarine Lagoon. There really are no bad spots around the perimeter of the lagoon, besides those with trees blocking the view. With that said, my favorite is this spot in the “corner” where the subs disappear under the waterfall.
You can stand under the monorail beam to the left or the right, which in turn determines whether the monorail will be on the left or right side of your photo.
Another great spot is the monorail load platform itself. From there, you can get the monorail, subs, and Matterhorn all in a single frame. For this spot, just enter through the exit of the monorail platform in Tomorrowland.
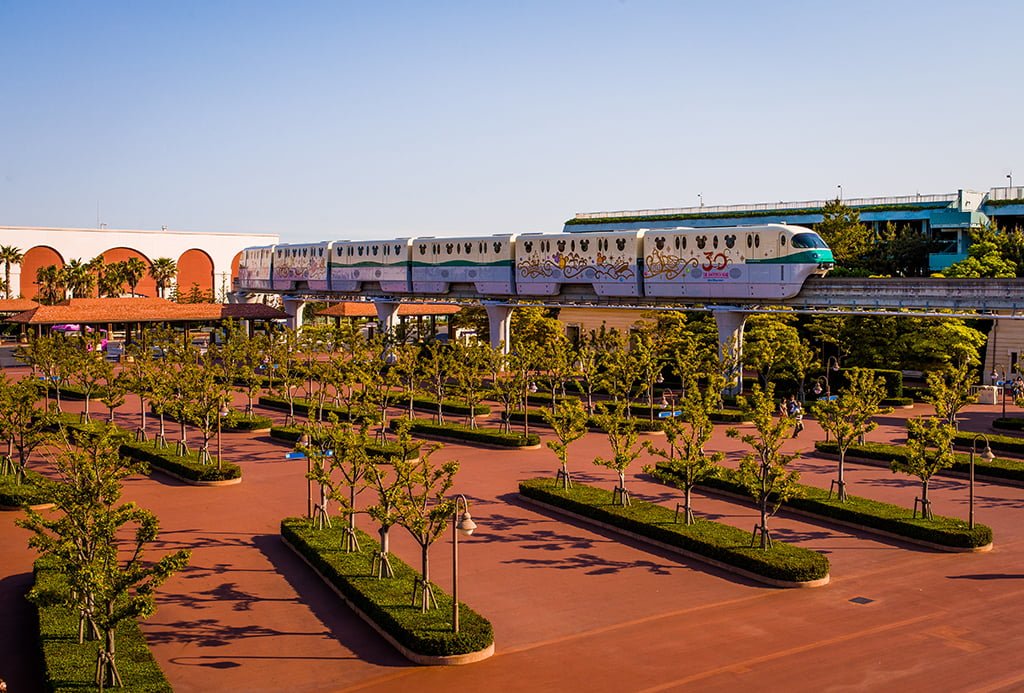
Over in Japan, the monorail (or “Resort Cruiser”) goes through Tokyo DisneySea, but is actually not visible from most vantages within the park (by design, to avoid ruining the illusion). The monorail does not pass through Tokyo Disneyland.
The best spots for photos of it are from Tokyo Disneyland Hotel and Hotel MiraCosta. Alternatively, on board the monorail, you can get some fun photos, especially if it’s dressed up for a particular season…or as the incredibly kawaii “Duffy Monorail.”

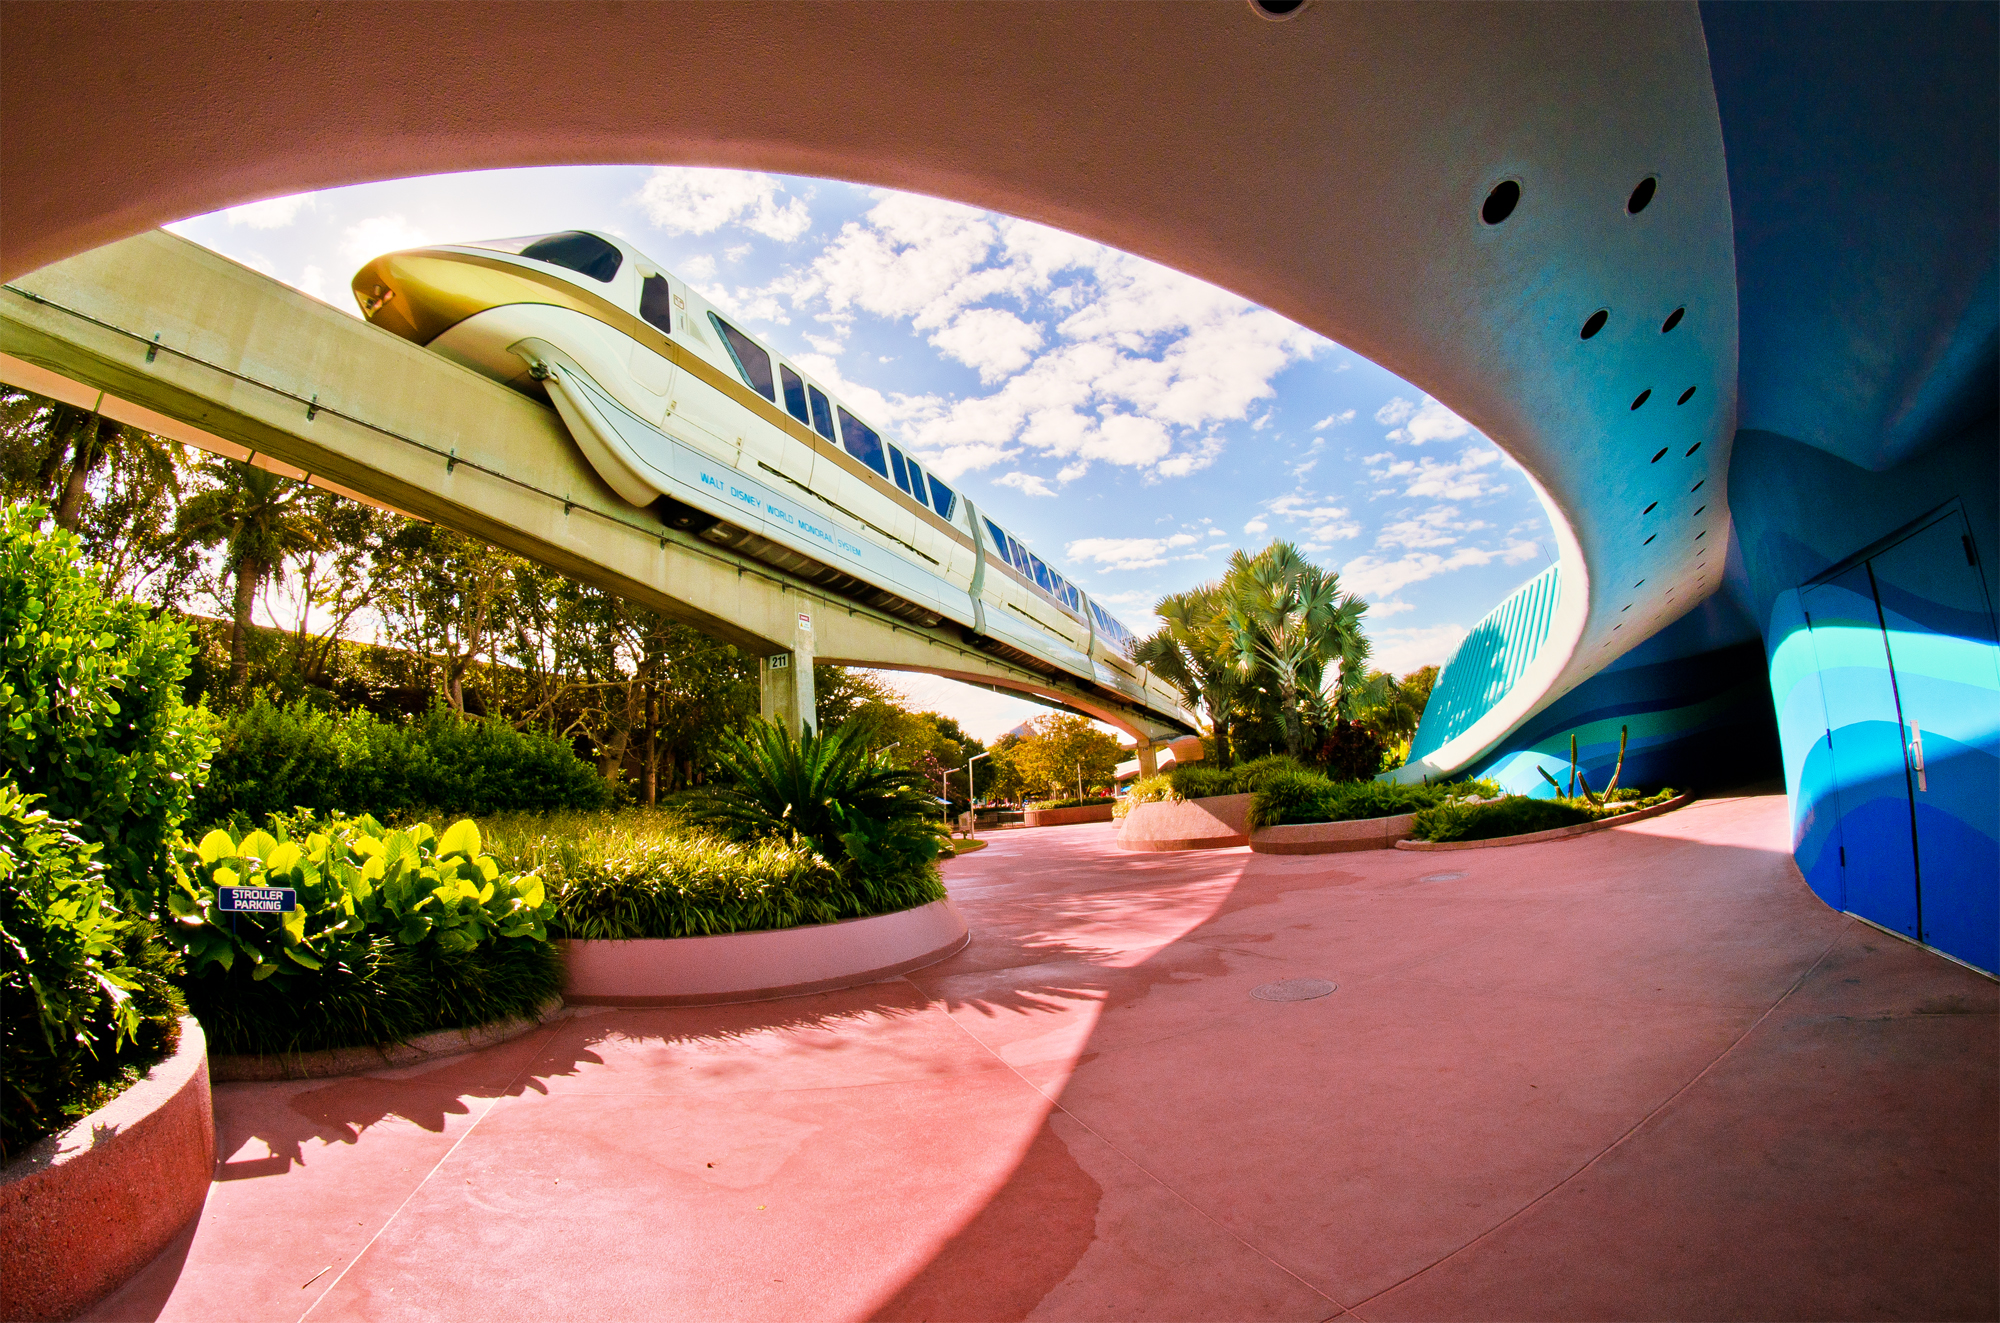
At Walt Disney World, you can photograph the monorail from any resort on the monorail loop, with some especially cool shot options at the Contemporary. In the parks, Epcot is the best option for monorail photography–without a doubt the best park for it, actually. There are so many good spots for monorail photography at Epcot that my recommendation would actually be to walk through the park along the track, scouting out spots, trying to find something of your own.
Even with as popular as Walt Disney World photography has become, to this day I still see original photos of the monorail at Epcot. Sure, there are tried and true locations that everyone shoots, but you can still come up with a fresh idea–and the best way to do that is by walking under the track, and checking out the scenery around it for yourself.
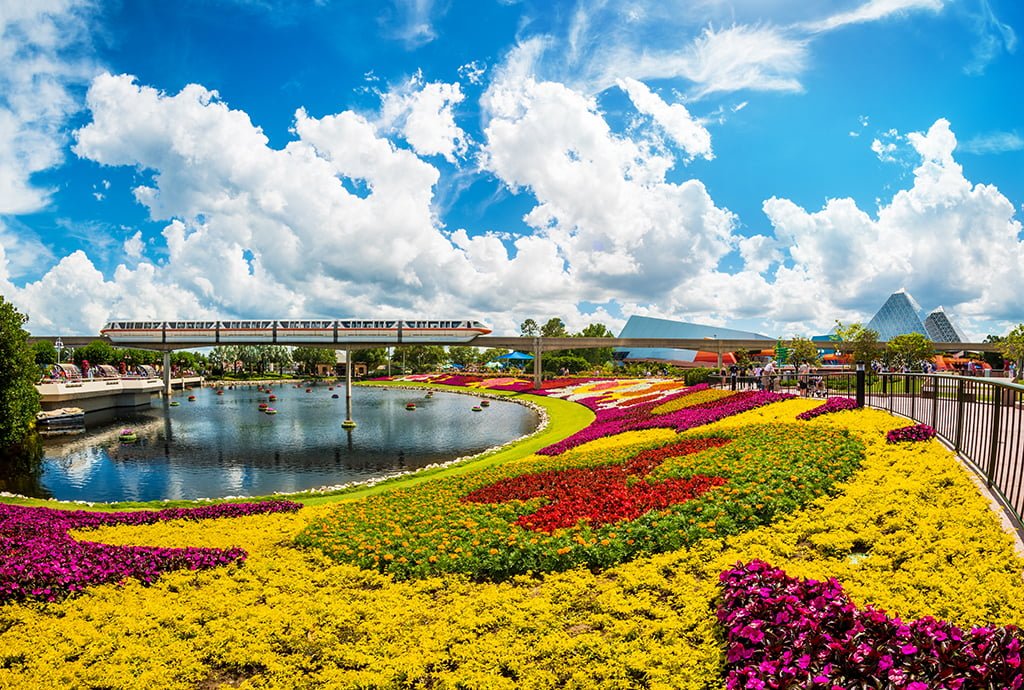
For these photos, I think the best place to stand is in the area around Journey into Imagination. This stretch of track as numerous icon photo spots, from the flower bed (above) that appears during Flower & Garden Festival to the upside-down waterfall.
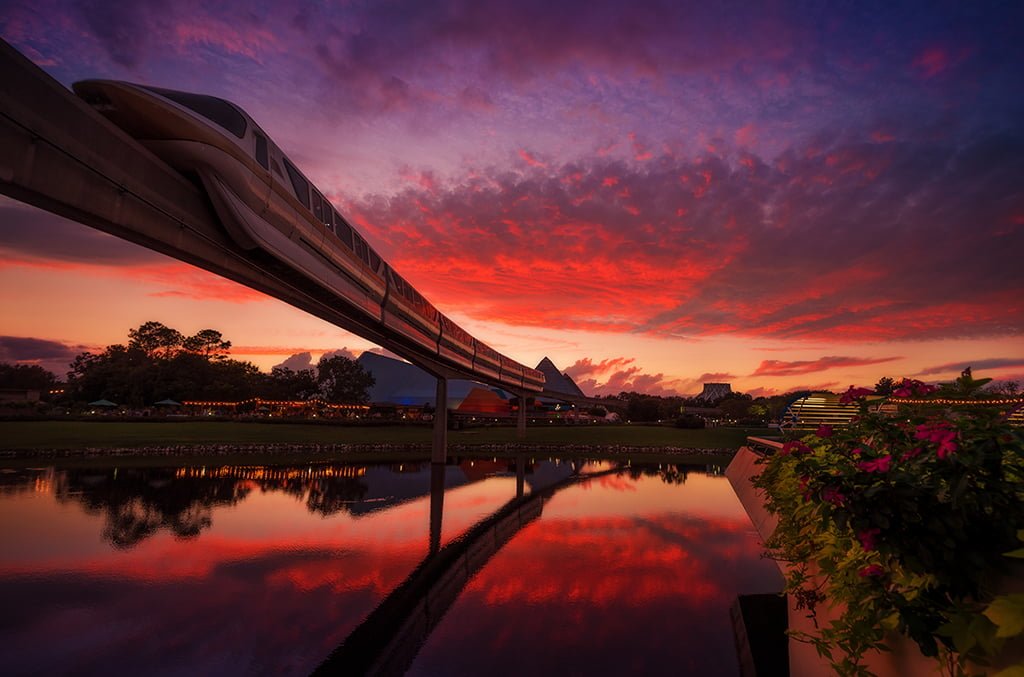
My absolute favorite spot in this area is the promenade leading from Future World to World Showcase, almost right under the monorail track. This provides the opportunity for those ultra wide angle distortion photos with Journey into Imagination in the background. (The sunset photo near the top was shot here.)

Heading more towards World Showcase, I like the view looking back towards Future World, which sometimes puts both Journey into Imagination and The Land in the background.
Going the other direction, photos near the leapfrog fountains at Journey into Imagination with the monorail in the background are fun.
There are other, less-common locations for monorail photos, such as this area to the side of The Living Seas pavilion in Future World.
The area over by the old Universe of Energy (soon to be Guardians of the Galaxy) pavilion facing Spaceship Earth is another good spot.

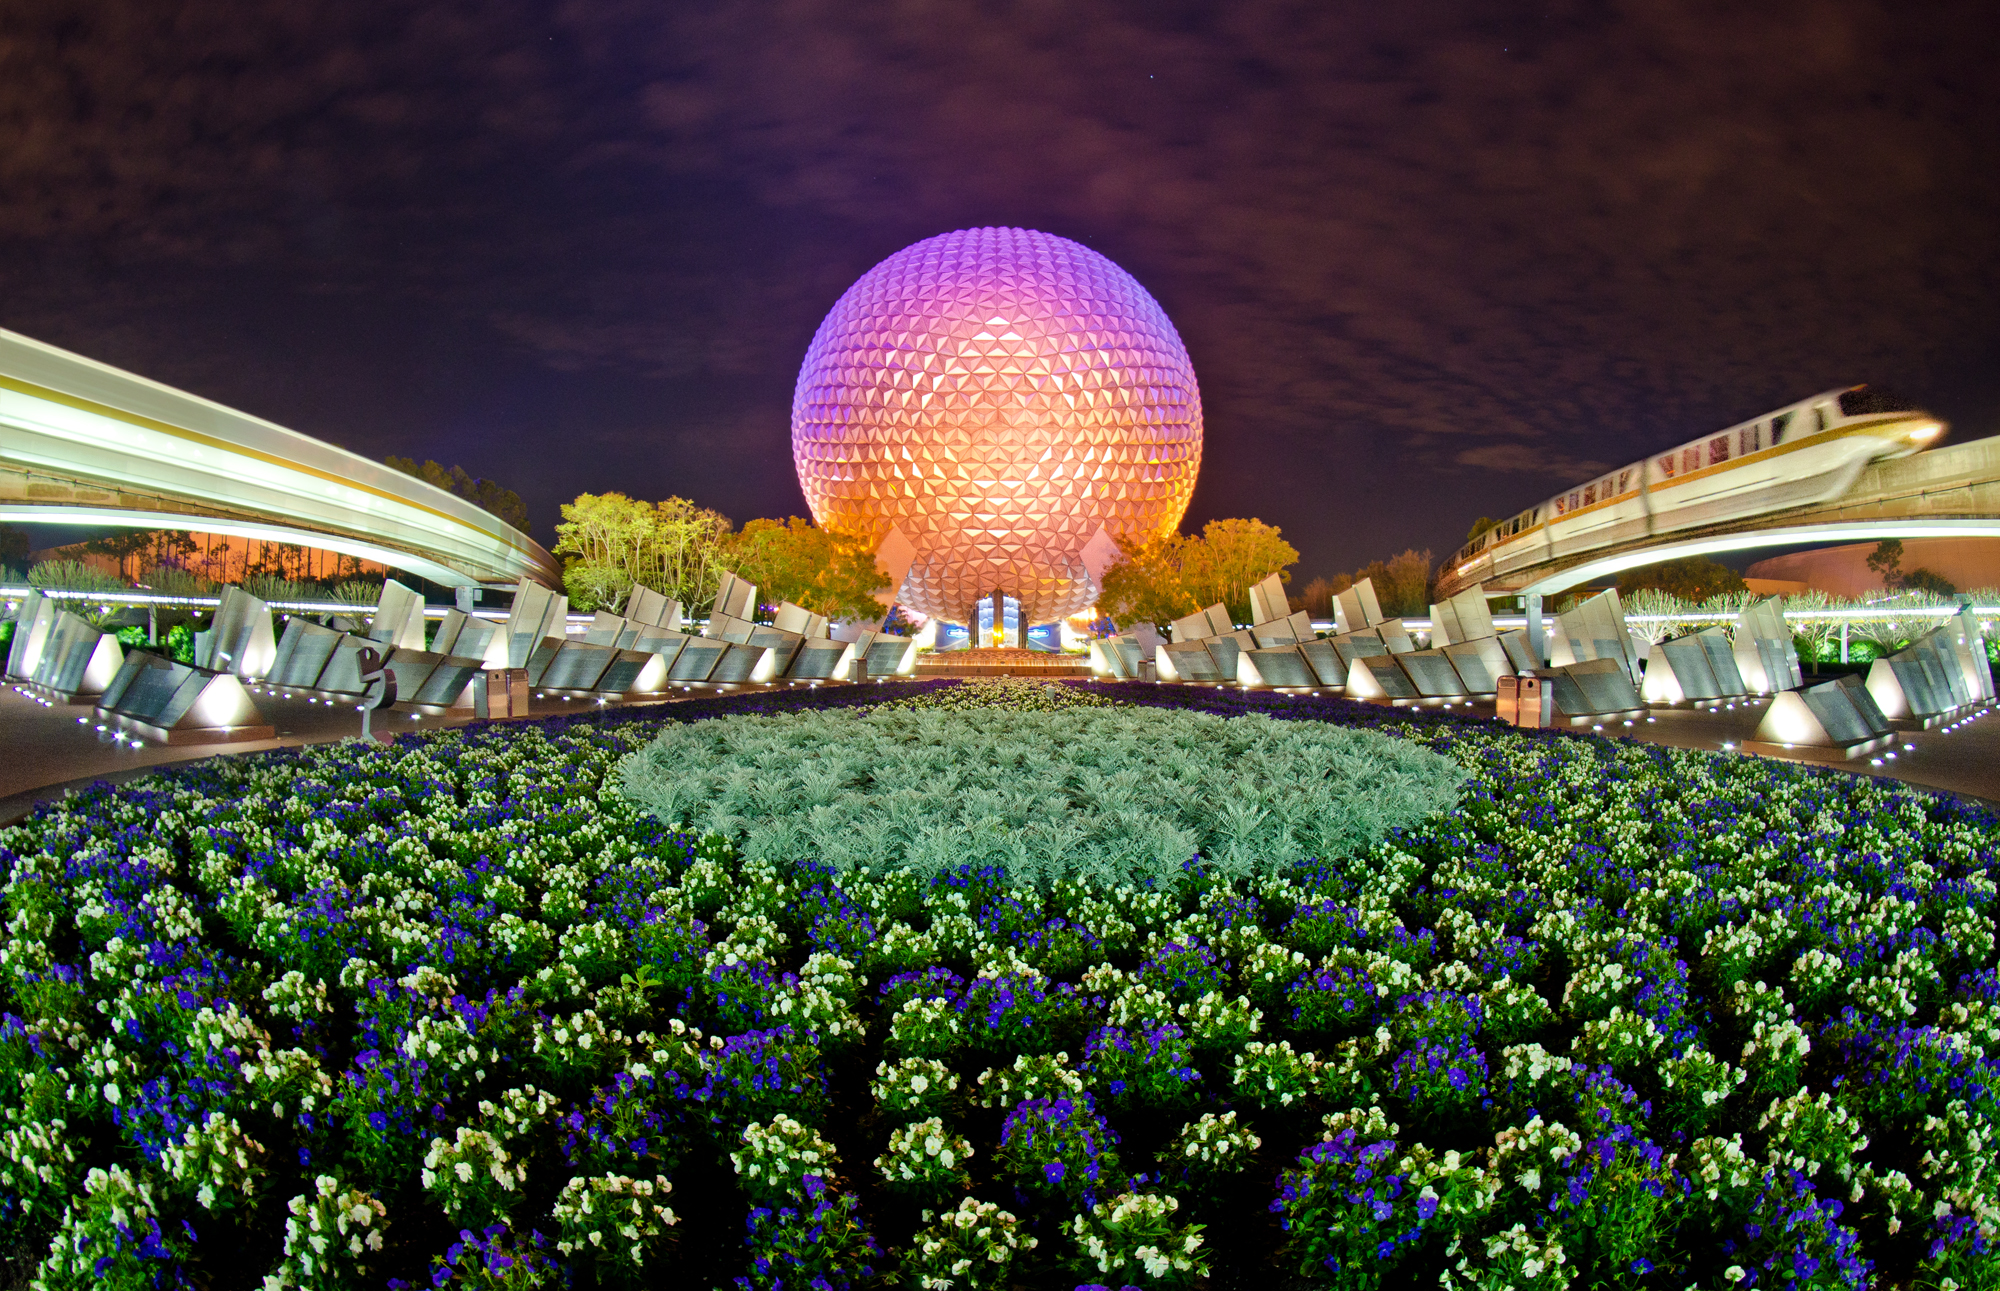
The front of the park, by Spaceship Earth where the two tracks converge is the most iconic monorail photo spot.
One of my first really popular Disney photos I shot back in the heyday of Flickr and it featured double monorails at the front of the park. I’ve redone this photo several times, and enjoy this scene so much that I did an entire blog post titled EPICOT V! about it. There are undoubtedly other monorail photography options throughout Walt Disney World, Disneyland, and Tokyo Disney Resort, but this is not meant to be comprehensive. Plus, part of the fun of photography is discovering some scenes for yourself!
Want to learn more about photography to take great photos in the Disney theme parks and beyond? The best place to start is Tom’s Ultimate Disney Parks Photography Guide, which covers a variety of topics from links to tutorials, tips, and tricks to recommendations for point & shoots, DSLRs, lenses, and more!
If you do want to purchase new photography equipment, we recommend the following trusted & authorized retailers. Buying from these retailers helps support this blog, and doesn’t cost you a thing:
Amazon
B&H Photo
Adorama
Your Thoughts…
What’s your favorite place for photographing the monorail? Any tips or techniques of your own to add? Leave any questions or comments you have below in the comments!
I know this is a monorail-centered post, but I really like the sunset shining through the Imagination pavilion.
The monorail sucks, it is 11:14pm, several hundreds people are waiting on the platform after watching fireworks in magic kingdom, and there are already two announcements of technical difficulties, no back up plan at all, the Disney should do better jobs.
Bad experiences.
My favorite place is to shoot from the landing that leads to Bay Lake Towers at the Contemporary (the one on the monorail station level). You can get some nice pieces of Magic Kingdom in the background.