

If you love Disney or traveling, you might be wondering how to start a blog. It’s a question about which we receive emails regularly, and I thought it’d be useful to create this resource page as a way to get started in the wonderful world of blogging.
Maybe you’re already convinced you want to start a blog, but just don’t know where to begin. Perhaps you’ve had people tell you that you should start blogging, and you’re curious about it, but aren’t quite sure. If you’re certain blogging is for you, feel free to scroll past the rambling introduction and start with the “Where to Begin” section.
If you’re on the fence about blogging, I’ll offer some insight that will hopefully help you answer that question for yourself. This blog grew out of my posts and trip reports on Disney forums, as well as rambling ‘too long for…’ content on social media. A lot of people told me I should start a blog, but the technical side of it was intimidating.
If this is somewhat how you’re feeling, I’d encourage you to learn the basics of blogging, as it’s truly not that difficult. (After all, I can do it!) There are minimal start-up costs involved, but the upsides far outweigh that. Namely, you’re not beholden to the whims or policy changes of someone else nor do you totally “own” your content, which is something that cannot be said for posting on social media or ‘free’ blogging options.
Second, blogs can make money to offset those costs. With that said, the vast majority do not. If you define “success” in blogging as profitability, you’re setting the stage for disappointment. In fact, I’d strongly caution against going into blogging because you want to make money at it.
This is not just because being financially successful as a blogger is incredibly difficult, but because money as a primary motivation just doesn’t work in blogging. Almost every blogging success story of which I’m personally aware follows the theme of “it started as a hobby I was doing for fun and turned into something more…”
The best advice I can offer for anyone who wants to start in blogging is to write passionately and have a voice. That doesn’t mean being strongly opinionated or writing in a sensationalized manner. Basically, all it means is that you need to bring something distinctly you to the table. This is the reason for your blog existing in the first place; an angle that catches the interest of readers. There are countless blogs that copy and paste press releases or regurgitate info and offer little beyond that.
For better or worse, I have very strong opinions about Disney. Back before the blog, I wrote multi-paragraph captions below photos on Flickr that often had nothing to do with the subject of the image. It was an odd outlet, but I was working with what I had.
The pitfall to being passionate and having opinions is that people will invariably disagree. Well, that part isn’t the pitfall–it’s that you’ll alienate people by saying something they find objectionable or they just won’t like your style. One of the biggest challenges in blogging is coming to terms with this. You can try to be respectful, deferential, etc., but some people just won’t like what you have to say.
The upside is you will connect with other like-minded people and help people simply by virtue of writing about something you enjoy. On balance, this far, far outweighs the downsides to blogging…
Where to Begin

As noted above, my technical expertise is very limited. Or at least, was very limited until I started this and had to start learning on the fly. The good news is that it’s surprisingly easy to get started, and things only become more difficult as you decide to complicate the process.
First, you’ll want to come up with a domain name. Really give this serious thought. A good name should be simple, easy to remember and spell, and perhaps even a bit catchy. Our other blog, TravelCaffeine.com, is a lesson in what not to do. Turns out “caffeine” is difficult to spell.
Once you have a good domain name in mind, you’ll want to register and host it. These can be two separate steps, but most hosts also offer registration services, and we’d encourage you to go that route, as it’s easier (and often cheaper).
Choosing a host is a chance to learn from my mistake. When we first started this blog, I found a bargain on SlickDeals.net for a year of hosting that was too good to pass up. Unfortunately, the company wasn’t the best once the site started growing–which is why regular readers of this site invariably have experienced errors over the years in trying to access the site.
Switching hosts later on can be difficult and/or intimidating, especially after you’ve accumulated years of content. We finally did it for this site, and it was incredibly stressful and mildly terrifying. I cannot implore you enough to learn from our mistakes here and use a host that is built to scale upwards. For this, I recommend Bluehost. (Learning from our own mistakes, that’s what we used when we began TravelCaffeine.com!)
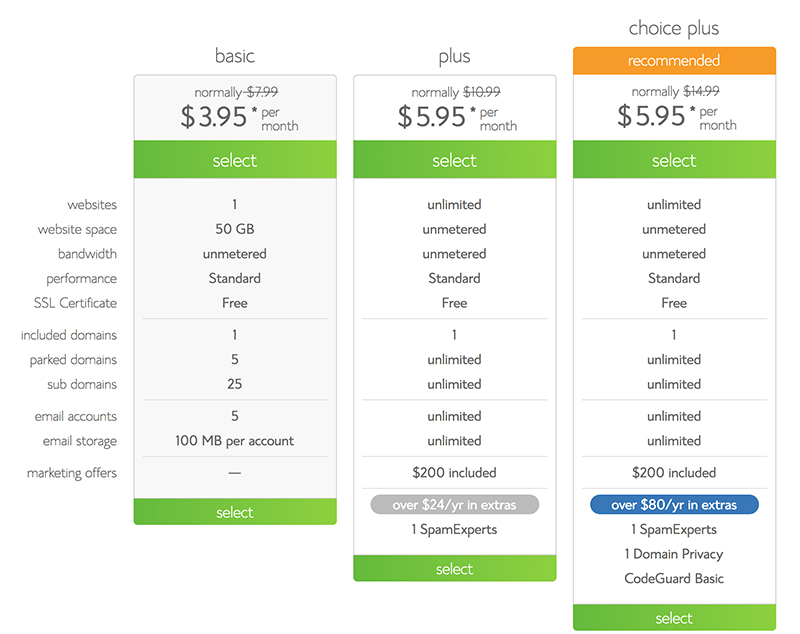
Bluehost has great pricing and gives you a free domain name if you host with them. Most importantly, Bluehost is reliable, has good support, and a robust user control panel. They also make it very easy to get a WordPress site up and running. We’d recommend simply starting with their cheap, “basic” plan, as it’s easy to upgrade if you end up needing features of another plan.
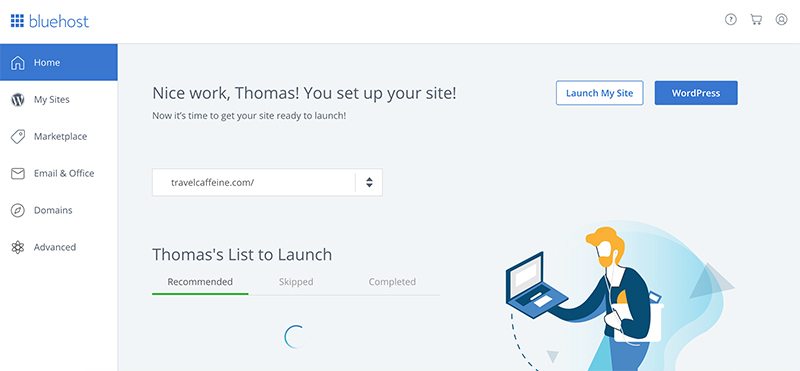
Once you’ve done that, Bluehost will offer you the option of setting up your site through a few different website builders. The only one I have any experience with is WordPress, which is what the vast majority of the blogosphere uses. Follow the steps and you’ll be done within a few minutes. If you opt to host elsewhere, note that this potentially won’t be as seamless of process.
After you receive the “your install is complete” message, you’ll also receive admin credentials for WordPress. Write those down, and then type your Admin URL into your web browser. Login and you’re ready to begin customizing your site!
You’ll want to start with a theme, and for that, WordPress has tons of free themes to pick from here. We now use a premium theme that was bought and customized, but when you’re getting started out, we’d recommend beginning with one of the “Twenty _____” themes, which are the default options by WordPress.
Learning the ins and outs of WordPress is easier on the Twenty series of themes, and it’s incredibly easy to switch themes to something more elaborate once you get going. By contrast, the learning curve on starting with a more robust theme can be very daunting.
When it comes to WordPress, trial by fire is the best approach. Start creating posts, categories, etc., and see how it all comes together (ideally, before you start sharing your site with the public). You’ll also want to install some plugins, and which you want will vary depending upon the nature of your site. Yoast SEO, which makes your site more Google-friendly, is essential. You’ll also want to create and set-up Google Analytics and, if you plan on trying to monetize, Google AdSense accounts.
Install other plugins as you see appropriate, but don’t go overboard. Create essential content like the contact and about pages. Upload photos (resize first!), and get several static pages plus a few posts looking good before launching to the public. As exciting as this all is, and as much as you probably want to go live right away, play with WordPress for a couple weeks, tweak, and start creating before you start sharing your site. You want to hook people from the start, and a bunch of blank coming soon pages won’t do that.

Speaking of which, sharing is the final step. You should absolutely create social media accounts for your site. This includes Pinterest, which is highly effective and overlooked by a lot of people. Using your personal accounts is also fine, especially if you’ve already established yourself in a niche. However, if your social media presence revolves around puppy photos and your blog will focus on French New Wave cinema, perhaps separate accounts are in order.
One thing you probably don’t already have is an email newsletter provider. When we started, we used MailChimp because it’s totally free to start. We outgrew that, and started searching for other options, landing on AWeber. It was a pain to transition from one service to the other, but we love AWeber for its robust features and service. However, it’s difficult to recommend AWeber to beginners, as the cost is high at first.
With the basics set up at this point, the final step is developing a content strategy and committing to a regular schedule of posting. A content strategy is huge, and admittedly took me 2 years to figure out. At first, I was posting a mix of trip reports, restaurant reviews, plus a photo of the day–the latter representing the vast majority of my posts. It was basically a glorified Flickr post, but (sometimes) with a longer caption.
These types of posts had been really popular on social media, so I assumed the same would translate to the blog. I was totally wrong, and it took me too long to realize that content better suited for social media should simply stay on social media. Basically, a content strategy is understanding your ideal reader, what they’re looking for, and the unique way you’re going to deliver that to them.
This can be as simple as “write for yourself” and create content you would enjoy reading. It might sound easy and straightforward, but it’s a bit difficult. What you would enjoy isn’t always what others would, so you’ll inevitably tweak your content strategy over time, but it’s nonetheless important to go in with an idea of what angle, type of blog posts, and fresh voice you’re going to bring to the table.
Phew. That’s a lot to digest, and gives you a solid foundation for getting started. With that said, we’ve only scratched the surface of the basics, and there’s a lot more ground to cover. If this ends up being popular, I’ll follow up with a “sequel” that delves deeper.