
Main Street Electrical Parade Viewing & Photography Tips
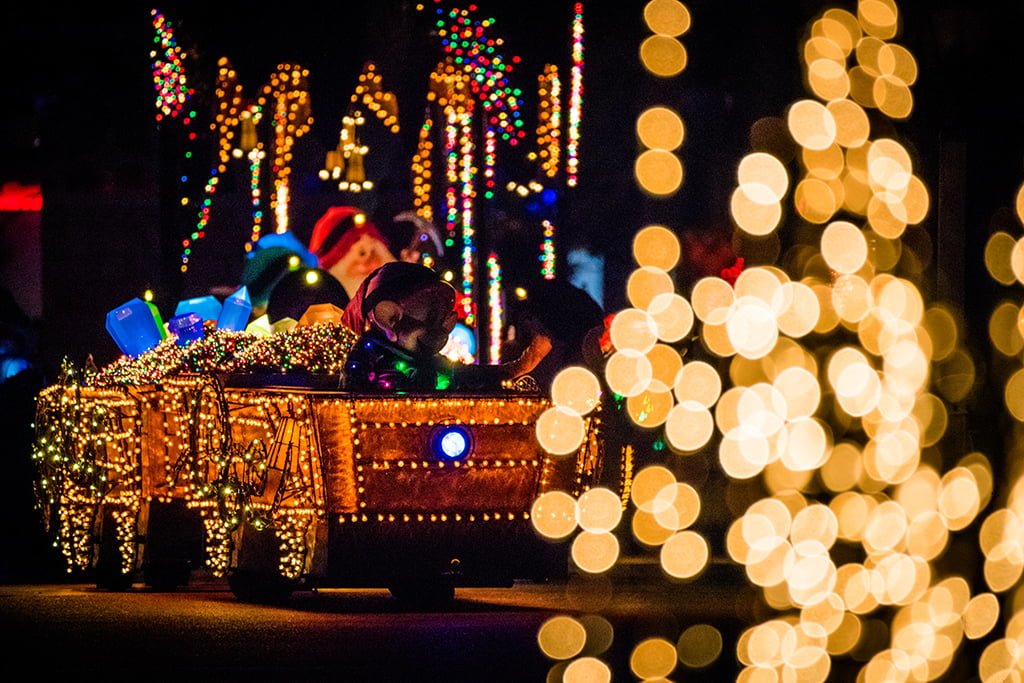
Main Street Electrical Parade is the nighttime light parade in Disneyland, which returns home in January 2017. This post offers tips for viewing the classic parade, as well taking better photos of it–and all of the night parades that Disney runs. (So, Dreamlights and Paint the Night, and hopefully SpectroMagic 2.0…someday.)
It’s been a long trip for Main Street Electrical Parade. Before returning to Disneyland, it was in Magic Kingdom. Prior to that, it was at Disney California Adventure. Before that, it was at Walt Disney World. And before that, it was at Disneyland.
Suffice to say, the Main Street Electrical Parade has been around the block a time or two, running in various forms since 1972. Its Disneyland “homecoming” started on January 20, 2017 and runs through June 18, 2017. It has been widely speculated to be permanently retired following its “limited” run at Disneyland. (This post was last updated January 31, 2017 with tips for the parade’s new home at Disneyland–see “UPDATE” section below.)
So put on that electro-synthesized music and let’s get started!
Best Main Street Electrical Parade Viewing Spots

If you’re viewing the Main Street Electrical Parade before the fireworks (also returning soon: Remember… Dreams Come True!) and you care more about the fireworks, the answer to this is simple: wherever you choose for the fireworks (following our Best Disneyland Fireworks Viewing Locations guide), except off to the side, so you can move into your spot in the middle of Main Street once the parade ends.
If you are viewing before the fireworks but care more about the parade, locations like the Main Street USA Train Station and Main Street itself are excellent locations. My favorite spot for viewing both would be at the end of Main Street on the curb by Refreshment Corner.
If you don’t care about the fireworks, the best spot outside of Main Street is the area around the small world mall (it’s a small world). This location isn’t as popular as Main Street, but it’s just as good. You’re always better off with a curbside location in a less-optimal spot than a second or third row location in a more popular area.
All other locations are varying degrees of okay. Be careful of spots around the Hub and directly in front of Sleeping Beauty Castle. People often will camp out in these locations for the fireworks, but these spots do not offer direct views of the parade.
Personally, I like sitting towards the Town Square end of Main Street with Sleeping Beauty Castle in the distance. Nothing beats parade photos with the castle in the background!
January 31, 2017 UPDATE: Last night we headed to Disneyland to try catching Main Street Electrical Parade. We figured that since it was a weeknight over a week after the parade returned, the initial buzz might’ve died down. How wrong we were.
On an off-season weekday in January (one of the least busy times of the year at Disneyland), there was a larger crowd gathered for Main Street Electrical Parade than I have ever seen for Paint the Night. Some guests on the Main Street curb indicated to us that they had been camped out for “over 3 hours” and I completely believe that given the size of the crowd. It was not even remotely what we were expecting.
We didn’t end up watching the parade, but wanted to provide an update, anyway, so you know what to expect. Cast Members indicated that this has been “normal” for every showing of Main Street Electrical Parade.
Honestly, we should not have been surprised. Any time we turn on the TV, we see that awesome commercial for the parade’s homecoming. The local news has run (multiple) pieces on its return. There is a print ad campaign featuring the parades and iconic Los Angeles landmarks. Virtually everyone in Southern California is aware of the parade’s return, and a lot of people are showing up to Disneyland to see it.
This is facilitated/exacerbated by current SoCal ticket promotions (for residents with IDs in certain zip codes), and a lack of weekday AP blockouts this time of year. Neither of us are the biggest fans of Main Street Electrical Parade, so we probably underestimated just how significant it is for SoCal natives–there’s a lot of nostalgia here for the parade.
If you’re a tourist, our recommendation would be trying to see the second showing of Main Street Electrical Parade on a weekend night (ideally, with AP blockouts) when the parade runs twice. Alternatively, if your time is limited, you might flat-out skip it.
Again, we are not fans of the parade so we are undoubtedly biased (and judging by crowds, the parade has many fans), but this is a parade from the 1970s that does not hold up technically to modern night parades, such as Paint the Night or Dreamlights.

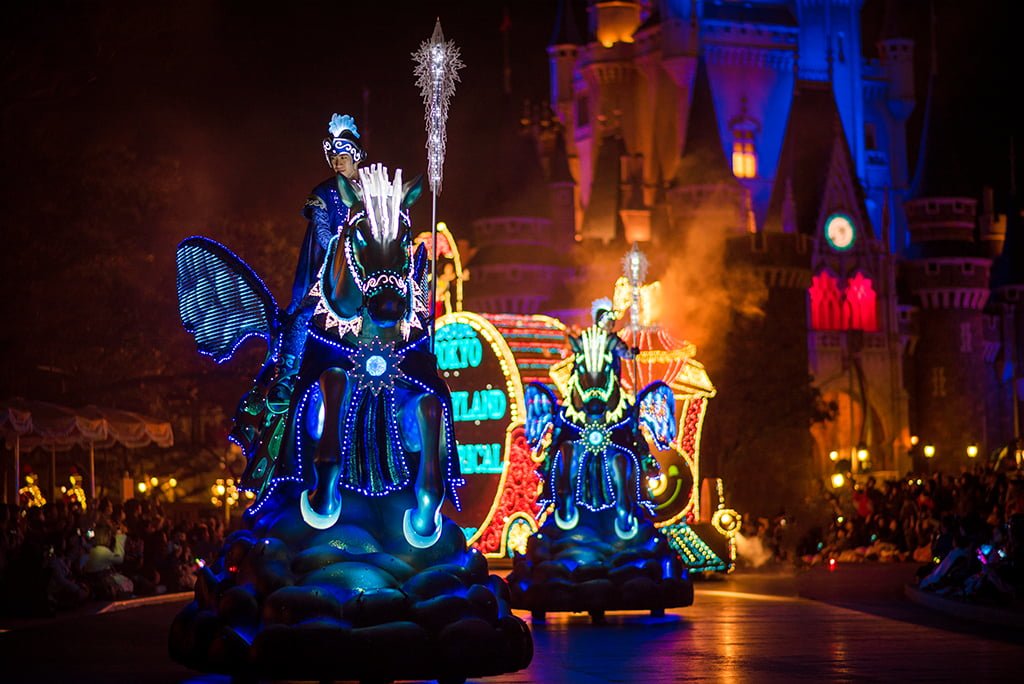
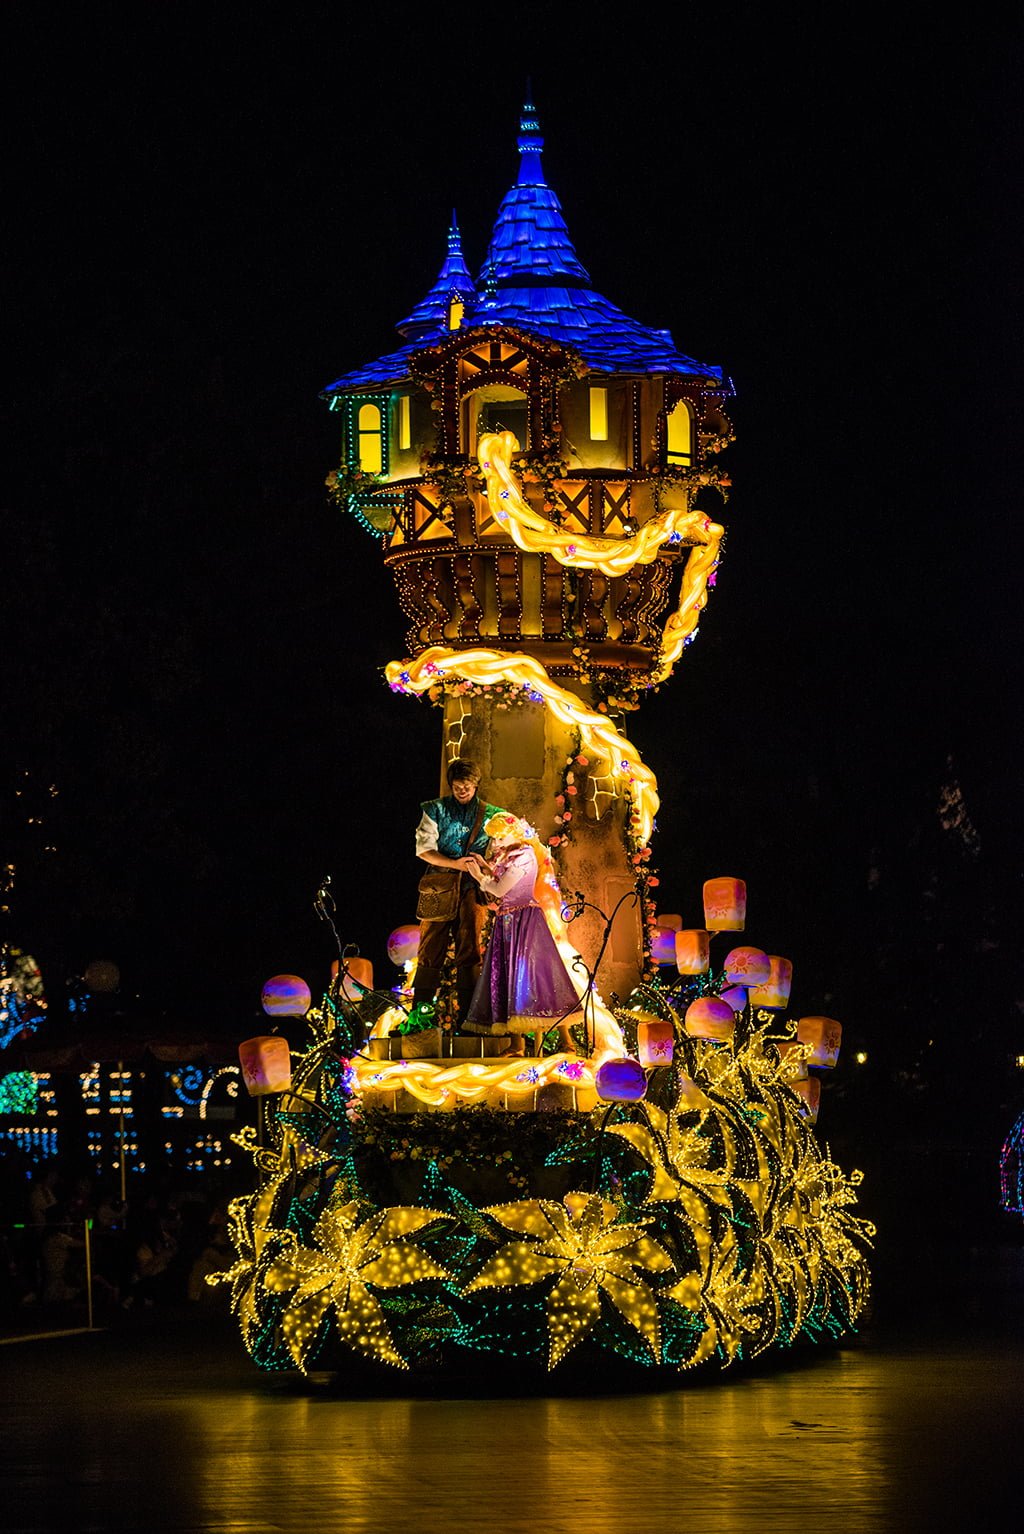
Speaking of which…in Tokyo Disneyland, Dreamlights takes a different route and the area distance between the end of World Bazaar (Main Street) and Cinderella Castle is enormous. I have far, far less experience photographing Dreamlights, but my favorite spot based on that limited experience and my intuition based upon the angles is on the far side of the Hub, between the entrance pathway to Adventureland and the Crystal Palace (see above).
This location has the parade coming towards you with Cinderella Castle directly in the background. Check out Tokyo Disney Resort Trip Report – Part 6 for a ton of Dreamlights photos!
Photography Tips

Note that a lot of the tips here are virtually identical to what’s found in the Tips for Photographing Disney Dark Rides article. If you’ve already read that and have a good grasp of the approach, the only thing you’re going to learn here is recommended shutter speeds and a couple other minor things. That article is much more in-depth and is a good foundation for this one (if you’re not so comfortable with photography yet).
The biggest difference between photographing dark rides and photographing nighttime parades is that you aren’t (or at least shouldn’t be) moving during Main Street Electrical Parade, but the “scenes” are moving.
Also, just like the Dark Ride Photography Tips article, our main piece of advice here is to turn off your flash. Because this cannot be reiterated enough, here’s the side-by-side flash (left) and non-flash (right) photo-comparison of SpectroMagic’s fish float:
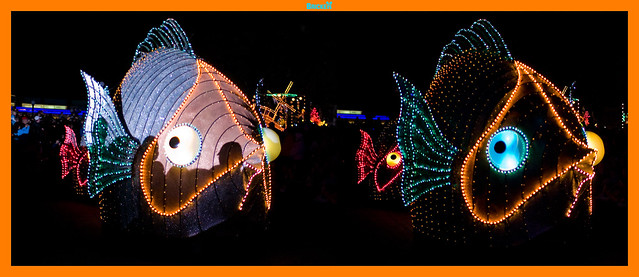
There’s no official Disney “rule” against using flash during Main Street Electrical Parade, but you absolutely should not, as it illuminates parts of the floats that are not meant to be illuminated. Photos taken with flash will not correctly capture the “feel” of the parade. It’s a nighttime light parade–the only lights should be those from the parade!
With that said, let’s turn our attention to how to better photograph the Main Street Electrical Parade at Disneyland with point & shoot cameras and DSLRs!
Point & Shoot
Main Street Electrical Parade will be difficult to photograph with a point and shoot unless you have an advanced camera like the Sony RX-100. With lower end point and shoots, you will end up with a lot of blurry and a lot of noisy photos, with a high percentage of blurry shot. You thus need to play the “quantity and percentages” game.
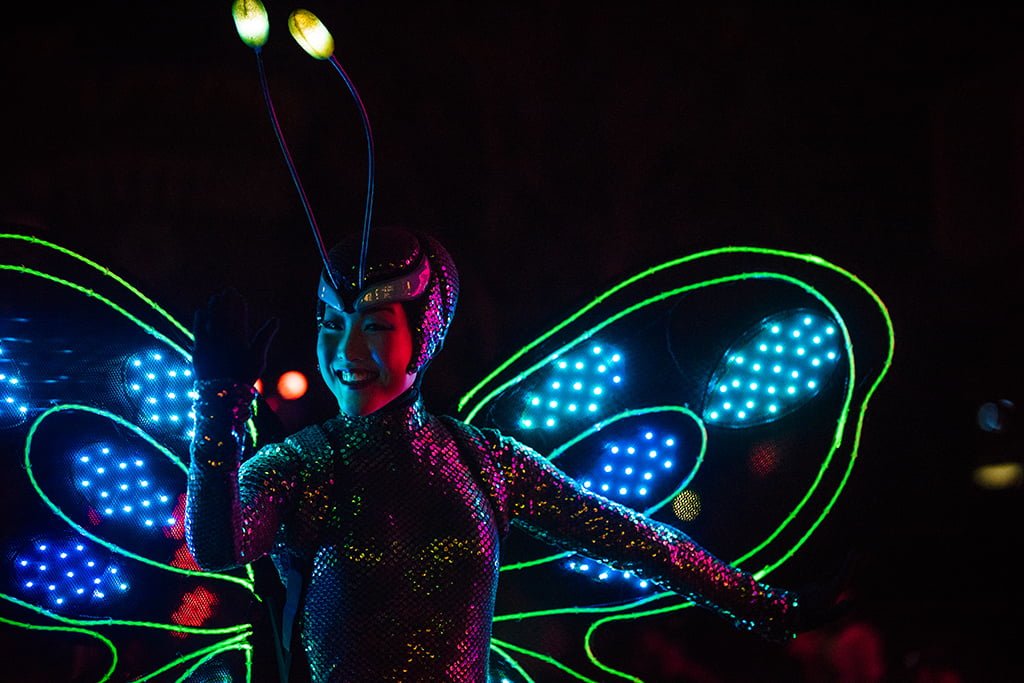
The good news is that some floats are quite bright, so even with a point and shoot, you can capture good photos of these floats! Just don’t expect to take great photos of the free-roaming characters during the parade. They are generally too dimly lit and moving too quickly.
If you are a point and shoot photographer who is familiar with semi-manual settings (and you have a camera capable of them), skip down to the DSLR section. The tips there will generally apply to you, just keep in mind the equipment limitation of using a point & shoot.
If you’re not familiar with semi-manual settings, but don’t mind trying, put your camera into aperture priority mode (“Av” or “A” mode), changing your aperture (“f/number”) to as low of a number as you can, and adjusting your ISO to the highest or second highest number possible.
Alternatively, put your camera into sports mode, or another auto mode that has a name that involves things that move.
DSLR

For this, it’s important that you have a good grasp on the three elements of exposure, and how to manually adjust settings on your camera. If you don’t have basic technical understanding of the elements of exposure (shutter speed, aperture, and ISO), read Understanding Exposure by Bryan Peterson before reading any further. If you lack an understanding of how to manually adjust settings on your camera, read its manual (or better yet, one of the intuitively-written Magic Lantern Guides).
In order for great, low-noise Main Street Electrical Parade photos, you need a “fast” lens–a lens with a maximum aperture of f/1.4 or f/1.8. If you have an f/2.8 lens, that will work, too, but you’re starting to push it. If your lenses have maximum apertures above that, you either need a new lens or be prepared to enter noise country.
Recommended Main Street Electrical Parade lenses are the inexpensive [insert brand name of your camera here] 50mm f/1.8 and the Sigma 30mm f/1.4 (check out my review of the Sigma 30mm f/1.4 here). I also use my 70-200mm f/2.8 lens from time to time for character close-ups. Unlike dark rides, you have much more latitude in choosing a focal length here, as you can control how far the floats are from you when you photograph them.
Nighttime light parades generally don’t cause cameras color problems, but I still recommend shooting in raw and using auto white balance. Raw gives you more latitude when editing, and auto white balance allows you to adjust the white balance in post processing (if you shoot raw) if the camera “guesses” it incorrectly. That won’t happen too much with the parades.
 in the Main Street Electrical Parade in Walt Disney World. For more MSEP photos, visit: https://www.disneytouristblog.com/main-street-electrical-parade-disney-world-photos/")
Use spot metering (Nikon) or partial metering (Canon). This is the metering mode that takes the very center of the frame, rather the whole scene or the center-average. This is important because the floats are very, very bright and the night sky is very, very dark. You want the camera exposing for the floats, not the dark sky. If it exposes for the sky (or an average of the sky and the floats), the floats will be blown out.
I usually also use exposure compensation of around -.7. This keeps my ISO lower and/or shutter speed faster. Plus, it’s easier to brighten shadows in post processing than it is to tame highlights.

Since the floats move, you want an auto-focus mode that tracks. I recommend servo (Canon) or AF-C (Nikon), which will ensure that you’re continuously focusing. Manual focus should not be necessary during the parades. There is plenty of light and contrast for auto-focus to work like a breeze.
In terms of mode, much like with dark rides, I use aperture priority with a wide open aperture (f/1.4 or f/1.8 depending upon the lens) and auto ISO enabled with a base ISO and minimum shutter speed. I recently shot with a Canon DSLR for a few weeks, and I missed the advanced auto ISO feature more than anything else. If you use a Canon DSLR, use shutter priority or manual mode with a shutter speed of between 1/60th and 1/200th of a second.
I usually use 1/100th, and I end up with some blurry photos but I prefer to use shutter speeds that are little on the slow side, since they allow me to keep your ISO down. More blurry shots this way, but the ones that are tack sharp have far less noise than they would otherwise. I like using this strategy plus shooting A LOT to play the percentages.

If you’re using auto ISO, use the camera’s minimum ISO as your base ISO and the maximum ISO as the maximum ISO. Same shutter speeds as above apply. The difference here is that instead of the camera prioritizing raising your ISO as it would in shutter priority (which will in turn raise your aperture), the camera here does not raise your ISO to compensate at all until it needs to drop to that minimum shutter speed.
This means that a float shot with a Nikon in A mode as described above might have an ISO of 400, while the same float shot with the Canon has an ISO of 6400, because the Canon also unnecessarily increased the aperture to f/8.
As mentioned above, I like to take as many shots as possible to play the percentages. A lot of your photos will be junk–this is normal. Taking more photos increases the likelihood that you’ll end up with more technically good shots. I’m usually pleased if around 33% of my Main Street Electrical Parade photos are technically good.
Post processing on Main Street Electrical Parade photos is very simple and not worth discussing in detail. The only ways it deviates from normal processing is that you’ll likely be applying more noise reduction and highlight recovery, and you probably won’t be doing any “aggressive” editing.
Getting Creative

If you’ve ever dabbled in light painting photography, you know the potential for creative options with long exposures and lights. Well, think of the Main Street Electrical Parade floats as giant lights for light painting, albeit lights you can’t control.
The key here is to use a tripod, a remote, manual mode (in bulb mode) a higher numbered aperture, and your lowest ISO. This is advanced photography territory, so if you’re still learning the ropes, this may not be the way to go.
As far as where to stand, I like the Main Street USA train station and anywhere else that puts a little distance between you and the floats. Trying this from the “front row” of a seating area is likely to be unsuccessful in a couple of regards. It’s more likely to be crowded and thus your tripod is more likely to be bumped, and you are so close to the action that you’ll simply have a frame filled with streaks of light, without much context.

Context is king here. I’ve seen a lot of bad Main Street Electrical Parade long exposures, and most of the time these shots aren’t good because they lack context.
It’s easy to get caught up in the excitement of the “cool effect” of light painting and just do it for the sake of doing it, but without an overarching composition and context to the photo, those shots are just cool for the sake of being cool, and aren’t actually good. Include other guests, the castle or another part of the park, or something that anchors the photo.

A lot of people initially find photographing these night parades to be a real challenge, but with a little bit of knowledge and the right settings, they are actually normally pretty easy to photograph. if you are comfortable photographing dark rides, you should be comfortable photographing the Main Street Electrical Parade. There are a few important differences, but ultimately, it’s just like an easier form of dark ride photography. Good luck!
If you’re interested in improving your Disney photography, check out a few of my top photography blog posts:
Photography Buying Guide: Everything from Underwater Cameras to Software
Best Books for Improving Your Photography
5 Indispensable Tips for Better Vacation Photos
Choosing the Best Travel Tripod
Choosing the Best Camera Bag for Travel
For trip planning tips and comprehensive advice, make sure to read our Walt Disney World Trip Planning Guide and Disneyland Trip Planning Guide.
Your Thoughts…
Have you tried photographing the electrical parades at Disneyland or Tokyo Disneyland? Were you successful? Any other tips you can offer? Hearing from you is half the fun of these articles, so share your thoughts and any other tips you might have in the comments!


How far in advance should I plan on claiming a spot if I plan on getting a good view near refreshment corner for watching the parade and then fireworks after?
Hey Tom – I have almost 0 experience with post processing, and other than white balance and cropping, it mostly is me taking a photo I like and pushing color/shadow/highlight buttons randomly and not being satisfied with the result. Between this or travelcaffine, could you do a bit on your general guidance to post processing? Thanks for the book ideas “Understanding Exposure” and “Photographers Eye”, they’re both fantastic, but neither cover this topic either.
I love this article and all the photography tips articles you do!
Thanks!
Do you know if this electrical parade is still going at Disney World? It doesn’t show up on the official website, from what I can tell.
It’s not, it left in October 🙁
We will be at Disney world from oct 8-14. 10 days away! I’m traveling with my wife and 2 kids (ages 5 and 7) it seems we lucked into being there the last electrical parade ever and already had a crystal palace reservation scheduled for 7:40 on that night (oct 9). I expect this parade will be jam packed. Can u give me your best advice on where to position ourselves after coming out of crystal palace at that time ? We are quick eaters but how long is a usual meal here to enjoy the characters? Is heading towards Liberty square best? How bad will the town square be as a quick getaway is nice but also if crazy crowded maybe not so nice. Thanks for your help!
Evan
Hi Tom, do you happen to know if it’s possible to watch MEP when leaving CRT for dinner? The only spot I catched was at 20:10 and MSEP starts at 21:00. We will try to arrive some time early to the restaurant, and try to eat as fast as we can while enjoying it, but I wanted to check if it’s possible because I read somewhere that someone did watch it from some part of the castle.
Hi Tom! I’ve been reading & rereading your Wishes and MSEP photo articles. I finally decided I wanted to do the MSEP FPP in the hub, but have just learned that 4/28 & 4/29 it’s listed as “Closed for Refurb” so I’m expecting that will be the case for 5/3, when I wanted it. So moving to Plan B… I really like your Liberty Square/Main Street bridge location for MSEP and the Crystal Palace/Casey’s Corner location for Wishes. Will I be able to do both the same night with a 9 PM MSEP and 10 PM Wishes? Crowd calculators put MK somewhere around a 5 or 6, however if the hub is truly closed I’d imagine that could cause issues. I care less about actually photographing and more about enjoying both with my mom and daughter from a truly spectacular vantage point. Do you have any specific advice? Thanks in advance…
I got great results with my iphone4s
I know you said you werent a fan of colonial america being the backdrop for this..BUUUUUT..I actually love the spot in liberty square when the parade turns to head towards frontierland…right in front of the gallows…the floats come head on towards you..turn..and then go on. You can get 3 types of shots…
see example:
http://www.flickr.com/photos/dreggs/9983213823/
Another spot I enjoy is the same viewing location I use for wishes. Right by the tables heading towards tomorrowland…again..see example:
http://www.flickr.com/photos/dreggs/10224382315/
Okay, you have me sold on that spot in Liberty Square! Thanks for the heads up on that. I had never even considered that location.
When Disney had this parade at California Adventure about 8 or so years ago, they had some great places to watch and take pictures. It was nice to see it this past September. Such a great parade it would be a shame to take it away.
I have to admit that while I love Disney World and readily contribute to its uber-materialistic and wasteful practices, the electric parade and Osborne lights just scream conspicuous consumption to me. I guess everybody has a limit, and they’ve found mine. Don’t confuse me with facts, I just can’t enjoy these things because I feel like they’re probably stealing electricity from poor families who can’t afford to keep the fridge cold. I know it’s ridiculous, but there it is.
If I do too much “thinking” when it comes to Walt Disney World’s practices, there would be a whole host of things that I might consider objectionable. Much like the wasted food from the Dining Plan or on buffets, I don’t think that electricity would be going to poor families were it not used in the parades.
Not that it makes the parade any more palatable, I guess it just is what it is…
Hey I know it’s been a while since you wrote this but i just thought I would let you know that Disney has it’s own power supply. They are their own city of Lake Buena Vista and their own utility complany of Reedy Creek Improvement District.
Instead of changing metering modes, I have a tendency to use evaluative metering with more exposure compensation dialed in. It probably doesn’t matter either way, but my theory was I’d have a better chance at success in case the float isn’t in the center of the picture.
I’ll have to read it a couple more times, but I’m not sure I understood the section on auto-ISO. Perhaps because I’m not familiar with how Nikon’s works. I think your description of shooting in shutter priority was right – it will often raise both the aperture and the ISO value. To avoid that I’ve always used Av and either limited the max Iso to something I’m happy with.
If you don’t have a system with “smart” auto-ISO, it’s difficult to understand how it works. It’s also difficult to understand why it’s so great. I’ve seen many Canon users online suggest just using shutter priority or full manual mode, but it’s just not the same. Granted, my purposes for it (dark rides and night parades) are VERY specialized uses, but I’m betting there are a number of specialized uses out there.
I am going in early december and plan on shooting the MSEP as well as the night parade at the Christmas party and Fantasmic! – my current debate is it worth the weight to bring my 70-200 f/2.8??? I am shooting full frame. (Fireworks are easier – particularly with a good tripod!)
Lenses I am planning on packing: (Some may stay in the room)
-Tamron 28-75 mm f/2.8
-Nikon 28, 50 and 85 f/1.8
-Nikon 16-35 f/4
-Nikon 28-300 f/3.5-5.6 (which will be useless for pardes)
Is my 70-200 mm f/2.8 worth bringing??? I do have a backpack, which will help offset some of the weight.
Man up and bring the 70-00 2.8. It’s too nice of a lens to leave at home IMHO
That’s a tough call. More than any other lens, the 70-200 f/2.8 gets left behind in our hotel room, BUT we visit regularly and I do use it a lot. You have some significant overlap with other lenses listed, but I still think the 70-200 is an essential lens to take. You’ll definitely want it for Fantasmic and if you shoot Mickey’s Once Upon a Christmastime Parade twice, you probably will want to use it one of those times.
Excellent tips, thank you! We found a great spot earlier this year at the 11 pm parade which was on the left side of the castle with the walkway facing liberty square (where the “kodak photo spot” is). There was hardly anyone around us and I was able to get very close to the parade. Unfortunately, my battery died after I had taken only a few photos and I forgot my spare which was a huge bummer!!
So in the seating area for Sleepy Hollow? My recommended spot is basically right across the walkway from that. Both are good spots, but I prefer facing the Castle.
Gotta have backup batteries!!!