
How to Take Great Photos with a Point & Shoot Camera
With gear out of the way, it’s time for some tips on getting the most out of your camera. The most important thing is setting the camera’s exposure via the three elements of the exposure triangle: aperture, shutter speed, and ISO.
I fixated on the importance of manual settings above, and the first thing you will need to do is put your camera into either “A” or “M” mode. “A” stands for aperture priority, in which you select the aperture, and the camera chooses a corresponding shutter speed for a perfect exposure. You may or may not select ISO, depending upon your settings. “M” mode is full manual, and there you select aperture, shutter speed, and ISO.
I prefer aperture priority because it provides more of a safety net if you forget to change settings, whereas you are totally in control with manual mode. In manual mode, if you don’t choose every setting appropriately, you’re gonna have a bad time. In some situations, such as when you’re photographing fireworks, sunsets, or night, you might need full manual mode so you can (essentially) override the correct technical decisions the camera would otherwise make for the correct creative decisions.
Confused yet? Don’t worry. In just a few paragraphs, I breezed through a topic that is detailed in hundreds of full-length books. To say I glossed over a lot would be a colossal understatement. The fact is, covering the basics of exposure in a meaningful way so that you can understand it is well beyond the scope of this blog post.
Instead, if you don’t already understand the fundamentals of exposure, my go-to recommendation is Bryan Peterson’s Understanding Exposure.
Many people have taught themselves photography using this book, me included. When I was first learning photography, a copy of Understanding Exposure was with constantly with me for reference, and although I don’t really refer to it anymore, a copy still sits proudly on my bookshelf as a reminder of the “good ole days.”
Since I’m not writing a book here, it probably makes more sense to talk you through some of the photos I’ve taken with my point and shoot, with random tips along the way. Let’s go through some of the basics of shooting…
Using Your Point & Shoot
We will start with the most simple tip, and that’s to read the manual, and know your cameras menu options inside and out. I’ve found that a lot of times camera manufacturers highlight “features” of a camera that are totally pointless, because that’s what sells in marketing, but they gloss over important features. Learning what’s in the manual and where different settings are located within the menus can unlock the full potential of the camera.
Along with this goes practice. You aren’t going to commit button location to muscle memory by only using your point & shoot camera a few times per year. Use it regularly and adjusting settings on the fly will be so easy that it’s second nature. Use it sporadically and you’ll fumble to make adjustments and miss that special moment.
Point & shoot does not have to be synonymous with “snapshot.” A point and shoot photo can be just as artistic as one taken with a DSLR. It’s just a matter of putting thought into composition. Focus on telling a story through the photo. Follow the rule of thirds. Actually think about how you should frame your subject and other elements of a scene, rather than just plopping the subject into the middle of the frame.
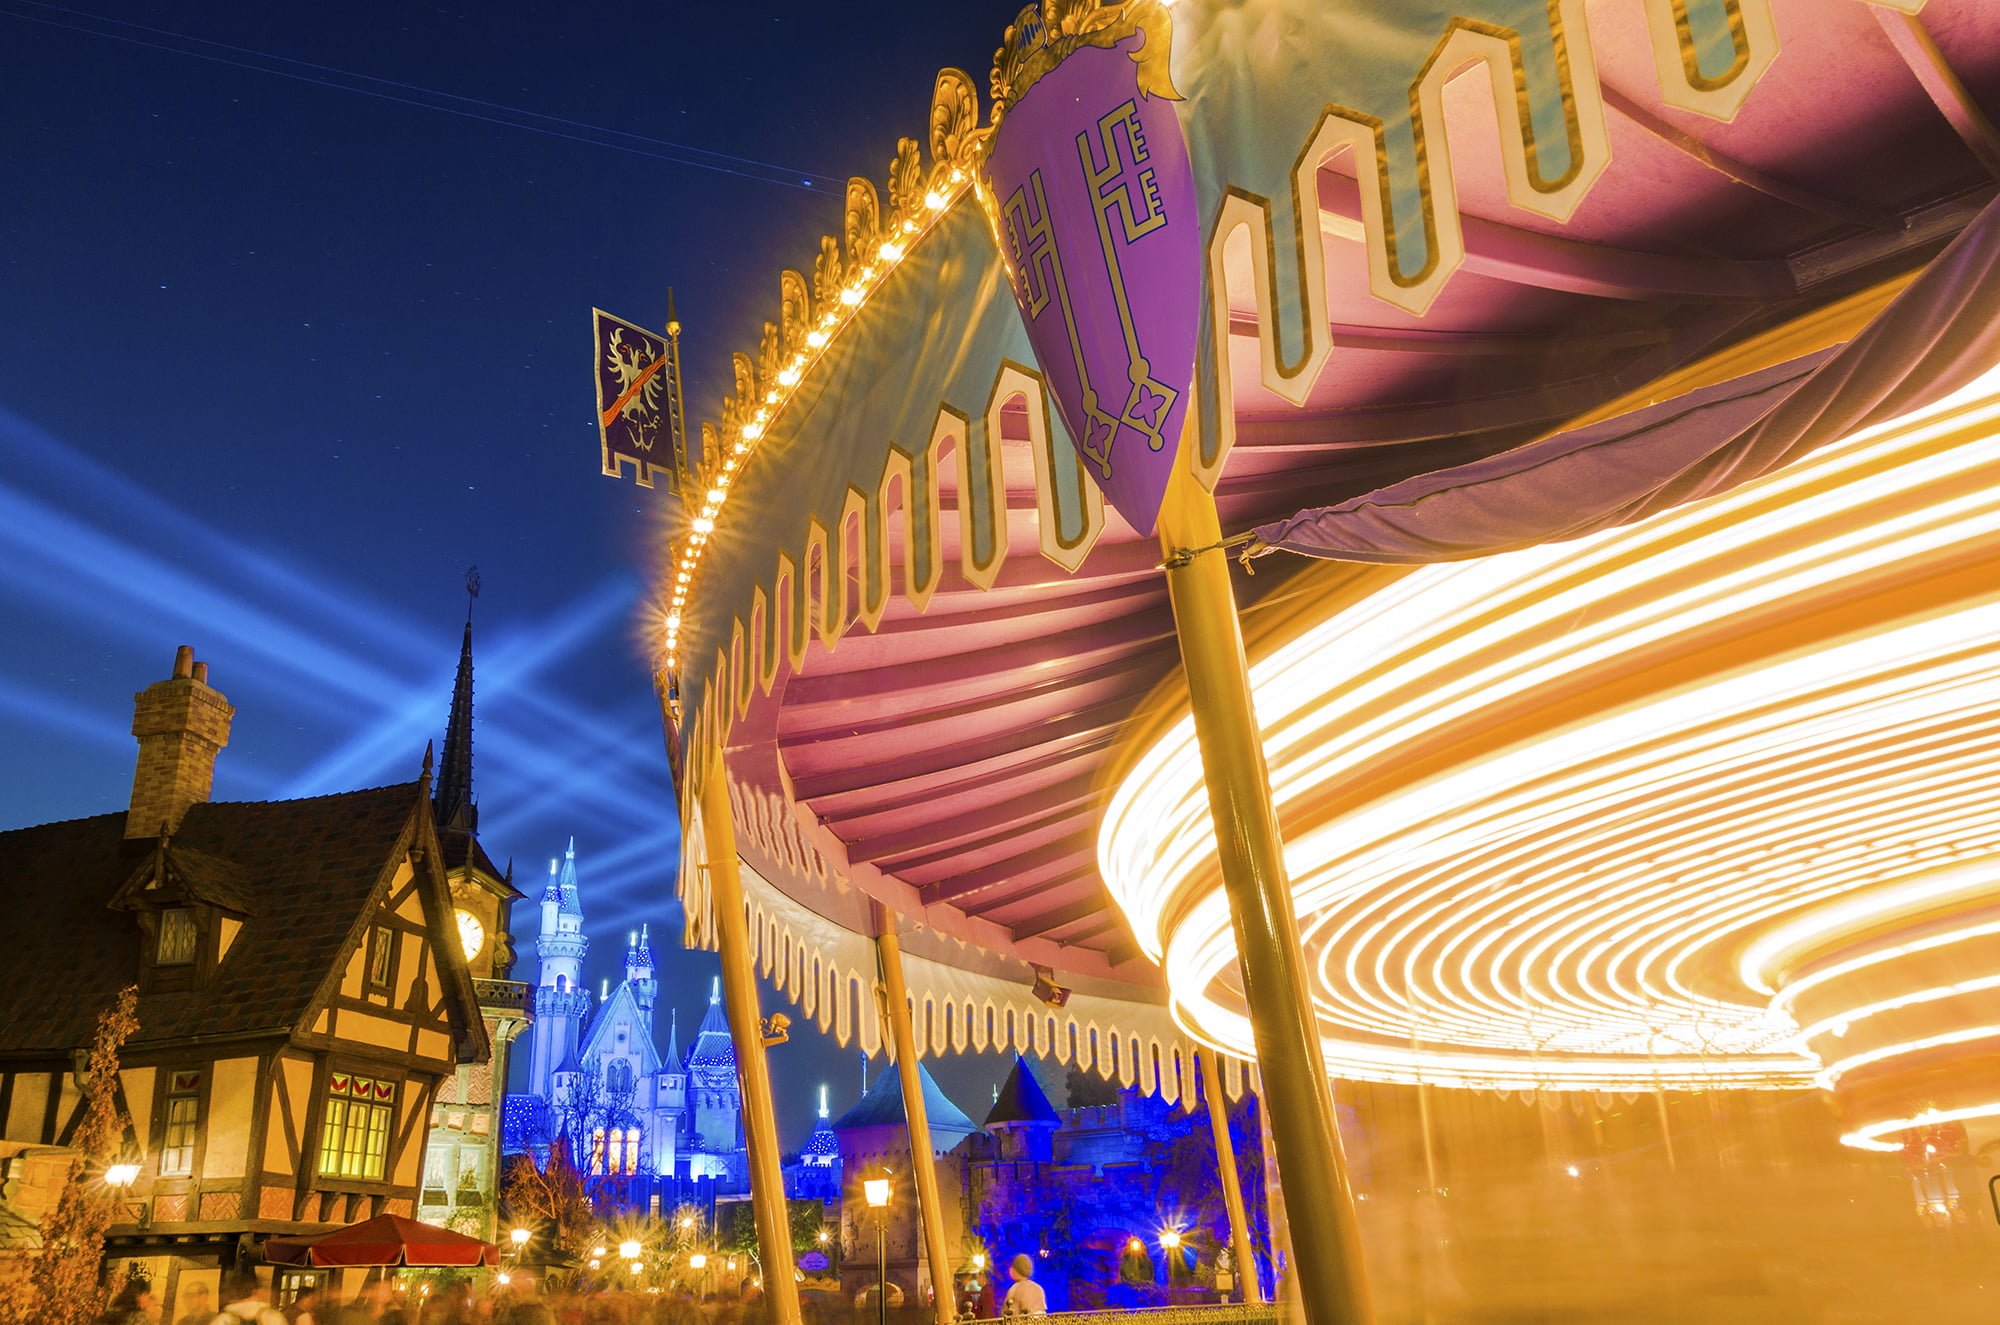
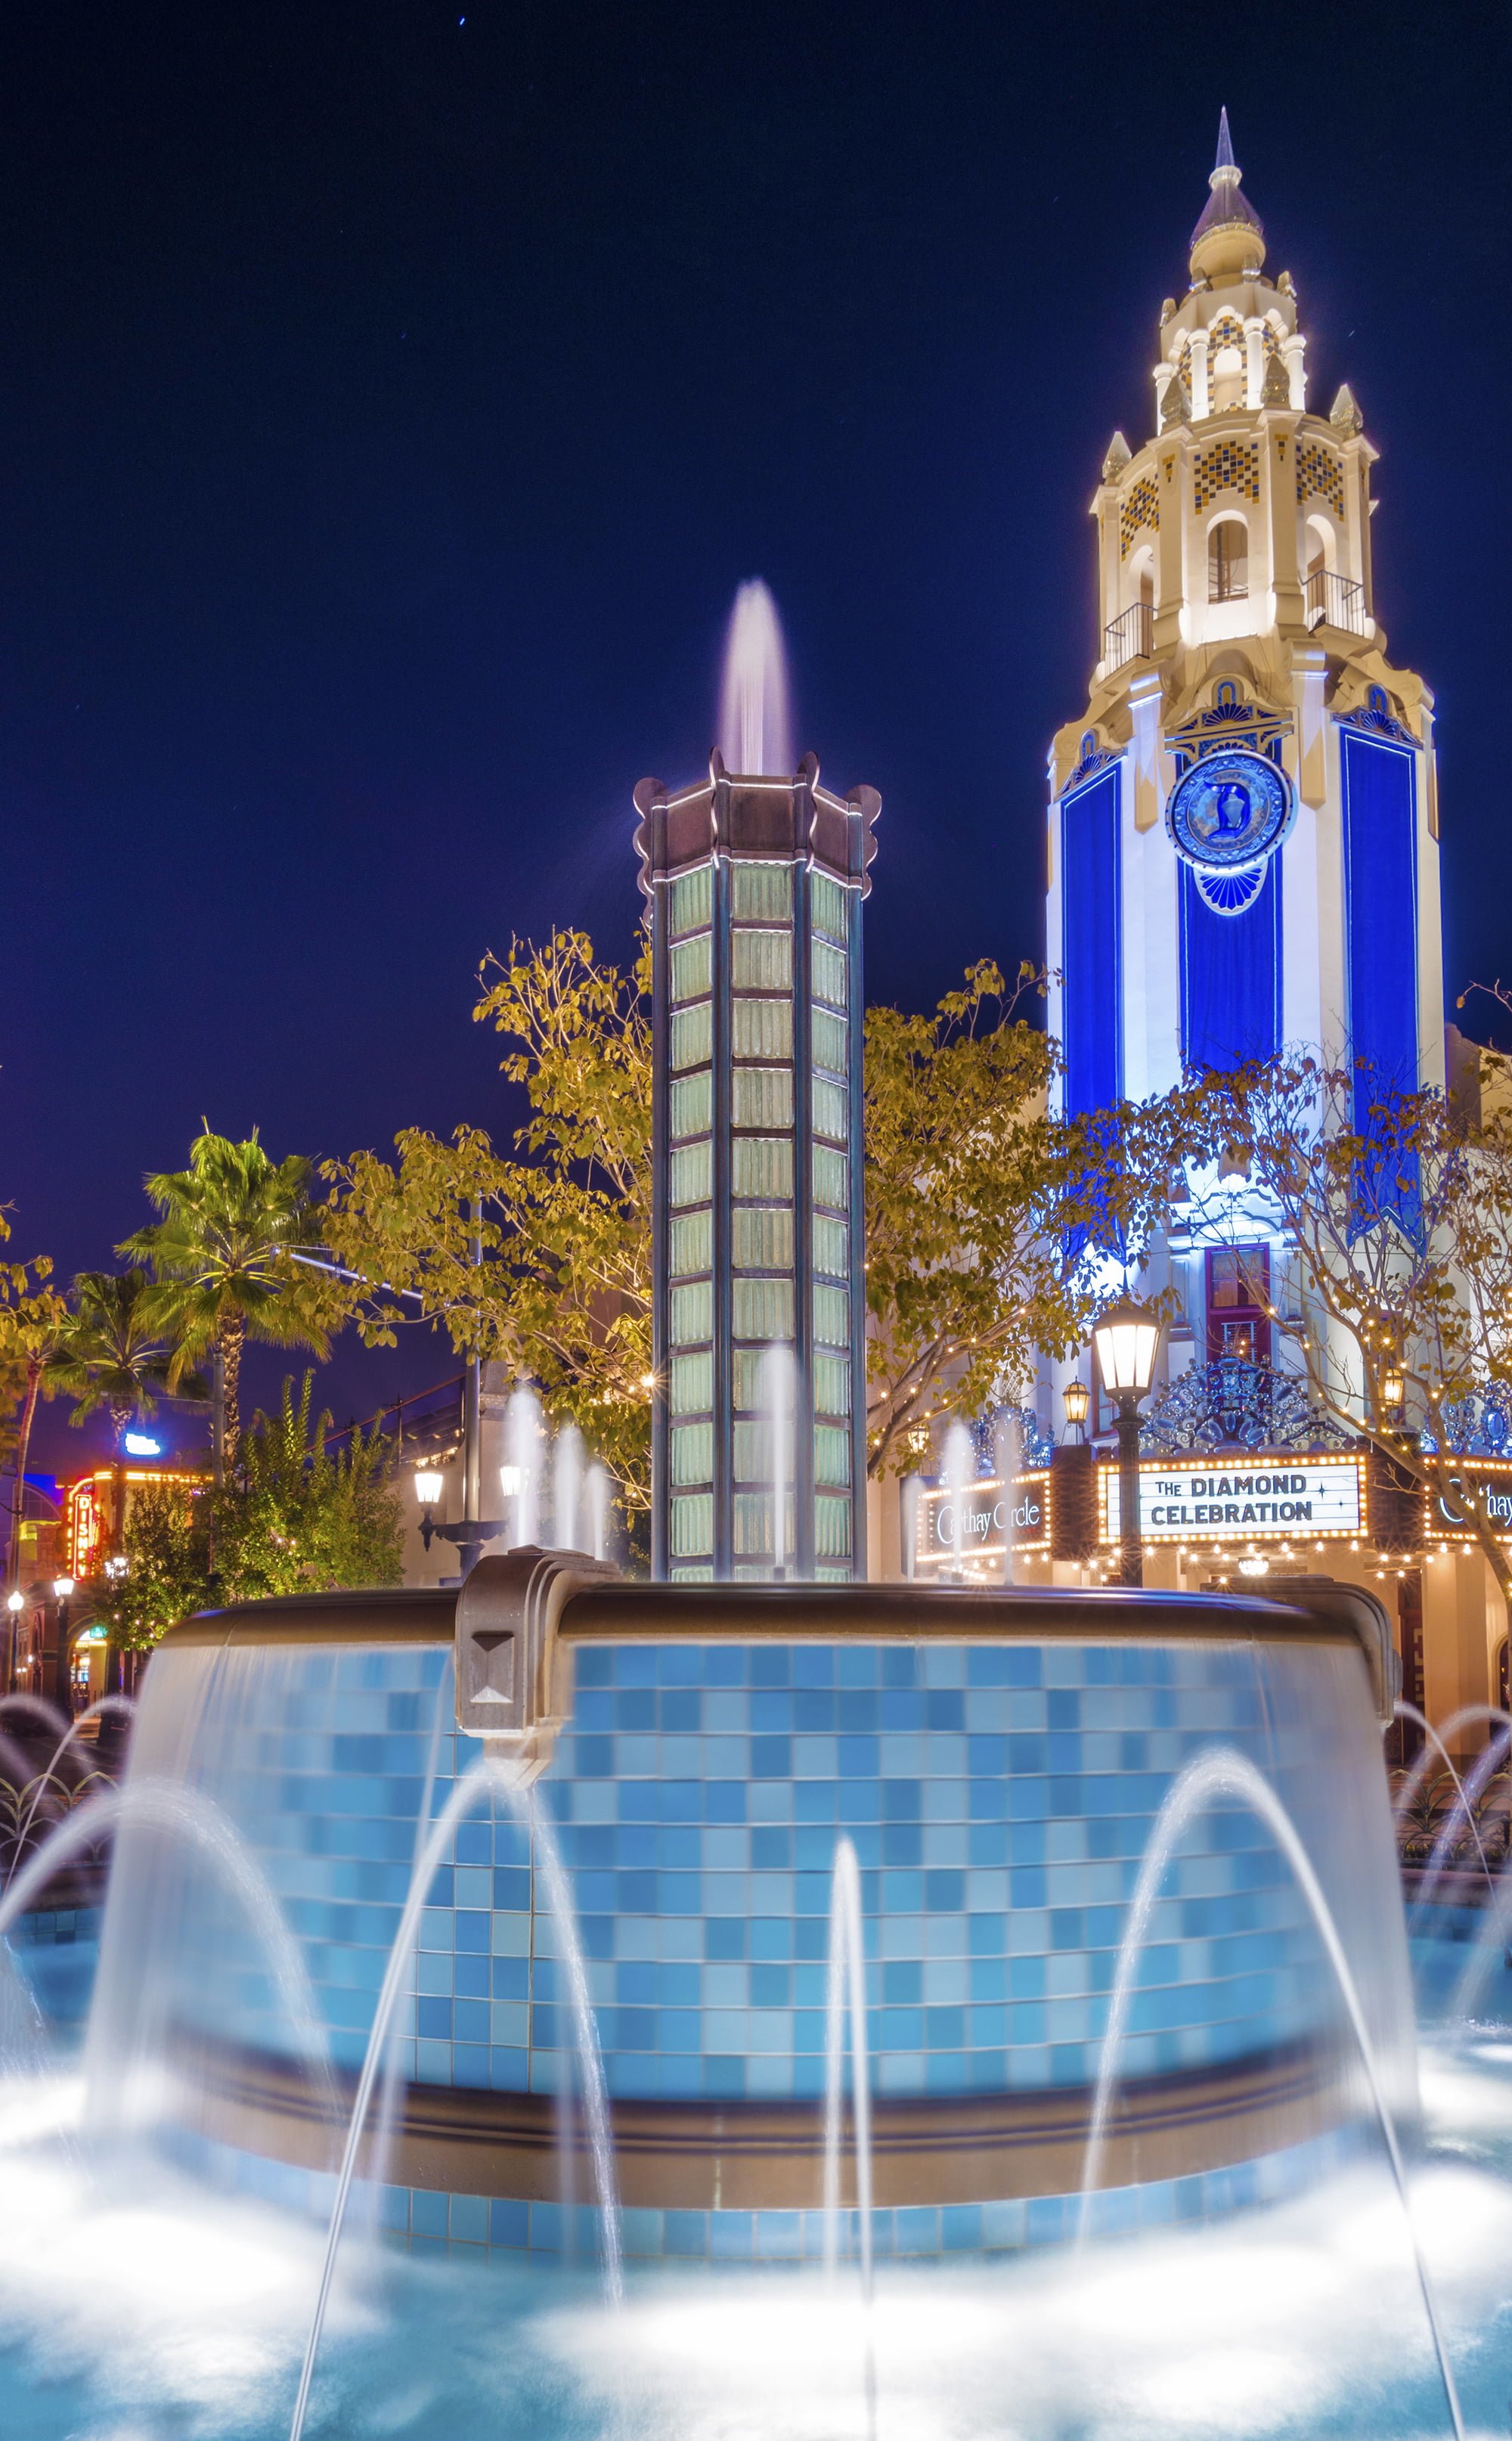
For example, in the photo above, I got low, intentionally placing the track of the Red Car Trolley at Disney California Adventure in the lower right corner of the frame, and Tower of Terror in the upper left corner. The goal here was for the track to lead the viewer’s eye to Tower of Terror.
Another element of composition is that sometimes less is more. Even I have a tough one with this, as I love using wide angle lenses, and cramming as much into a scene as possible. Sometimes you need to zoom in focus on the main elements of a scene.
When you’re zooming in with your point & shoot, be sure to only use optical zoom. Digital zoom is a pointless gimmick that I suspect was invented by whomever invented FarmVille. Digital zoom degrades image quality. If your camera has it, disable it.
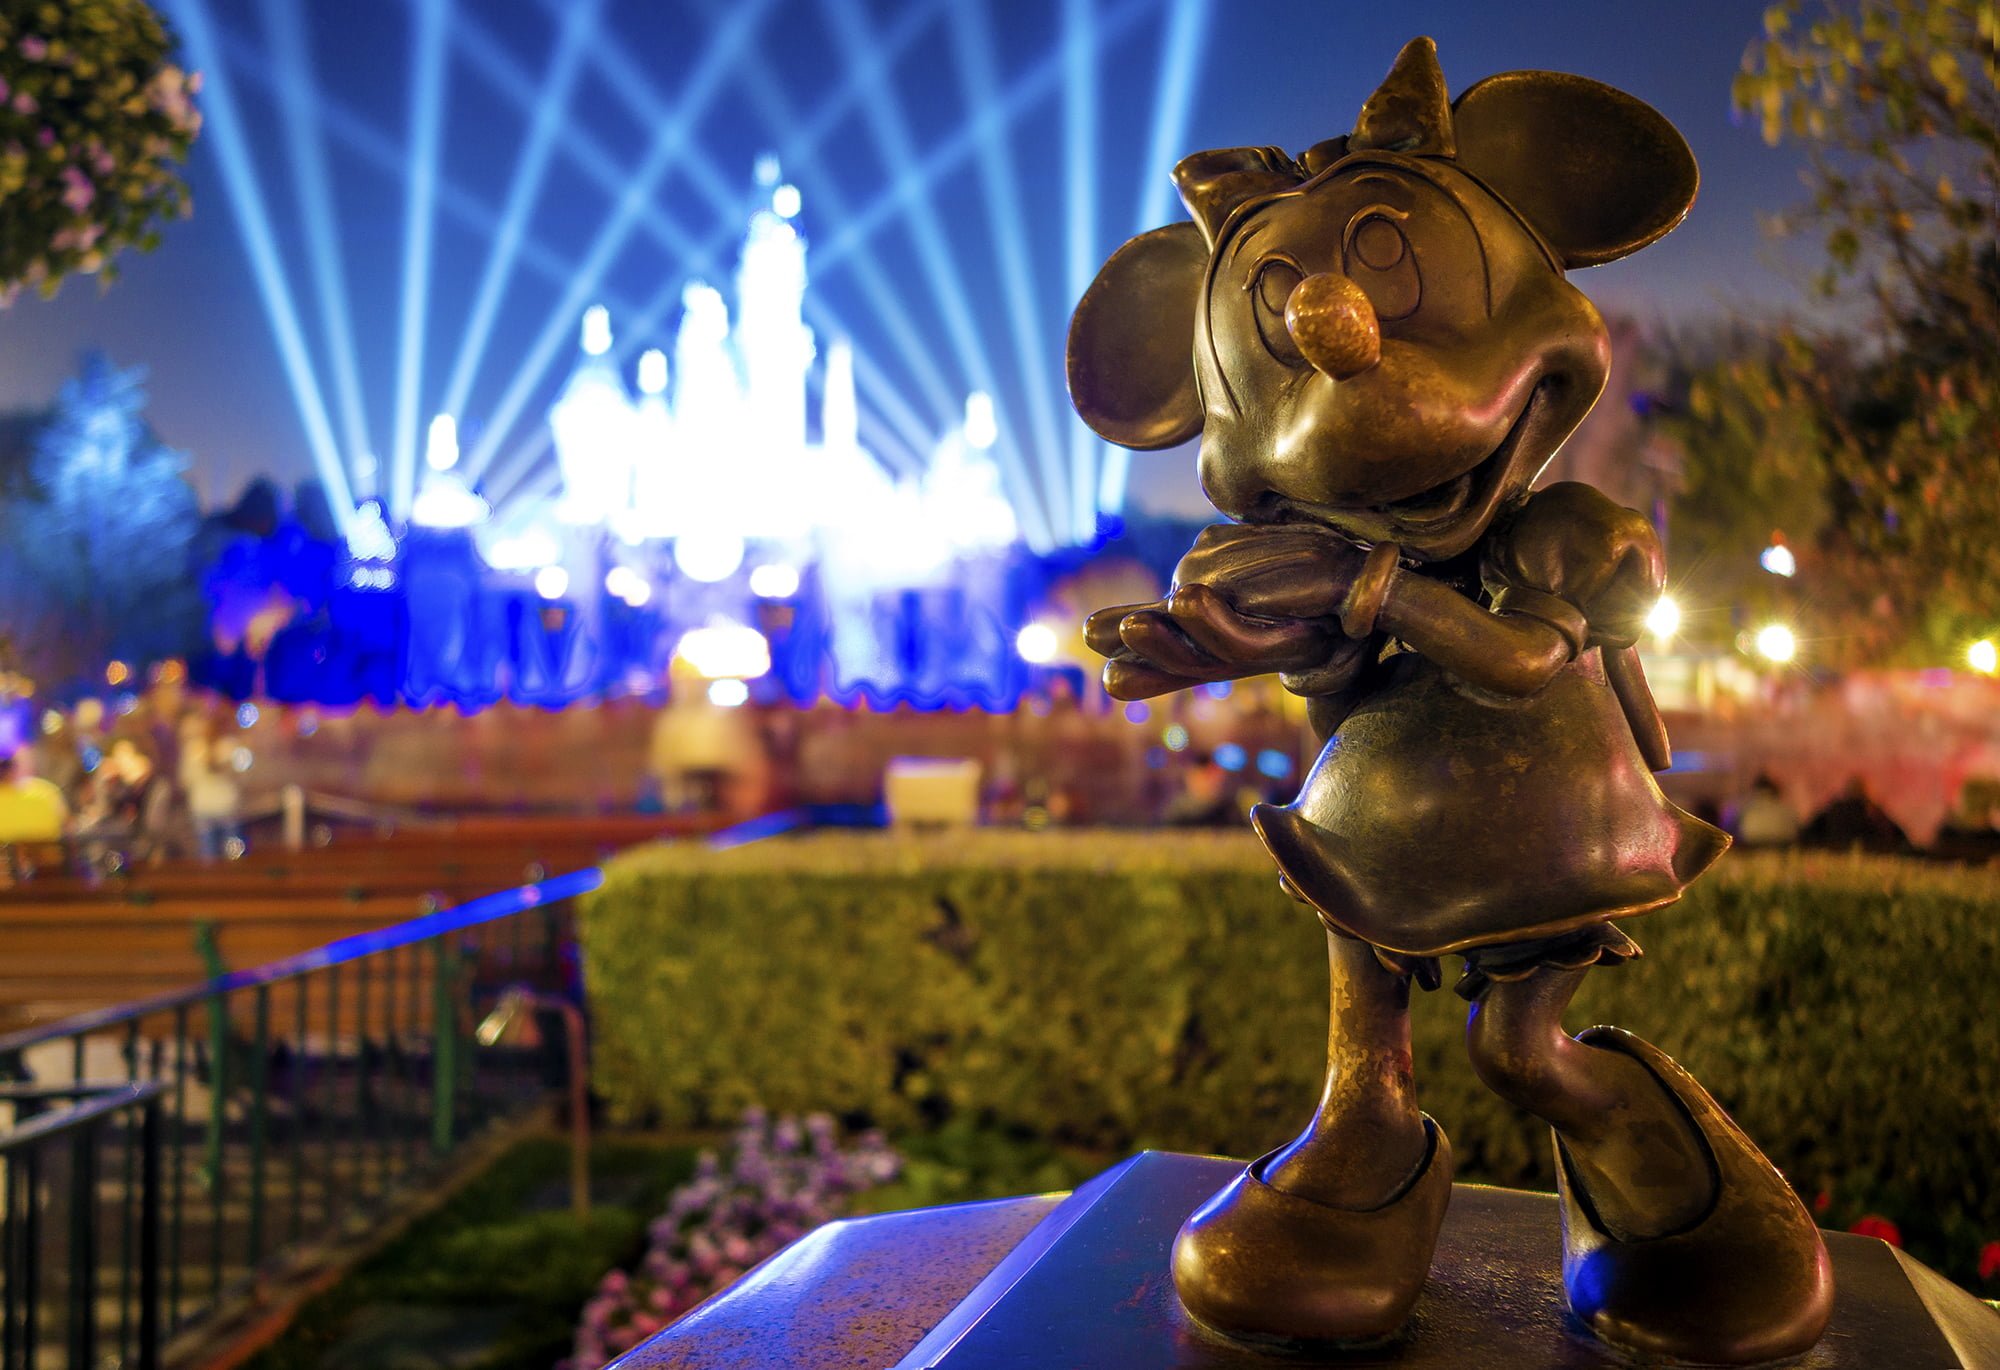
Be cognizant of focus. With many point & shoot cameras, you can choose the focus point yourself, and I always prefer doing this rather than letting the camera choose. Cameras aren’t smart, and might focus on an object you didn’t want as the subject, leaving your actual subject blurred. So pay attention.
For the above photo, the camera would have chosen Sleeping Beauty Castle as the focal point if I let it. However, I wanted to focus on Minnie Mouse, with the castle blurred out in the background. By selecting the focus point and choosing a wide open aperture, I was able to accomplish that.
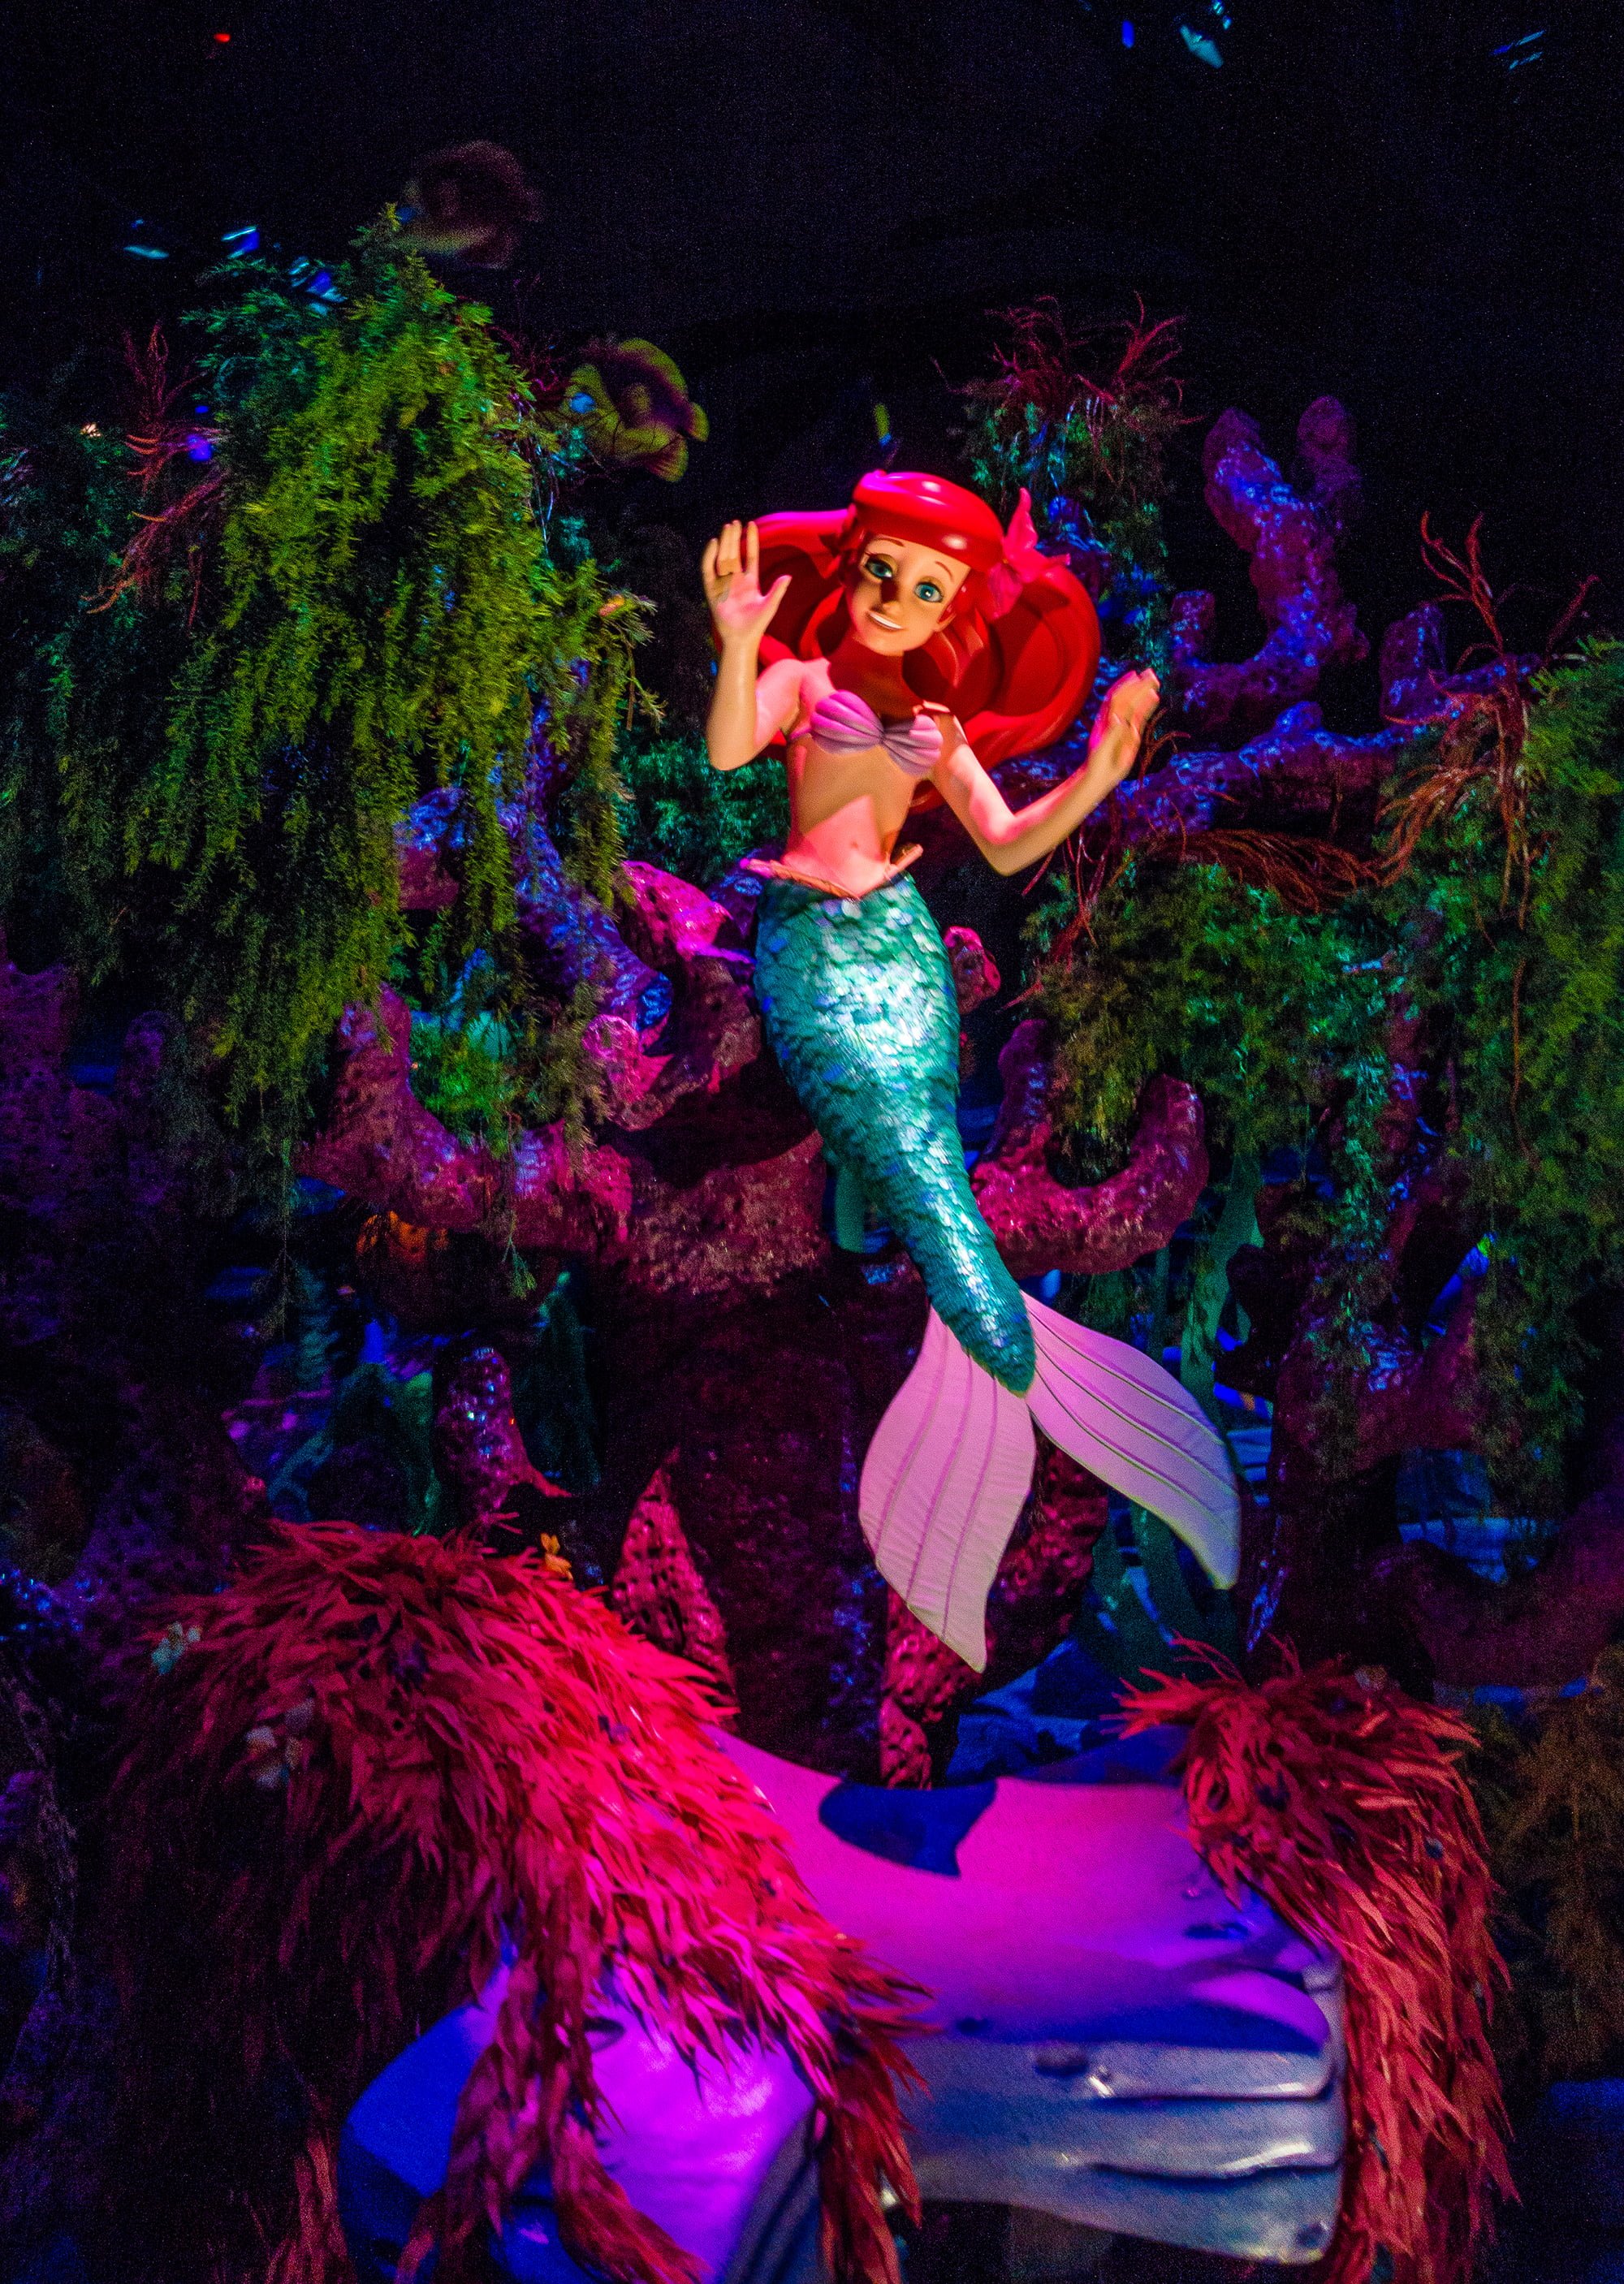
Likewise, always take multiple photos of a subject, especially people. Another feature many cameras have is burst mode or continuous shooting. This means that when you hold down the shutter button, it keeps taking photos until you release. Enable this and use it liberally. Memory cards are cheap, and you can always delete extra photos. You can’t time travel to re-photograph that moment you met Uncle Jesse and redo the photo because you blinked. (Fun fact: John Stamos never blinks…he’s always on his photogenic A game.)
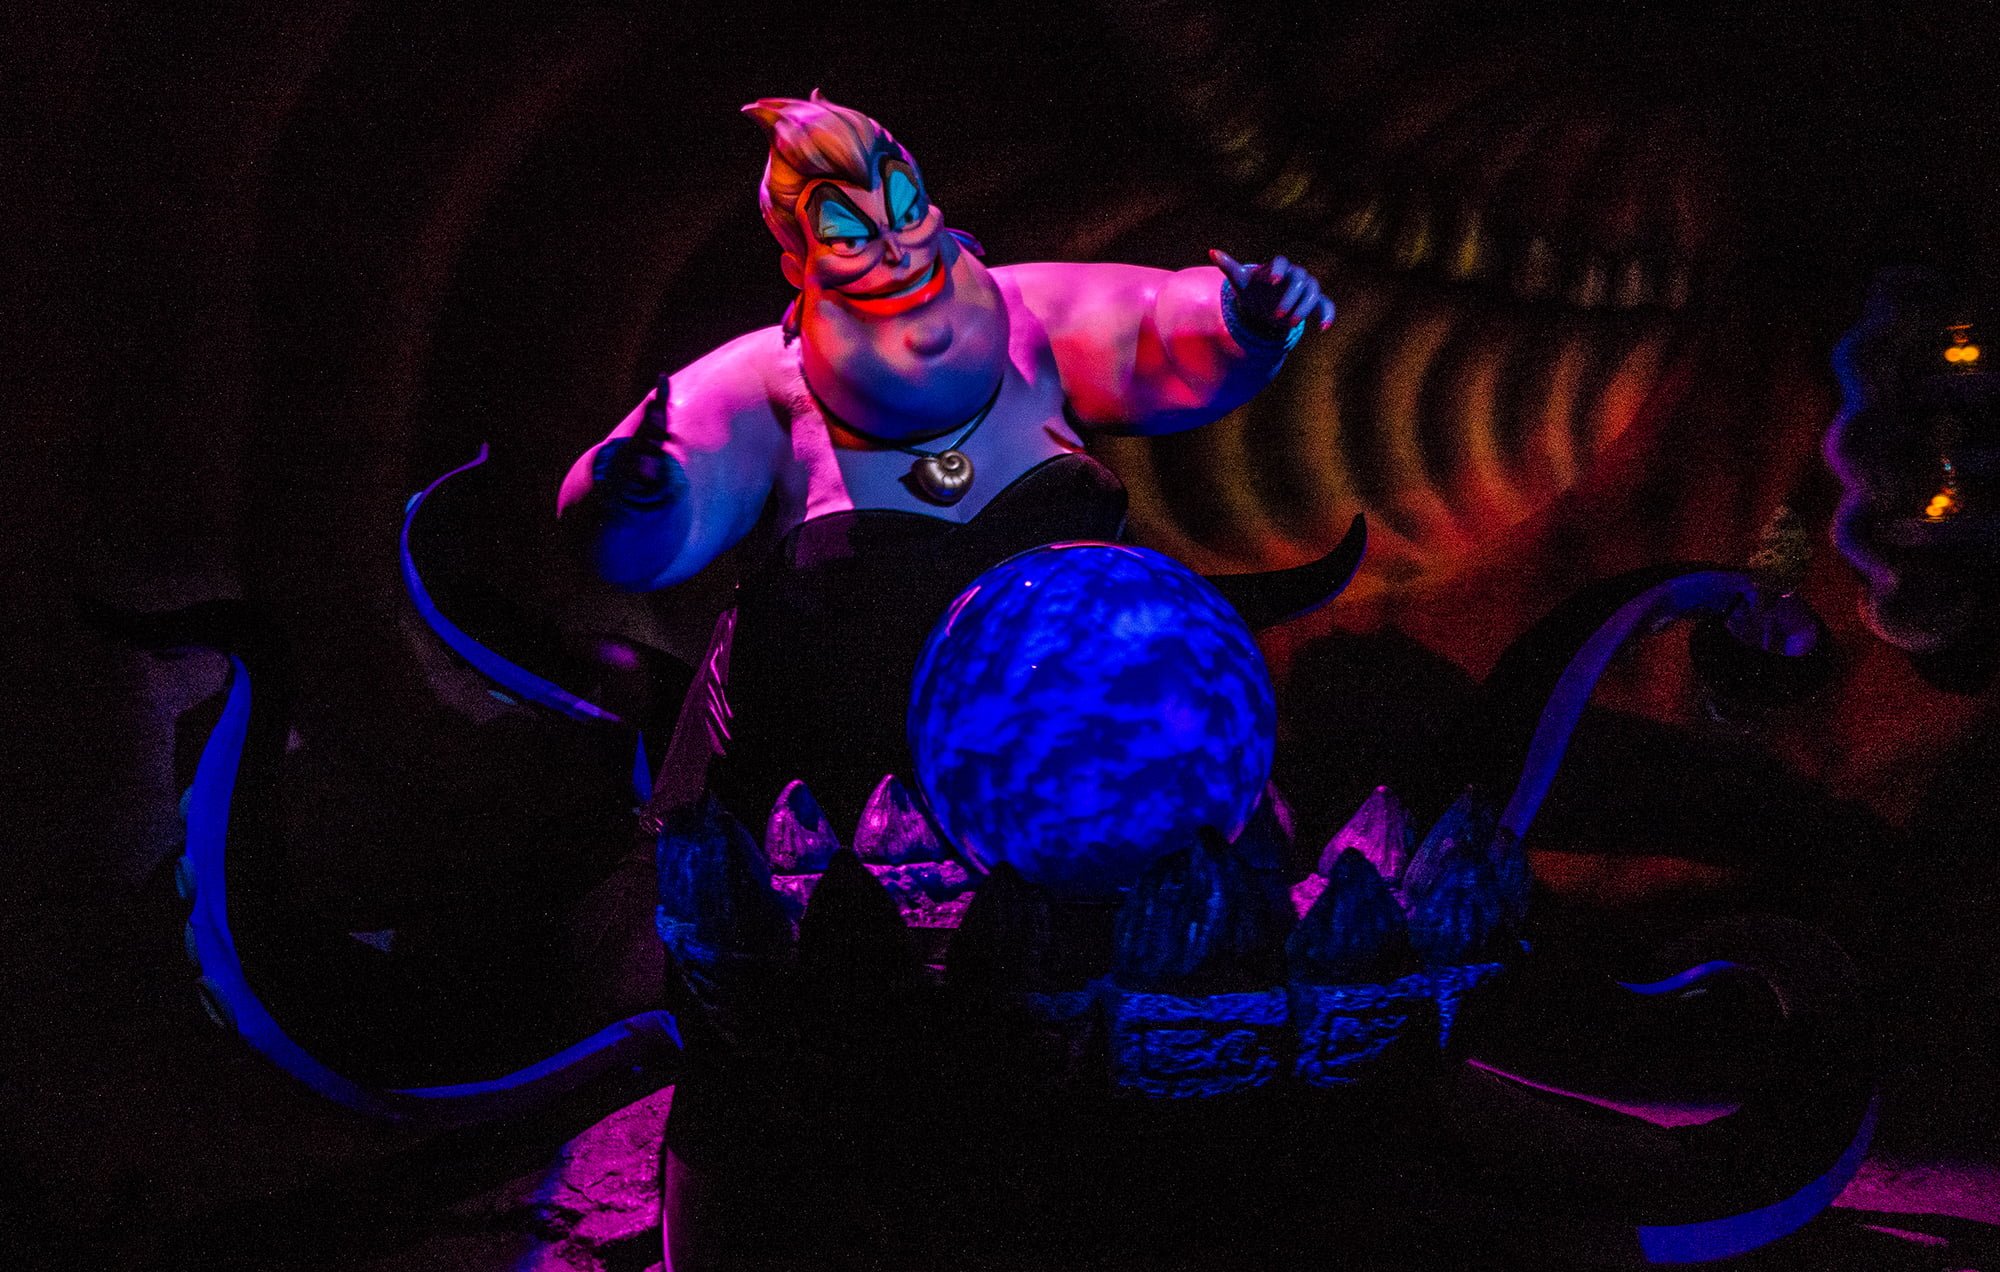
This is also a good rule on dark rides. Ariel constantly moves in this scene, so I fired off 10 shots in a row, hoping one of them would be a good pose. I had a grand total of 2 keepers, and in the rest, she was blinking, awkwardly posed, or blurred. Had I only taken 5 shots, I might have had 0 keepers.

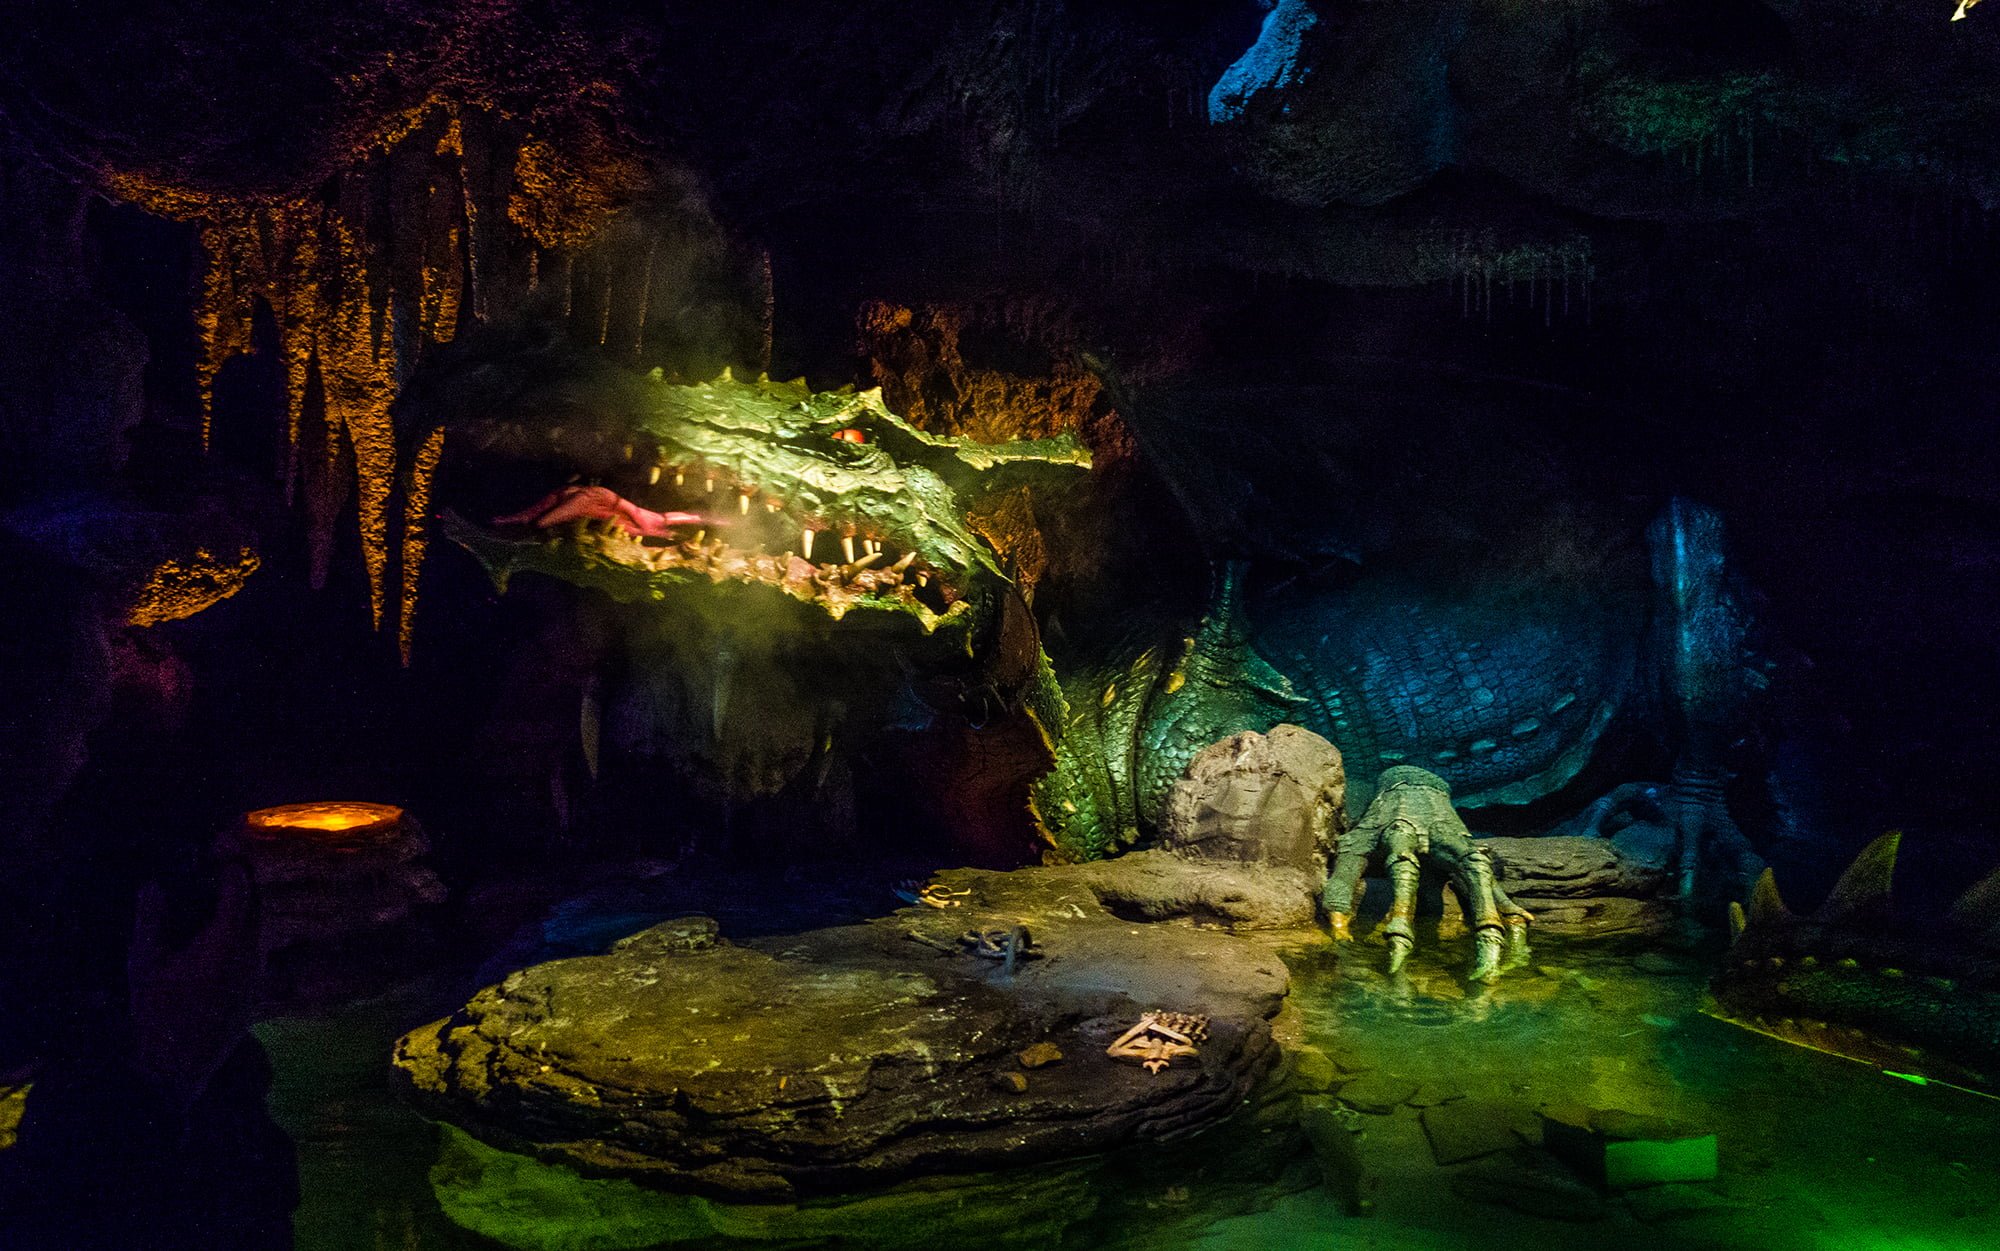
In terms of Disney photography, dark rides are a challenge with most point & shoot cameras. This, unfortunately, is one of the limitations of the gear. With many cameras, you just aren’t going to get good dark ride photos.
I have found my Sony RX100 to be pretty capable with dark rides ranging from Phantom Manor (pictured above) to Spaceship Earth. The keys here are low expectations and really pushing your settings. I cover this in depth in the point & shoot section of our Tips for Photographing Disney Dark Rides post.
If you are using a camera with only preset modes, I would still recommend learning the fundamentals of photography, as that will keep you thinking as you approach each scene, even if you can’t adjust the exposure. It will also help you reverse engineer the preset modes, manipulating them to get the camera to use the approximate settings you want.
For example, you’ll know portrait photography uses a larger aperture to blur the background. You can use “portrait” mode for times you want shallow depth of field. Night photography requires a longer shutter speed. You can thus use the camera’s “night” mode for scenes that need a longer exposure (like sunset).
Speaking of night photography, I’ve encountered many people who are unhappy with their point & shoot cameras and want to purchase DSLRs for one reason: night photography. I’ve tried to demystify night photography with previous posts, even saying that you can get great night photos with a point & shoot. Still, people don’t seem to believe me.
Because of that, I decided to challenge myself, spending an entire night at Disneyland last week using only my point & shoot. I think the results above and below speak for themselves, that good night photos are possible with a point and shoot camera. These photos don’t use HDR or any other elaborate techniques, either.

Again, I have to stress how important manual settings are for this. Likewise, using a tripod or other form of camera stabilization is key. I have both the Velbon Luxi L tripod and the The Pod stabilizer (it’s basically a glorified beanbag), and both work wonders and are fairly easy to carry in the parks.
As for everything else you need to know about night photography? You can crack that riddle with my Top 10 Disney Parks Night Photography Tips post. Seriously, night photography is no sweat. It’s more patience than anything else. You want a real challenge? Rewind the clock and shoot at sunset.
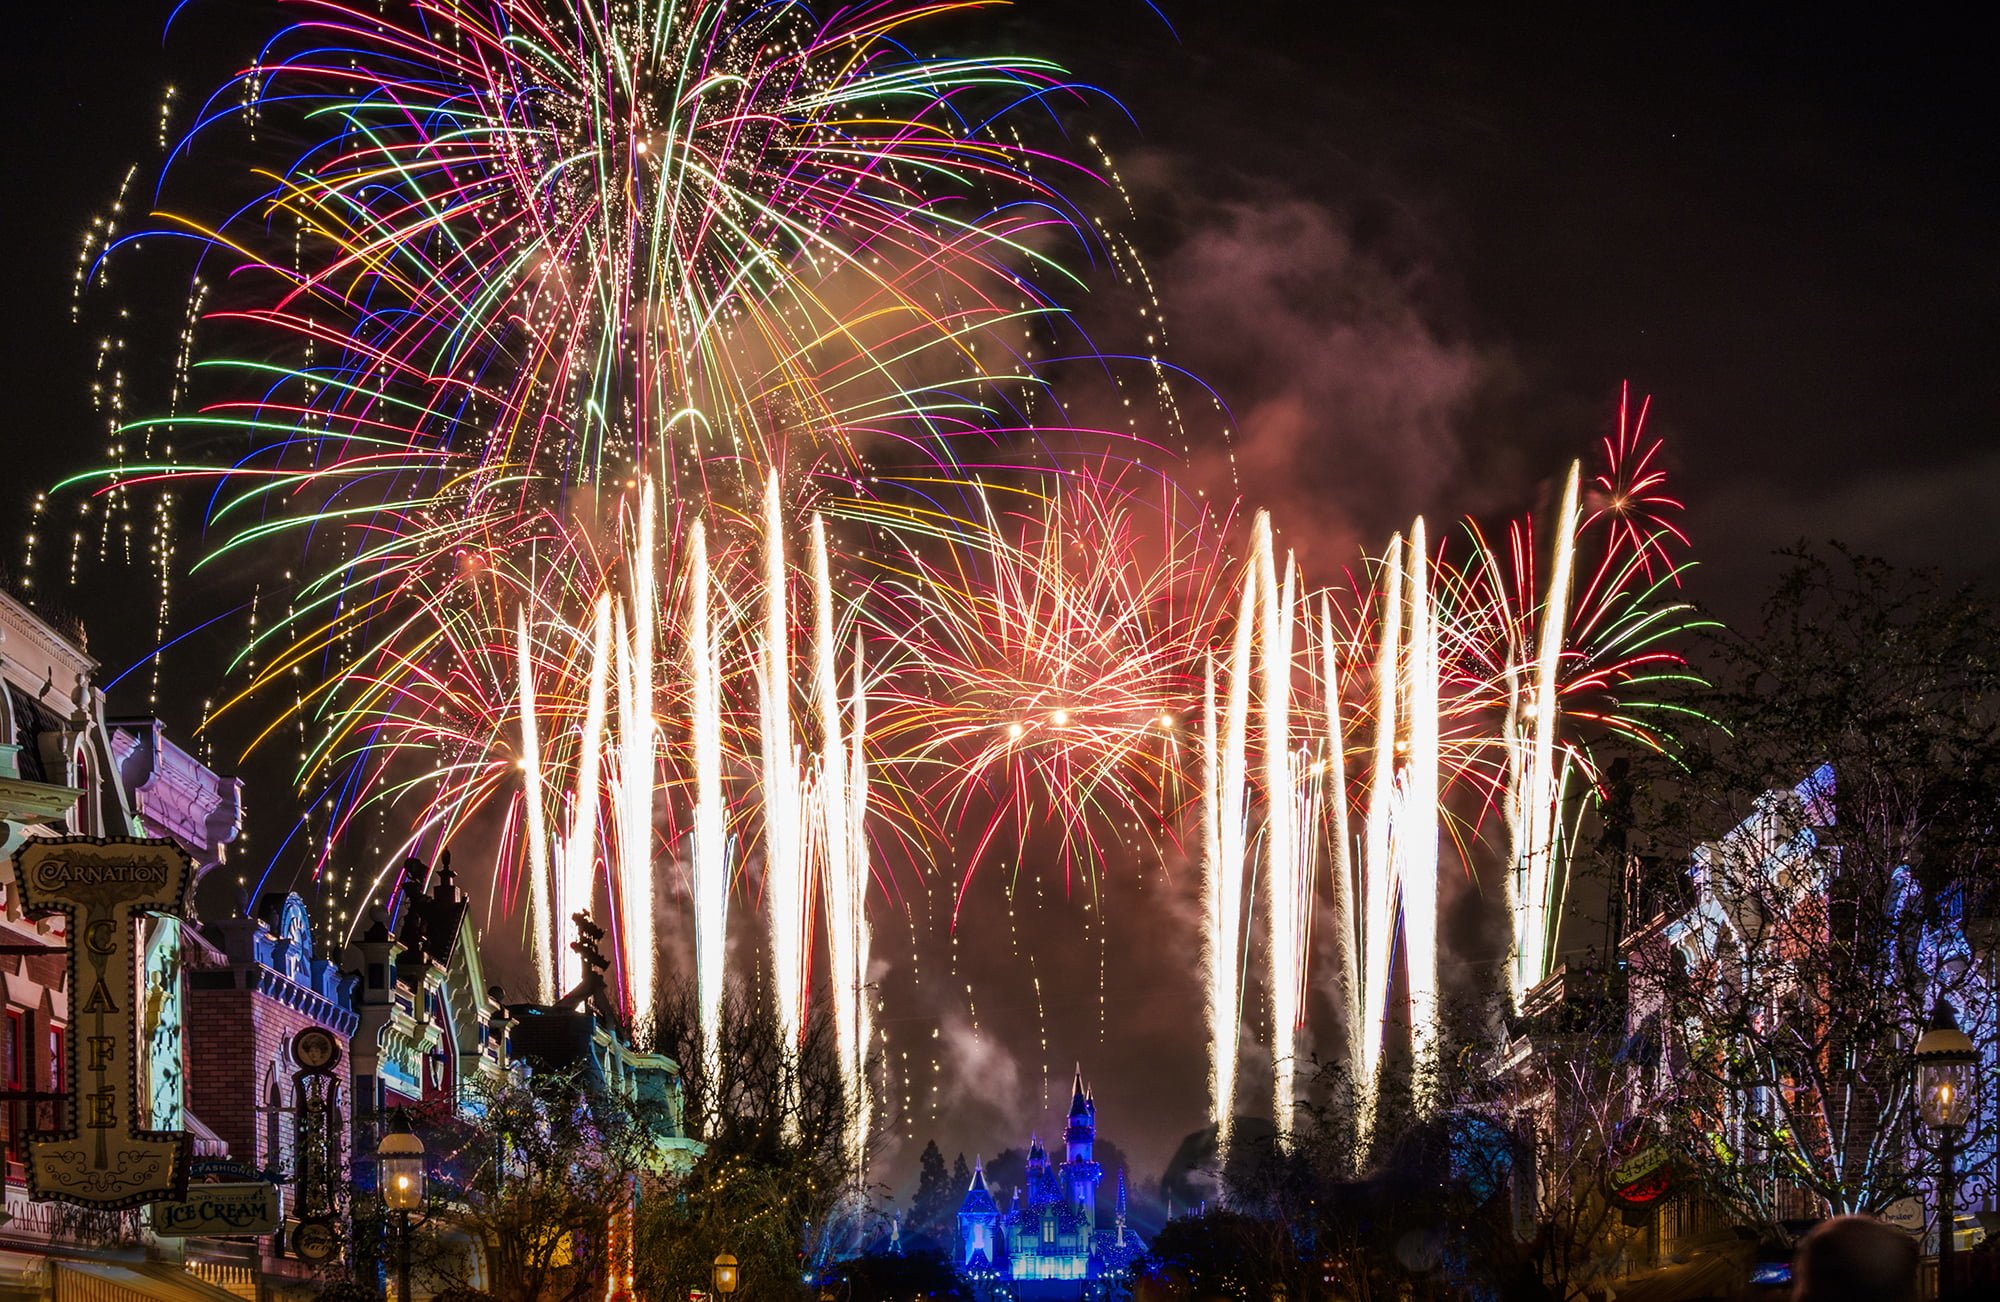
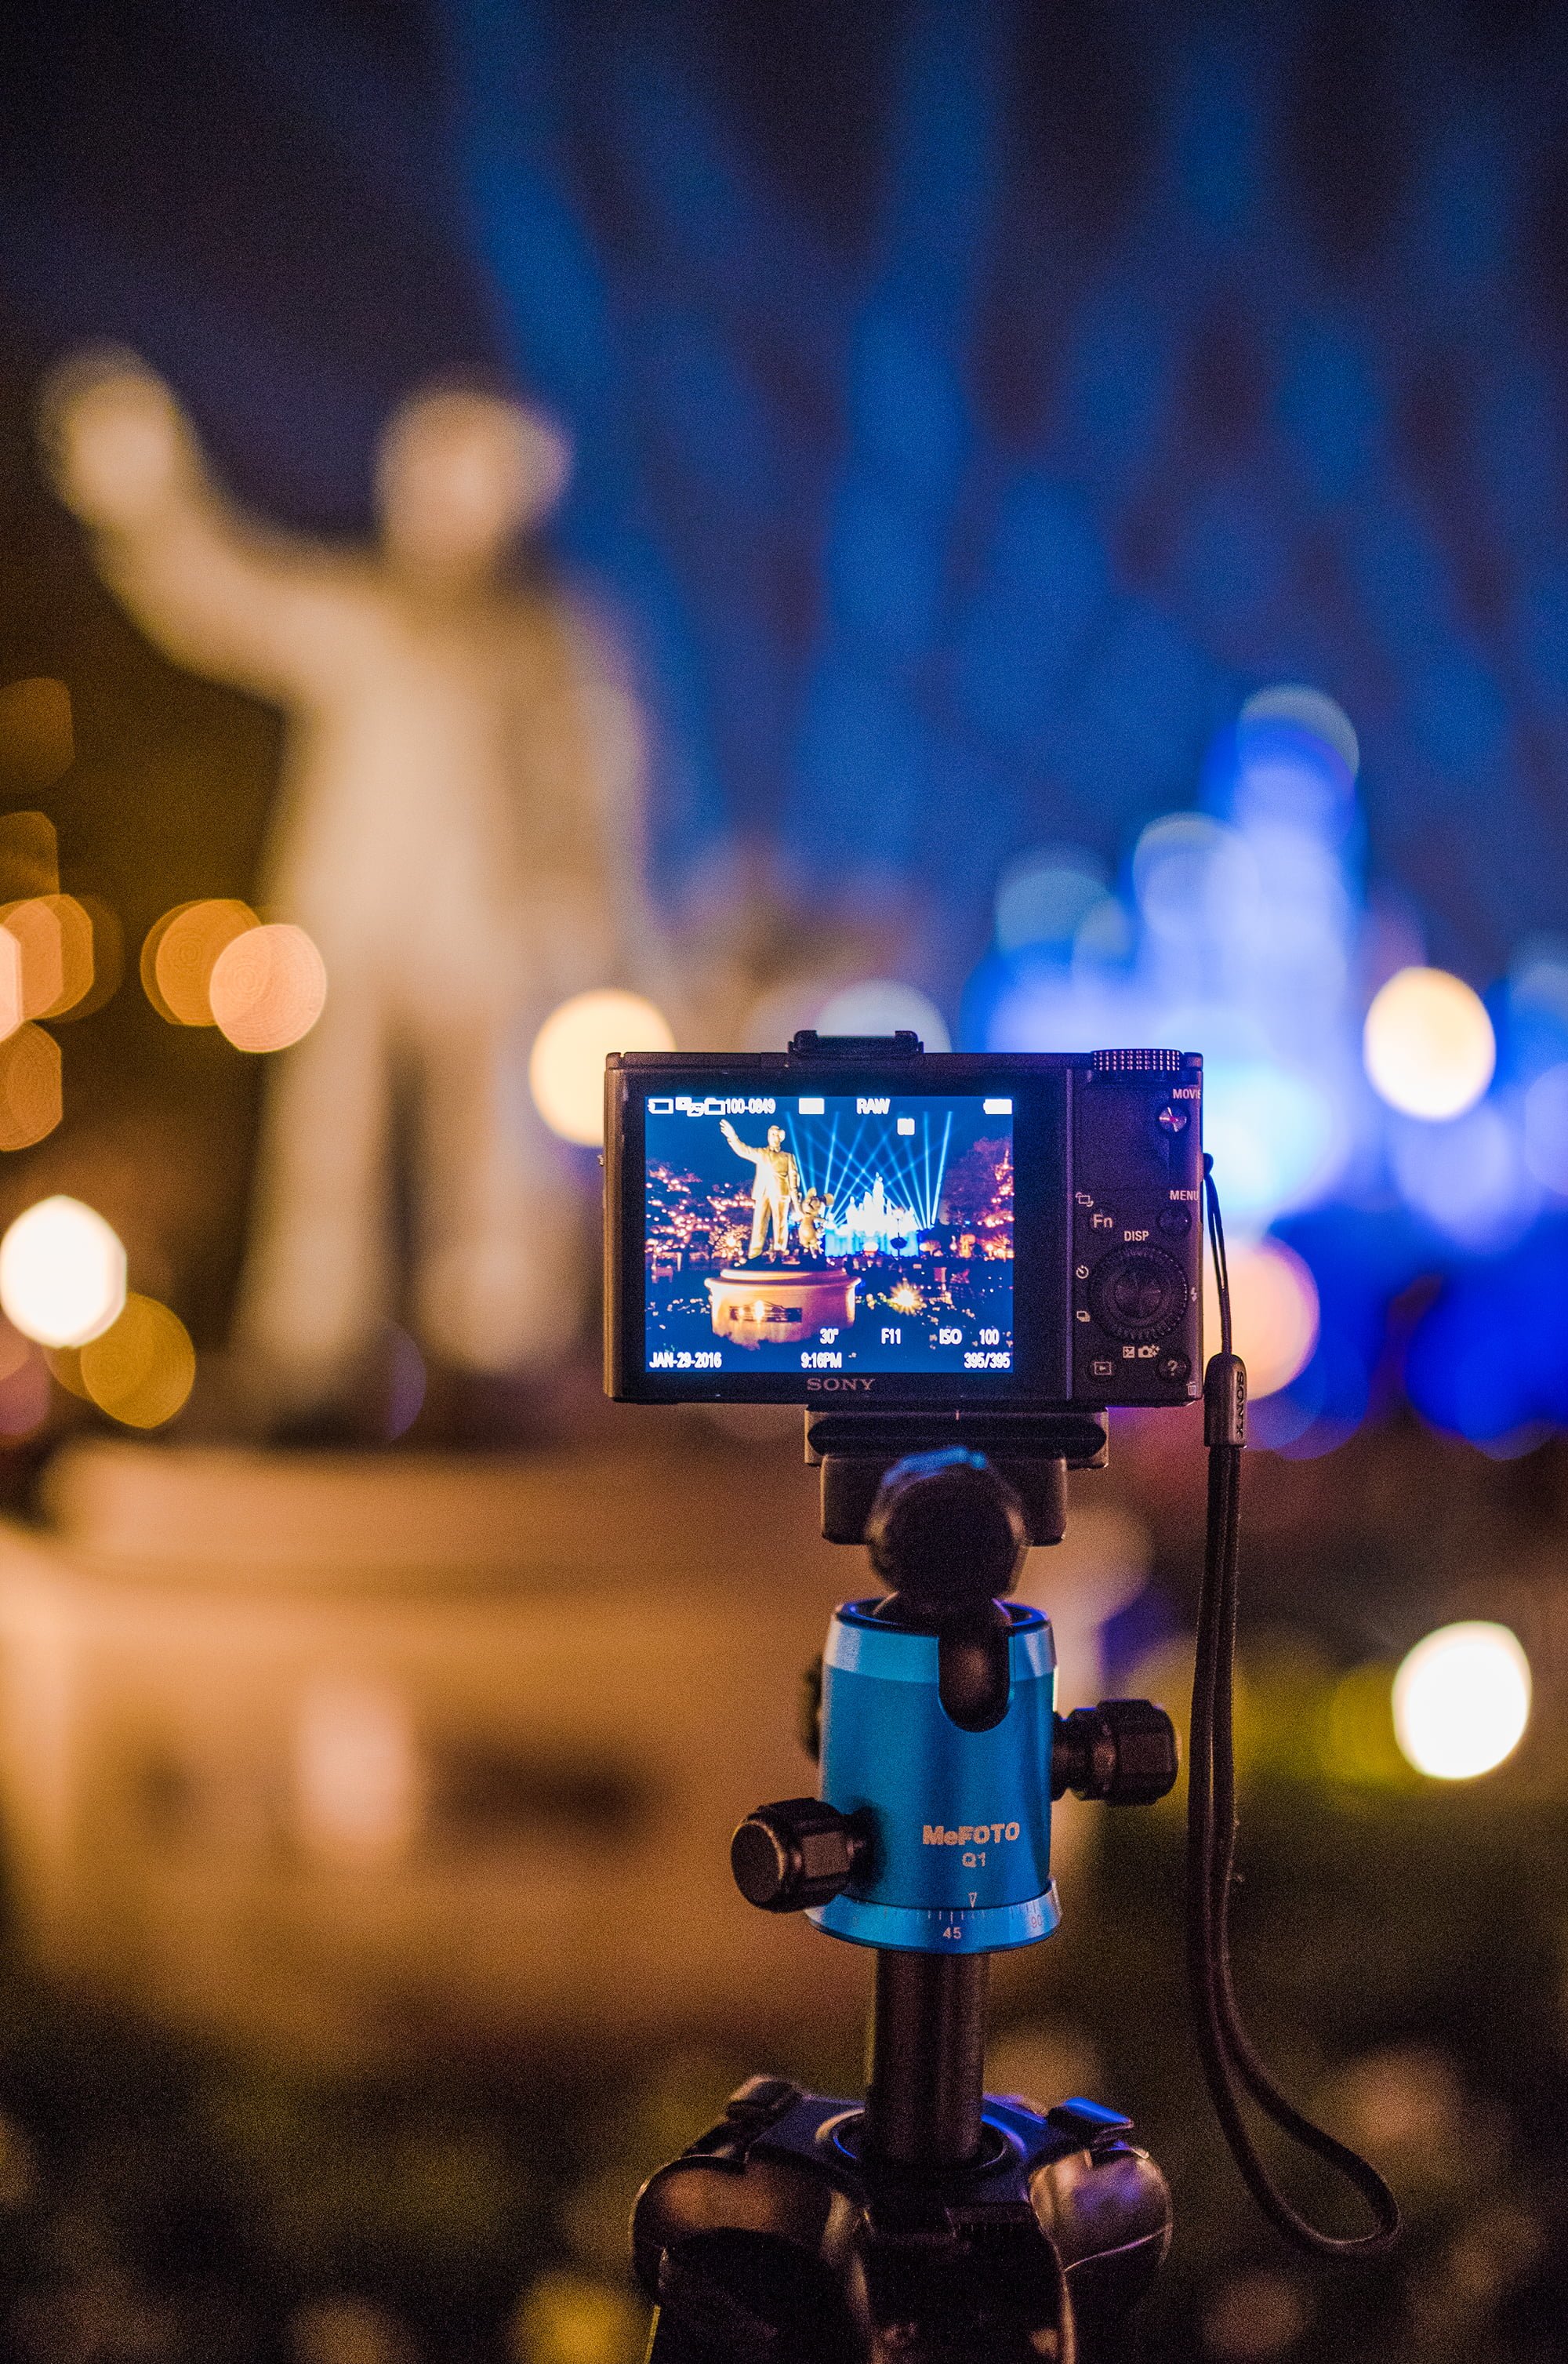
On the topic of night photography, fireworks is one type of night photography about which I receive a lot of questions. Just like any other night scene, you can capture fireworks with the right point & shoot (and tripod).
For the photo above, I used my tripod and RX100’s self-timer to shoot Disneyland Forever! I put the camera into full manual mode, varying my exposures from 6-25 seconds at f/11 and ISO 100. It was a bit of a challenge to get my timing down with the 2-second delay of the timer, but I got a few good shots. I could have done better if I had an actual remote.
By the way–would anyone be interested in a blog post on fireworks photography?
Sunset, or rather, the time just before sunset can be a real challenge with point and shoot cameras, especially when shooting into the sun. I mentioned limitations of point & shoot cameras above, and this is one scenario where they are really exposed. Think of when you’re looking into the sun–you squint and your eyes have to adjust so you can see, and you still can’t see perfectly.
Well, your eyes can see better than the best camera sensor can “see” and point and shoot cameras are not the best camera sensors. The dynamic range of light–from the darkest shadows to the brightest lights–is difficult for cameras to see fully. This is an important thing for photography geeks like me, and one reason why techniques like HDR have become really popular.
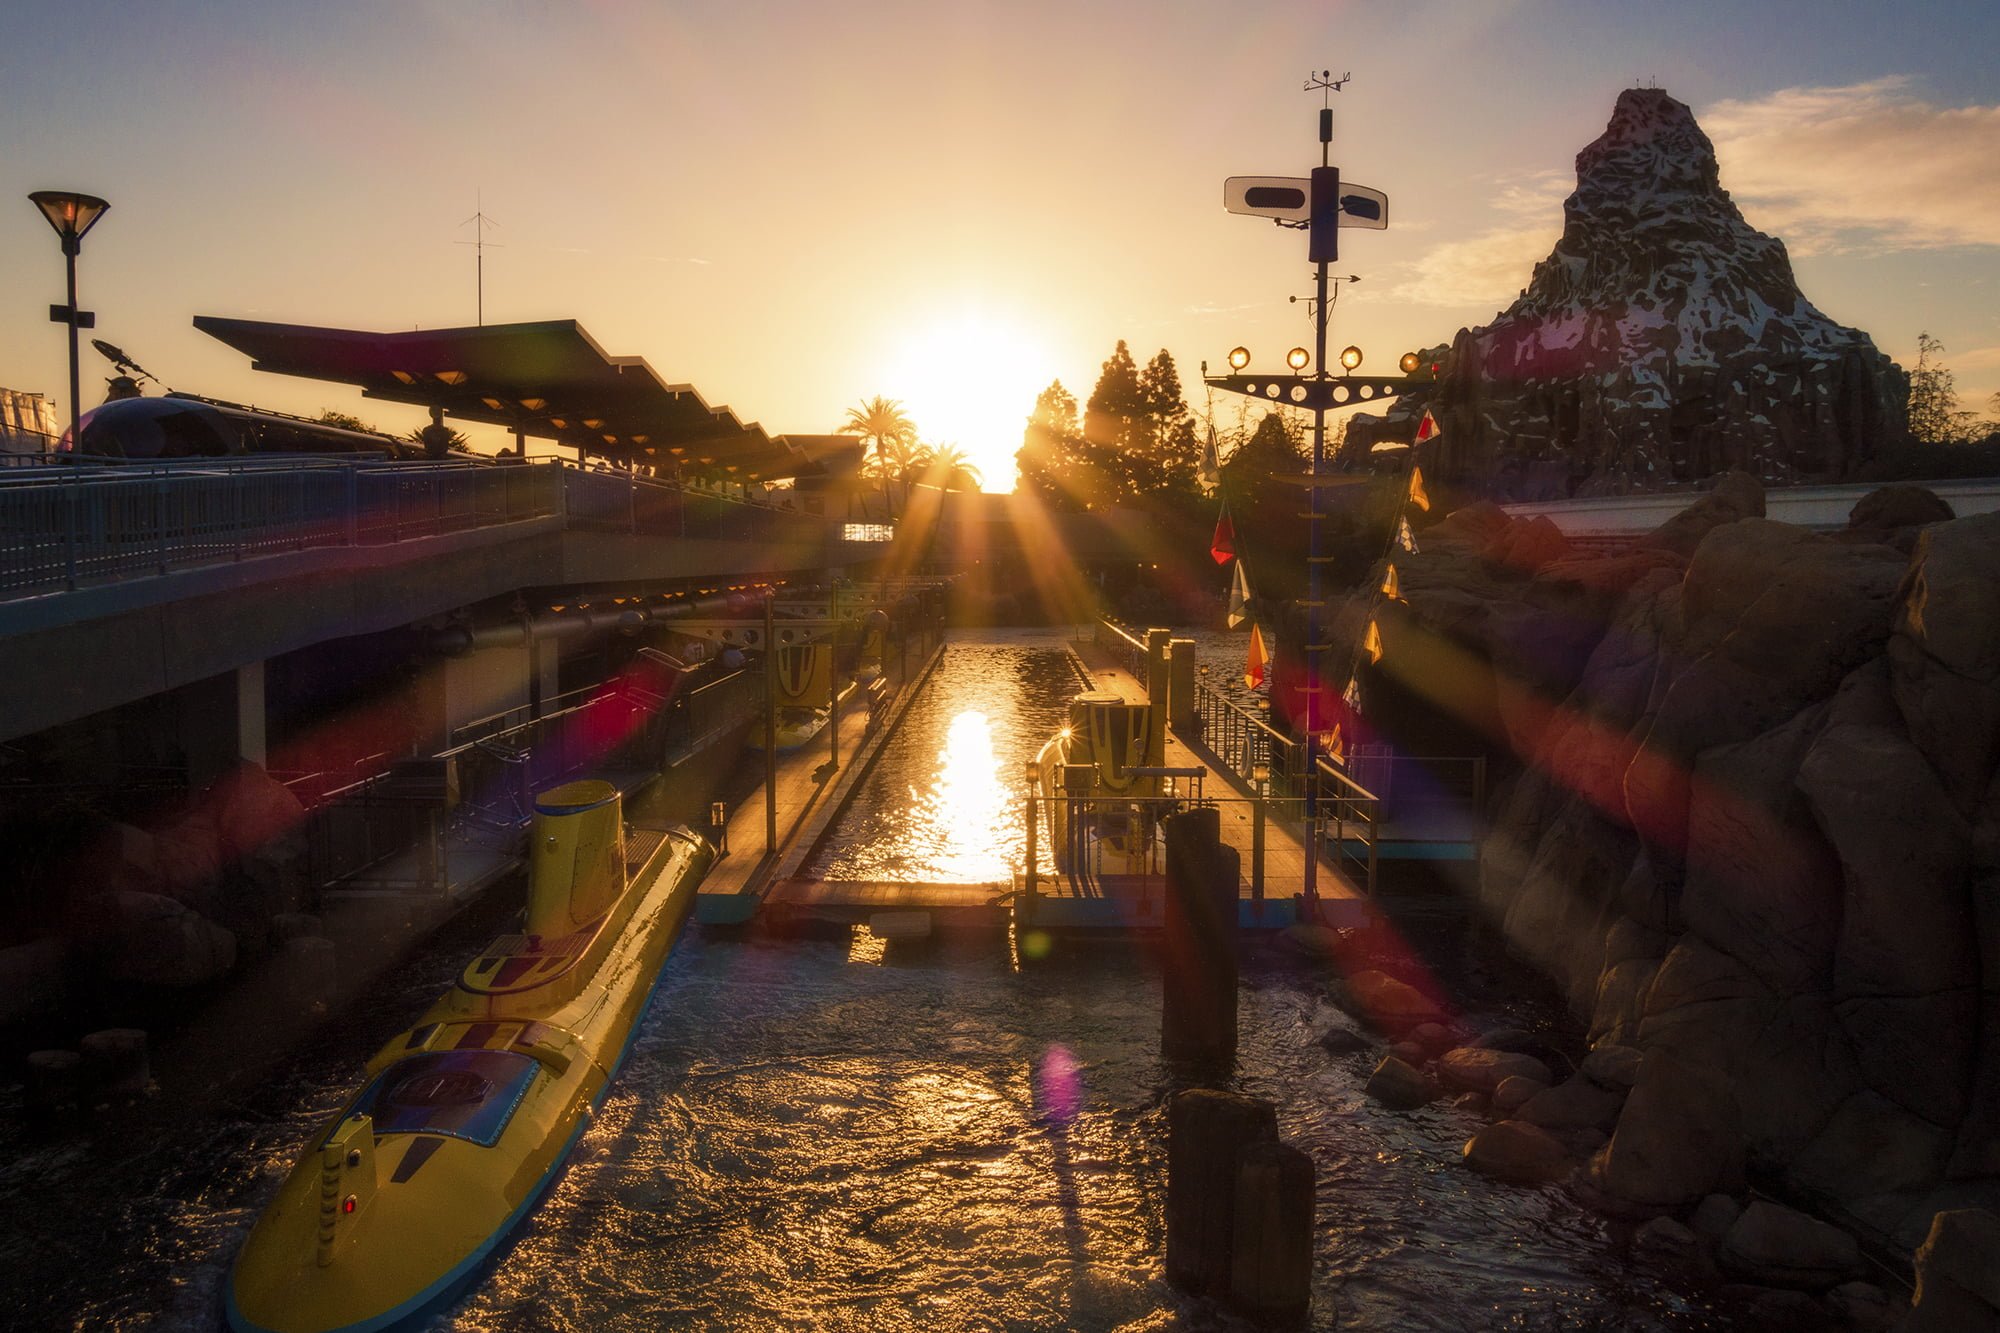
When shooting into the sun for sunsets like this, I generally choose a small aperture, f/11 on my Sony RX100, as it has the effect of tightening the sun into a sunburst that fans rays of light over the entire image. Not only does this look cool (I think), but it’s a way of controlling the sun so it doesn’t blow out the entire sky.
Editing is also important with shots like this. The brightness of the sun overpowers a normal exposure, meaning the shadows are darker than what the human eye would see. To combat this, I increase the shadows as much as practical. I don’t take it too far because I don’t want to introduce a lot of noise or grain, nor do I want the photo to look super fake.

Sunsets aren’t the only scenes that can be improved with photo editing. Just as film photographers edited photos in the darkroom, modern photographers make adjustments in Lightroom, Camera Raw, Photoshop, and other programs. Don’t be intimidated by editing: it can be as quick as spending 10 seconds to increase contrast and vibrance to make a photo pop.
With the photo above, thanks to shooting in raw, I was able to do a quick edit to bump up the shadows, which brought out the blue in the sky and the stars! This is why I love being able to shoot raw. If this were shot as a .JPG, I wouldn’t have been able to do this without the photo becoming grainy.

I’m not much of a portrait photographer, so just a couple of quick notes about that. The biggest one is to use your flash for daytime photos! I know it seems counter intuitive, but I’m more likely to use flash in broad daylight than I am later into the evening. This is because broad daylight makes for harsh shadows on the face that aren’t flattering.
In the photo above, I manually turned on the flash to fill (on some cameras, it’s even called “fill flash”) the shadows before handing it off to the Cast Member who took my photo. Had I left the flash on “auto” it would not have fired. By contrast, in the evening, natural light (or lack thereof) can make for a neat, moody shot. If you leave the flash on “auto” at night, it will fire, making the scene look unnatural. Yet another situation demonstrating the need to be smarter than your camera.
Phew, that’s a lot to digest, so I think we’re going to stop there. There are innumerable scenarios for using your point & shoot, and I simply cannot cover them all in a single blog post. If you have specific questions about other situations, or about the fundamentals of photography, feel free to ask in the comments and we can continue the lesson plan there. 🙂
Want to learn more about photography to take great photos in the Disney theme parks and beyond? The best place to start is Tom’s Ultimate Disney Parks Photography Guide, which covers a variety of topics from links to tutorials, tips, and tricks to recommendations for point & shoots, DSLRs, lenses, and more!
If you do want to purchase new photography equipment, we recommend the following trusted & authorized retailers. Buying from these retailers helps support this blog, and doesn’t cost you a thing:
Amazon
B&H Photo
Adorama
For other photography equipment recommendations or photography tips in general check out a few of my top photography blog posts:
Best Books for Improving Your Photography
5 Indispensable Tips for Better Vacation Photos
Choosing the Best Travel Tripod
Choosing the Best Camera Bag for Travel
If you enjoyed this post or found it helpful, we’d really appreciate it if you’d share it via social media to help spread the word about DisneyTouristBlog. We put a lot of work into making this site a helpful planning resource, and hope it’s useful to you! 🙂
Your Thoughts
Experienced photographers, have any tips of your own to add? Beginners, anything else you’d like to see covered here? Have any specific questions or wanting feedback? Post in the comments below, and I’ll try to help!


Loved reading this. Currently use my IPhone XR and get decent results. Now looking to add a point and shoot, for the same portability as the phone but with the added bonus of zoom lens. Looking at canon power shot sx620 would be appreciated
Hi, just wondering if you ever tried the canon sx700hs or if you could tell me if it is good enough. not sure if i should upgrade
It was great reading this. I have 2 Sony RX100 cameras, one for me and one for my husband. I also have a Panasonic Lumix, but haven’t used it much. I got a Nikon DSLR years ago when I traveled to Australia and New Zealand, but decided it was too big to travel over seas with…..less is more. I hope to improve my photos so I can leave behind so good memories.
Since many of us ‘just’ have the iphone camera, would you consider an article/help guide to make the most out of taking photos with it? Please? 🙂
your blog is amazing, i have scheduled a trip to disney world with my family and i would love to have a great point and shoot camera, i curently own a bridge camera but i need something with wider angle and larger aperture.
im struggling between the sony RX100 and the RICOH GR.
im also considering a wide angle lens adaptor to get wider shots.
any help would be apreciated.
Thank you for your amazing blog! We leave in a little more than a week for our third trip to WDW and I have extensively used your site for planning. I enjoy your tips and great pictures and recommend you to whoever will listen. I would like to update my point and shoot to the Sony RX100 3 or 4 possibly. My husband thinks we would like the Sony HX99 because of the increased optical zoom. Our planned uses include vacations like WDW, National parks, road trips etc. Also daily use with three kids including sporting events. Any thoughts on which model would be a better investment?
Hello Tom
Thank you, for writing and teaching all of us how to learn and confidently understand how to be a good compact point & shoot photographer. I recently purchased my first compact digital camera and wanted to read and watch video tutorials on how to produce good photographs with my new camera. I read your online article and enjoyed the ease and confidence in what you know and believe about your career in photography. I love your photo’s too ☺
I just got a new camera and would love to hear your thoughts on the settings to use!! Your photos are always gorgeous and lighting is always a problem when I’ve used my phone camera in the past.
Canon PowerShot SX720 HS (Black). Thoughts?
Thank you so much!!
Very Helpful Post! I have a Canon powershot sx610 hs and you can change the iso speed and shutter speed however, you cannot change the aperture. It shoots full HD video which is perfect for me since I often make short films in Disney, vlogs, etc. Also it is 20 mp and portraits are pretty good but the big landscapes could be better. How should I work around the setting limitations in the parks to get really great shots? I think it is a pretty good camera for the versatility and the deal/price I got it for. Im looking into the d3300 if my current point and shoot setup will not work for what I plan to use my camera to do. But first I would like to see how big the margin between the two cameras is to see if the upgrade is worth it and make a final decision. Thanks!
I am getting “error 404 page not found” for page 2 of the article 🙁
Thanks for the timely article. Tired of our horrid iphone photos but cannot justify carrying our huge DSLR around for our family trips. That said, any thoughts on mirrorless vs point and shoot? Or is that a subject for another day…?