Disney Dark Ride Photography Tips
Photographing dark rides at Walt Disney World and Disneyland is tough, but with these tips, you should be able take great on-ride photos! This guide will help you improve your photography on the toughest dark rides like Haunted Mansion, Peter Pan’s Flight, and Pirates of the Caribbean.
There are a lot of great reasons to get into dark ride photography. First, it’s a fun challenge that adds a lot of re-rideability to many attractions as you want to keep going back to get that perfect photo. Second, it’s also a great way to spot details that are very difficult to see with your eyes.
My favorite discovery photographing dark rides has been the various brands of booze Imagineers made up to put in the Saloon scene of Phantom Manor; these bottles are impossible to read with the naked eye! Finally, it’s a great way to document your favorite attractions and see how they change over time (or disappear completely), so you can relive your memories on them years later…
For me, the challenge is mostly what it’s about, as I love competition, even if it’s only with my past “benchmarks.” As I’ve been able to conquer the “easier” dark rides, I’ve tried the faster-moving ones. My greatest “conquests” so far have been the Carnotaurus on Dinosaur at Animal Kingdom, and the Lava Monster on Journey to the Center of the Earth at Tokyo DisneySea.
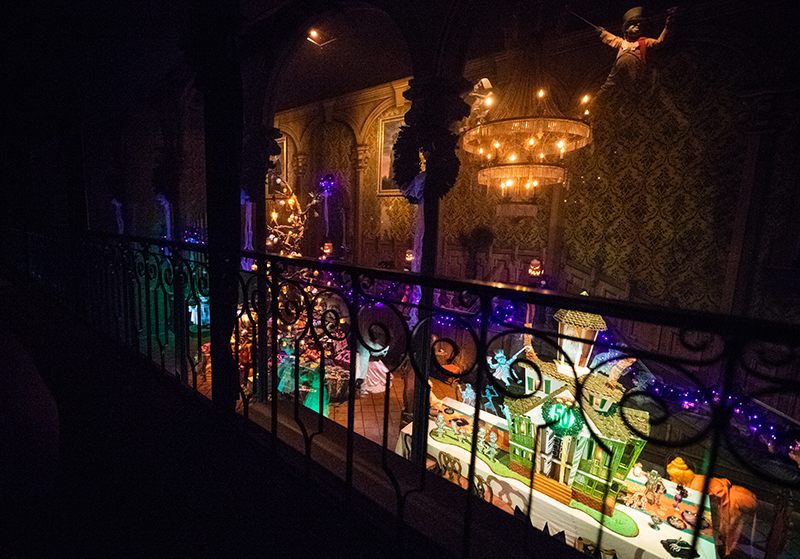
While this article focuses on dark rides, most of the general advice here can also be applied to stage shows like Country Bear Jamboree and Carousel of Progress. Just be careful not to get yelled at on the latter, as Cast Members constantly change the photography ‘rules’ there!
If you’re ready to learn how to take better photos on Disney attractions and rides, let’s get started!
Actually…before we get started, I’ll put my most important piece of advice right at the beginning. TURN OFF YOUR FLASH ON DARK RIDES. It doesn’t matter whether Cast Members inform you it’s the rule or not. Turn it off. Not only is it rude to other guests because your flash destroys the illusion that the Imagineers created with carefully considered show lighting, but it makes your photos look like garbage for the exact same reason.
Why would you want to replace this brilliant and moody show lighting with the washed out look created by an on-camera flash?! Inability to take good photos on a dark ride without the flash is no excuse for using it and ruining others’ experience. If taking good photos without the flash is problematic, there’s this magical place called the internet, where thousands of other people have uploaded photos with Creative Commons licenses!
Your family isn’t going to be in these photos anyway, so it doesn’t matter if you use someone else’s photos! Same applies with night parades. If you wonder why this is such a big deal, check out the two-photo comparison above. My photo on the left captured someone else’s flash, my photo on the right was .25 seconds later, without any flashes captured. Quite the difference, eh?
Sorry (not sorry) for the tone of that last paragraph. The good news is that you have no reason to be offended if you don’t blatantly disregard ride rules and etiquette! If you didn’t know any better, consider it a learning opportunity–many of us have made the same mistake so there’s no reason to feel bad. If you did know better and just don’t care about others, I don’t really care if I offended you.
With these pleasantries out of the way, let’s turn our attention to how to better photograph Disney dark rides with point & shoot cameras and DSLRs!
Point & Shoot
The unfortunate news if you have a point & shoot is that many rides are going to be flat out impossible for you to photograph. The really dark attractions like Haunted Mansion and Peter Pan’s Flight probably are out of the question. You can try them, but unless you have a camera like the Sony RX-100, or another fancy point & shoot, chances are you’re wasting your time…or at the very least will end up with a lot of blurry and a lot of noisy photos, and maybe one or two lucky shots that look good.
The good news is that not every ride is this dark. Rides like ‘it’s a small world’ and Spaceship Earth have some brightly lit scenes, as do several other dark rides. If you’re a non-photographer, you may not think about lighting a ton, but if you pay closer attention, you should notice some brighter scenes–and those are where your best opportunities lie.
If you are a point and shoot photographer who is comfortable with semi-manual settings like(and you have a camera capable of them), skip down to the DSLR section. The tips there will generally apply to you, just keep in mind the equipment limitation of using a point & shoot.

If you’re not comfortable with semi-manual settings, but are willing to learn a little, I’d recommend putting your camera into aperture priority mode (“Av” or “A” on most cameras, if they have it), changing your aperture “f/number” to as low of a number as you can, and adjusting your ISO to the highest or second highest number possible. Test this now by starting with the highest number and taking a photo in a dimly lit room. If the photo looks acceptable to you in terms of noise, use that ISO. If it’s too noisy, go with the next lowest ISO number.
If you’re not comfortable even with the above (that’s your best option, so I highly recommend learning how to do that–it might sound complicated at first, but it’s fairly easy), then I recommend putting your camera into sports mode or kids and pets mode, or some other auto mode that has a name that involves things that move. You will most likely end up with a lot of grainy, dark, and out of focus photos on the dark rides that are especially poorly lit, but you might end up with some good shots, too.
In general, try to avoid zooming when photographing scenes in dark rides, as that decreases your likelihood of capturing good photos. Also, when possible, photograph subjects as you approach them straight-on (a front row seat in boat rides is your best option) rather than as they move past the side of your ride vehicle.
Your best option for photos will be when something bright is in the center of your LCD screen, at which time you should halfway-depress the shutter button to focus, and then fully depress once the camera has focused. As mentioned above, make sure you turn off your flash, but also make sure you turn off “auto-focus assist” or any other external lighting that helps your camera grab focus.
DSLR
Before we dig into this section, it’s important to know that we’re in intermediate territory here, so it’s important that you have a good grasp on the three elements of exposure, and how to manually adjust settings on your camera. If you don’t have basic technical understanding of the elements of exposure (shutter speed, aperture, and ISO), read Understanding Exposure by Bryan Peterson before reading any further.
If you lack an understanding of how to manually adjust settings on your camera, read its manual (or better yet, one of the intuitively-written Magic Lantern Guides).
DSLR Equipment
For most of these rides, there’s another thing you’re going to need beyond just knowledge, and that’s equipment. Few types of photography in the Disney theme parks are equipment-prohibitive, but dark ride photography is one such type. You will need a “fast” lens, and by that, I mean a lens with a minimum aperture of f/1.4 or f/1.8. If you have an f/2.8 lens, that will work, too, but you’re starting to push it (and chances are, if you have an f/2.8 zoom, you have a less-expensive f/1.8 lens).
The most common lens I see people recommend for dark rides is the 50mm f/1.8. Canon has one of these, as does Nikon, and the other manufacturers do, too. This lens gets recommended a lot because it’s only around $100. I do not recommend it for dark rides (unless you’re shooting full frame). The reason I don’t recommend this lens is that for most show scenes, it’s going to be too tight. In most situations, you want a lens that provides pretty much the same field of view as your eyes.
The 50mm f/1.8 lenses are designed to provide this field of view, but they are designed to provide it on a full frame camera. With a crop sensor camera, they provide what I feel is an awkward, no man’s land, field of view. You can work with this limitation and use them to great success when you’re able to “zoom with your feet,” but you can’t zoom with your feet in dark rides…unless you plan on getting out of your vehicle. (Sadly, Disney no longer is cool with folks like the Mesa Verde Times.)
Instead, if you’re shooting with a crop sensor DSLR, I recommend something in the 28mm to 35mm range. My top pick here is the Sigma 30mm f/1.4, which was my go-to dark ride lens before I moved to full frame. Check out my review of the Sigma 30mm f/1.4 here. I know Nikon has a budget 35mm f/1.8 lens that might tempt many of you, but I highly recommend spending a little more for the Sigma. It’s a better lens overall, and is much better for dark rides. For full frame shooters, I think those 50mm f/1.8 lenses are great options.
DSLR Settings
As for settings, you want to shoot in raw and use auto white balance. Several years ago, raw v. JPEG (note: raw is not a format or an acronym, so it’s “raw,” not “RAW”) was a big debate on the internet. This debate is so pointless that it’s not even worth addressing. If you are a dinosaur who still believes JPEG is somehow superior (thanks for reading, Mr. Rockwell), have at it.
Use auto white balance because you can set it in post processing, and it’s too difficult to change on the fly as most dark rides have dynamic lighting. As for metering, put your camera in spot metering (Nikon) or partial metering (Canon). This is the metering mode that takes the very center of the frame, rather the whole scene or the center-average.
Since you’re photographing scenes that will have heavy lighting on specific focal points but dim lighting on the rest of the scene, you want to meter off of those bright spots (which will be your subjects, too), and not average that metering with the dark areas behind them. If you stay in the default metering mode, the portions of your shots that matter the most will be overexposed messes.
In addition to this, on most dark rides, I adjust my exposure compensation into the negative–from -.7 all the way to -1.7. This serves two purposes: it keeps my ISO lower and/or my shutter speed faster, and it’s easier to brighten shadows in post processing than it is to recover blown highlights.
You’ll also want to adjust your focusing mode to servo (Canon) or AF-C (Nikon), which will ensure that you’re continuously focusing. Your ride vehicle is moving, as are the Audio-Animatronics, so you want to be tracking focus on those movements.
Another option, and this is seriously advanced territory, is using manual focus. I do this from time to time, and it’s difficult. It’s nearly impossible to actually nail manual focus on a moving ride in the dark, but switching into manual focus is a good makeshift solution if you find that your lens hunts and hunts for focus, but rarely achieves focus.
In many dark rides, each scene is about the same distance from your vehicle. Once you’ve successfully nailed the focus for one scene, you might be able to leave the focus alone for subsequent scenes.
The problem with this is that not all scenes are the same distance, so you will most certainly end up with out of focus photos for entire scenes if you do this. My preferred method when using manual focus is to hold my shutter button down while going through a scene, as I slowly turn the focus ring back and forth in the general range of where it should be.
I only do this if the scene is really important, and I might end up with 40-50 shots from one scene, at least 75% of which are pretty much guaranteed to be out of focus, but even then I still have a few shots that are in focus. That’s a few shots more than you have if your lens keeps hunting and you aren’t able to take any photos!
As for exposure settings, I like to go with aperture priority with a wide open aperture (f/1.4 or f/1.8 depending upon the lens), with auto ISO enabled. I then set a base and a minimum shutter speed. Some people recommend shutter priority mode or manual mode instead. If you have a Canon DSLR, you may not have the option of auto ISO with a minimum shutter speed.
Instead, shutter priority or manual mode may be your only option. If you do use shutter priority or manual mode, I recommend a shutter speed of between 1/30th and 1/50th of a second. You’ll end up with some blurry photos using these shutter speeds since they’re a little on the slow side, but they will help keep your ISO down.
Likewise, for the minimum shutter speed if you’re using auto ISO, I recommend 1/30th to 1/50th. Same reasoning and results apply. As you get more comfortable shooting and more knowledgeable, you can get outside of this zone depending upon the ride you’re photographing. For example, I typically use 1/15th of a second during some scenes of Haunted Mansion, but bump it up to 1/80th of a second during some parts of Peter Pan’s Flight.
For minimum and maximum ISOs, go with the minimums and maximums your camera allows. This will probably be ISO 100 or 200 on the minimum end, and ISO 3200 or 6400 on the maximum side. Dark ride photos will have varying degrees of noise no matter how nice your gear. That’s just a fact of life.
If you take 100 shots on a ride-through with the settings I have suggested here, expect at least 50 to be garbage for various reasons. If you used more conservative settings, you might end up with only 25 that are garbage. However, with my suggestions, the ones that are good will have less noise and more detail than the ones captured using more conservative settings. Personally, I’d rather have 5 very good photos than 50 okay ones, but that’s just me. Your approach when shooting dark rides should be all about quantity and percentages–the more photos you take, the greater the likelihood that you’ll end up with some great ones. In any case, you are only going to end up with a handful of good to very good photos on each ride-through, with the vast majority being trash. This is normal, so don’t be discouraged by it!
Post Processing
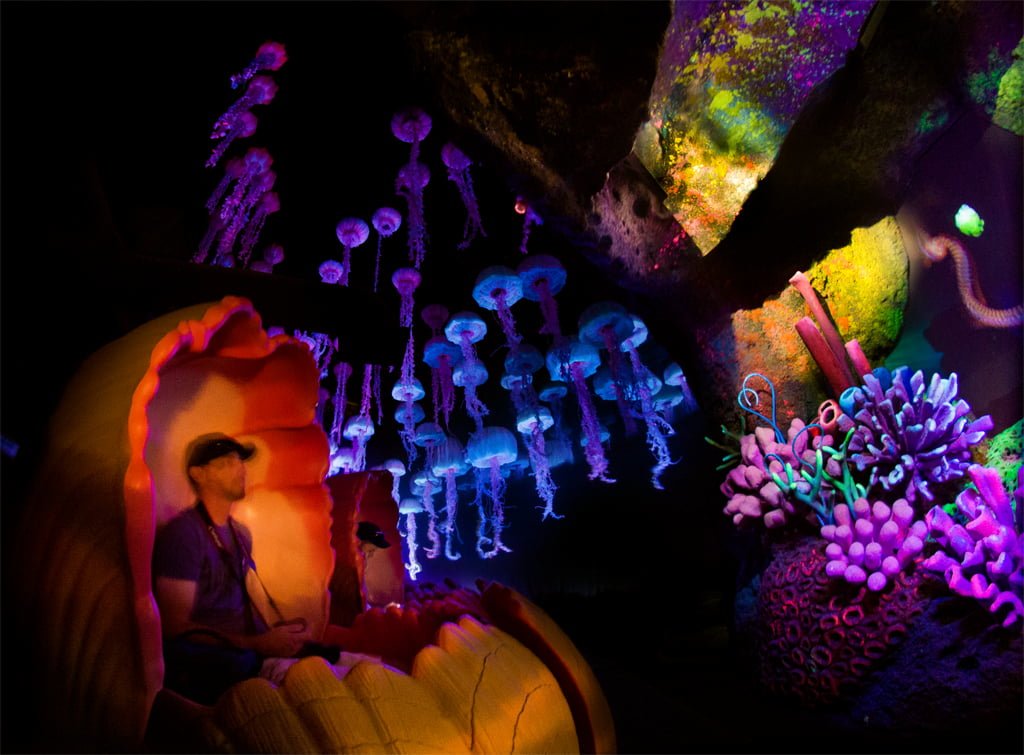
![]()
Your post processing on most dark ride photos will be fairly minimal. The big things here are noise reduction and getting the colors right. You can add your own post-processing wrinkles, like contrast and black level adjustments. You’ll probably want to increase the brightness or exposure if your shot is underexposed, and you’ll also probably want to adjust the recovery, which tames highlights that will likely still be a bit too bright.
This is one instance where I don’t mind a vignette (the Sigma 35mm f/1.4 I use has a great natural vignette wide open, but you can also add one in post processing), because it’s usually not noticeable since the edges are usually dark, and it can conceal noise. Be aware that any “over the top” post processing is going to really draw out the noise in the photos, so don’t bust out Photomatix or any other tone-mapping programs, unless you have a specific, artistic goal in mind.
For noise reduction, I don’t have any special tricks here. I just use Adobe Camera Raw’s built-in noise reduction sliders. Adobe Camera Raw uses the same processing engine as Lightroom, so if you have that, use its built-in noise reduction. Adobe has made serious strides in noise reduction in recent releases. A lot of people used to use separate plug-ins for noise reduction, but now I’d say Adobe is the best in the game.

As for adjusting the color…good luck! The first step will be adjusting white balance and tint. This will be done to taste, and with Disney dark rides, usually means going with a cooler white balance. One thing to consider here is whether you want your photos to appear true-to-color or true-to-lighting.
Many of these attractions have very deep lighting that masks the actual colors of the Audio-Animatronics and environments, and you can choose to either show how the Audio-Animatronics and scenes would look in the absence of such lighting, or you can embrace the lighting and leave a bit of color-cast on your photos. I tend to go somewhere in the middle, as I think true-to-lighting makes the photos look overly flat, and true-to-color doesn’t accurately represent what you’d see while riding an attraction, since you do see its lighting.
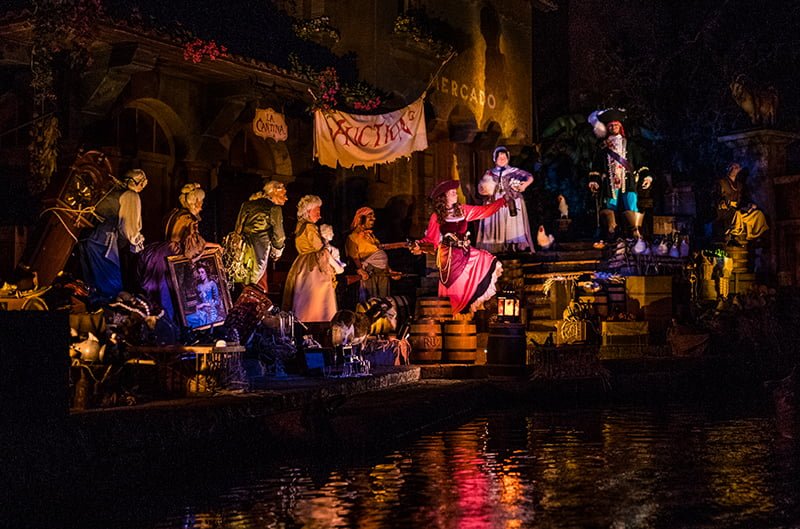
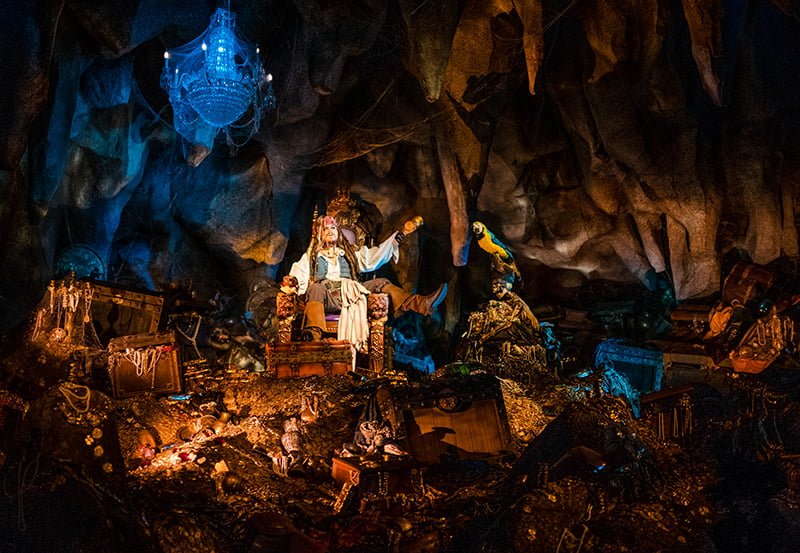
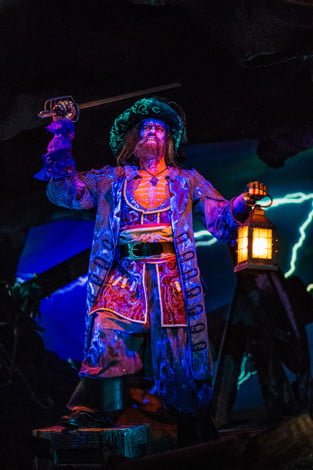
Beyond adjusting white balance and tint, you might find yourself adjusting the saturation and intensity of individual color channels. The prime example of this is on Pirates of the Caribbean. Pirates has moody orange lighting in most of its scenes, and this lighting wreaks havoc on DSLR sensors.
Your raw files will be much more orange and red than the eye would see, and the best way to address this–even better than adjusting white balance–is to de-saturate the orange and red channels of the photo. Not completely, but to the point where you don’t have an orange mess. You might also consider adjusting the balance of various colors (I sometimes do this), but this is another “salt to taste” type thing, so there’s no since in me offering specific advice. Just tinker with the sliders until you have something you like. Over time, you’ll learn what works and doesn’t work for each dark ride.
Getting Creative
While I love the challenge of photographing dark rides, one of my biggest “beefs” with them has always been that it’s much more difficult to get creative when photographing dark rides, and I think photography is all about creatively. (I view regular dark ride photography as more of a sport than an art.)
Creative dark ride photography is one of the most challenging types of photo you can take in the parks, since it combines the inherent challenges of photographing dark rides mentioned throughout this article, and also throws “being creative” into the mix, which has its own set of challenges.
There are a number of ways to get creative with dark ride photography, but I think the best are using atpyical lenses, trying longer exposures, going abstract, or trying to incorporate people in the photos. I’ve found that this is easier accomplished with shows than it is dark rides, but it can be done on both. This is still very much a work in progress for me, but I love the results I’ve had thus far.
Overall, dark ride photography is something that challenges a lot of people not because they don’t have the knowledge for it, but because they don’t have the equipment for it. If you want good dark ride photos, the unfortunate reality is that you most likely will have to have the equipment for it. Equipment, alone, is never enough when it comes to photography, and hopefully the tips I’ve shared here will help you put your equipment to good use. Just remember that the majority of dark ride photos even the best photographers take go directly to the trash, and your chances of great photos increase with the more photos you take. Good technique is important, but so is luck!
If you’re interested in improving your Disney photography, check out a few of my top photography blog posts:
Photography Buying Guide: Everything from Underwater Cameras to Software
Best Books for Improving Your Photography
5 Indispensable Tips for Better Vacation Photos
Choosing the Best Travel Tripod
Choosing the Best Camera Bag for Travel
For trip planning tips and comprehensive advice, make sure to read our Walt Disney World Trip Planning Guide and Disneyland Trip Planning Guide. For updates on Walt Disney World, the latest news, discount information, and tips, sign up for our free monthly newsletter!
Your Thoughts
Have you tried photographing dark rides at Walt Disney World or Disneyland? Which rides are your favorite to photograph? Which ride is your “white whale”? Any other tips you can offer? Hearing from you is half the fun of these articles, so share your thoughts and any other tips you might have in the comments!
Wow I have some cotrol like this in my Vicdeoe 4k camera with a 1″ sesor. I’m goig to apply some of these techics ad see what yie;ds the best results o a Cao Vixia GX10.
Wow, really impressive. You shared really great sources of Disney Dark Ride Photography Tips.
Thanks for the consice and formative article Tom.
I reread this before our Disney trips each year. One technique I would add is to turn off the LCD if you have a viewfinder, or at least turn its brightness as low as possible. This will be less distracting to other riders and better preserve your night vision during the ride.
Any recommendations on a video camera for recording while at Disneyland or Disney World? Historically, on all our trips to Disneyland, I have just used my camera on my phone, but I wanted to try to take some better photos this year (for a first trip to Disney World) so was looking at getting one of the Sony RX100s, but I wasn’t sure if that would be capable enough to take some limited video or if I needed to find something else that would be better. Any suggestions?
Thanks for this. It was extremely helpful during my trip to WDW last month. I’m reviewing my shots and found a few dark ride shots I really like. I wasn’t able to take a picture of the Wilderness Lodge lobby that I liked, though. I always seemed to be there when the light wasn’t great for photography, and the construction walls were not helpful either. Any thoughts on a good time to try to capture that space? I am usually touring with an impatient cast of thousands, so staking out the lobby for a great length of time to capture a moment is difficult to impossible.
I’m looking at buying a new full frame DSLR camera for the first time and am debating between a Nikon D610 and D750 and note the natural ISO for the D610 goes up to 6400 while the D750 goes up to 12,800.
Once you’ve got a good lens that opens up to a f1.4 of f1.8, how important to you is the difference between those two ISO settings?
And for your dark ride photos, what is the ISO setting you find you’re using most of the time?
Tim, I have both the D600 and the D750. You will want the D750 for sure. It can pick up focus points on the dark rides when you can’t even see what it’s focusing on. When using a higher ISO, I use Lightrooms “Luminance” slider under the “Detail” section. Check out some of my photos on Instagram (GSOJIM) and also look at some of George’s photos (Disney_cobbpr) as he also uses the D750 and does a great job with the dark rides.
While I’ll never consider myself a pro when it comes to taking pictures. I have to say I did pretty good during our first trip. This article would of been a great refresher and probably would of improved my pictures and been a big help for my wife. Oh well there’s always next time now that the family is hooked at want to go back.
I do have one question though and would love your input on a few rides since you went to Disney World recently. On Pirates of the Carribean is it meant to be so dark during the scene where the ships are firing their cannons at the forts after the drop? I swear when I was younger it was more lit. It seems like they had lights that were burned out or not working. Same with haunted mansion. The scene with the cemetery guy and his scared dog seemed very dark to me and it was had to see them. Even when riding both those rides at night where your eyes were more adjusted for dark rides. Again great article and I’ll be bookmarking it for refreshers on future trips to Disney World.
I am looking to upgrade my gear and would like some advice.
Canon 6D or Canon 70D??
Which lenses would you recommend?
Looking for a fast lens for shooting sports, but also a good lens for shooting dark rides. The 70D is great for sports but not so great for low light. The 6D is the exact opposite so I am torn trying to make a decision. Is there any lens out there that will help me meet somewhere in the middle? A fast lens for shooting dark rides for the 70D perhaps? Or a good lens for taking pictures of my kids soccer games with the 6D?
Help 🙂
Great article. Love the K.Rockwell dig….
Tom, Let me 1st say that I’m just a hobby photographer. I am heading to Disneyland tomorrow and want to get some good shots of my 3 year old on some of the darker rides (Pirates, Peter Pan, Monsters etc) I am shooting with a Canon 70D, 2 lenses I am bringing are Canon 24mm f/1.4L II and 24-70mm f/2.8L II. I have never attempted, well successfully that is, to specifically shoot these rides. My main objective is to get my sons facial expressions on the rides, 2nd I will want to get some scene shots.
Can I follow you suggestions above with the same results ie. spot mode, exposure & shutter settings. Would you recommend Auto or go to Ap or Shutter Priority? Any advice would be GREATLY appreciated.
Thanks Randy
Hi Tom, we are heading to WDW next week, big 16 birthday for my daughter. Curious how often you use a tripod. I have a really nice one, but it is heavy. So if I want to take one I will have to act fast to purchase a lightweight one.
Hi Tom- I recently purchased a Sony RX-100 and am just starting to play around with its different features. What setting did you use for your Phantom Manor photo? Thank you, as always, your tips are appreciated!
Tom, I’m a huge fan of yours, and you’ve inspired me to try different things with my Disney photography. My most recent trip was in March, and I tried infrared, using filters. I’m having a lot of fun altering them now. Getting back to this topic, I purchased an Olympus SH-60, which has a mode called Handheld Starlight. It’s a really good low light mode, and I was able to grab some nice interior Spaceship Earth and POTC shots. Got one decent HM shot. I was really pleased with my Illuminations shots, best I’ve ever gotten. I would have been just as pleased with my Wishes shots, if I’d been in a better place. Standing behind someone who’s over 6 feet when you’re 5 feet tall is challenging for getting a good shot! But the camera performed well for the price (under $300), and had a nice zoom of 24x. My best shot was of the monorail over by Seas using the dynamic filter, which is pretty much an artsy HDR filter. Anyway, thanks for all the great tips and ideas. You’ve influenced me a lot!
Great info! I’m looking forward to trying some new things on my upcoming trip. I have a Canon 50mm that I’m going to try out. Would rather have the Sigma you recommended, but can’t afford that AND a WD trip.
Quick question – what’s the highest ISO you’d go with on dark rides? I’m shooting with a Canon EOS Rebel t5i, and for dark rides will probably be using a Canon 50 mm f/1.8. I also have a Tamron 28-75mm f/2.8 that I’m taking along. I’m practicing before I go, but didn’t know how much noise was generally too much. With it set to Auto ISO, I can set a max. Should I do that, and if so at what? (Options are up to 6400.) Should I max out at 3200 or will there be too much noise? 1600?
Highest ISO totally depends upon camera and your personal noise tolerance. If you have to, I’d max out at 6400, but would try not to go above 3200.
One thing that I’ve learned to do… even if you have a point and shoot or are using your cell phone (works just as well)… on a dark ride, the shutter will need to stay open longer to take in that light. Normally with the movement of the ride, that longer opening will blurr the photo… Unless… and here’s the trick. You make the camera “Think” that it’s stationary. This is done by holding the camera (or phone) where the Camera (or phone) would be if it were stationary. So hold it infront of you about the length of your arms… and as the ride moves… pull the camera toward you (or the direction) that would allow the camera to stay stationary. If you’re on a turn, you just adjust for the turn. This works GREAT on Pirates, etc. I tested it first on “It’s a Small World” and perfected it on Pirates. Give it a shot… 🙂
Will this work for dark rides: sony 35mm F1.8 OSS E-mount Prime Lens. or can you recommand one for Sony a6000?
Hi Tom! Just found your post and have a question for you. I’m planning a trip to Disney next month and am in need of a ‘simple’ camera that can still take great shots on the dark rides like Splash Mountain as well as ‘normal’ shots like Cinderella’s castle. Night shots of the fireworks and shows would be awesome too. I’m looking for something around the <$150 range as I'm not into photography, but still want good quality pictures. Would prefer something that I can just pop in new batteries when I run out of juice as well. Is there anything you can recommend? Many thanks for your time!
Unfortunately, what you want for the price you want to pay does not exist. The closest thing would be a used Sony RX100.
Just found your website from Pinterest and am loving it. I love to take photos and decided its time to step up my camera game. Any cameras you could recommend that are around the $500 range?
I have just recently taken up photography as a hobby and am really loving it thus far. I picked up a Nikon D3200 as it seemed like the best option for a beginner. I also picked up Bryan Peterson’s book based on your recommendation and it has helped greatly.
My upcoming Disney trip will be my first with my new hobby and I am beyond excited to give your tips a try. I really appreciate all of the advice in here. Unfortunately before reading this post, I already purchased the bargain (around $200) Nikon f1.8 35mm lens rather than the sigma you suggested. Do you think I will still be able to get some decent dark ride pics with this?
I have gotten to the skill level where I can follow all of the rest of your advice easily enough as far as it goes with things like exposure settings, exposure compensation, and the auto iso w/ max and min shutter settings. Hopefully my cheaping out a bit on the f1.8 lens doesn’t hurt me too much. Photography is definitely an expensive hobby, especially at the beginning!
Anyway, I would love to get your thoughts on it. Thanks
BTW, I love your “angry tone” paragraph about the flash. That stuff drove me crazy even before I started getting into photography!
Michael,
Any updates how did that lens work. I have the same setup. Going in september.
Wow! This is a LOT of wonderful information! I’m not the photographer in the family other than with a point and shoot, but I know my readers will love this information. Family vacation photos are worth their weight in gold and people want to know how to get the best ones possible!
Thanks for this wonderful article.
Natalie, The Educational Tourist