Neutral Density Filter Reviews & Buying Guide
Note: this article was originally published in September 2011 and was most recently revised in September 2013 after purchase and use of additional neutral density filters.
A few years ago, I bought my first neutral density filter. Before making the purchase, I did an inordinate amount of research (as I do with everything in my Photography Buying Guide), spending countless hours trying to determine how to get the best bang for my buck on a neutral density filter (or ND filter). I probably researched ND filters more than I researched my first camera! Since I had never before purchased such an expensive photo accessory that would get so little use, I wanted to make sure I got it right the first time. Lucky for me, the ND filter quickly paid for itself, as one of the first photos I took with the ND filter won me an Apple iPad in my university’s photo contest!
Before we get ahead of ourselves, it might be appropriate for me to explain what neutral density filters are, and why it’s an absolute necessity to have one in your camera bag. ND filters reduce the intensity of light reaching the lens, to allow longer shutter speeds or larger apertures. Unlike a polarizing filter that changes color rendition while allowing less light to reach the lens, a good ND filter gives no change in color rendition. Succinctly put, think of a neutral density filter as sunglasses for your camera lens.
As with sunglasses, different filters block different amounts of light. Neutral density filters have long been used by landscape photographers to achieve longer exposures during daytime hours to blur moving water or clouds and to blur other moving subjects. For fireworks, the most commonly used ND filter is the ND 0.9, or 3 stop filter. All ND filters follow this naming pattern; meaning a 0.6 filter blocks 2 stops of light and a 1.8 filter blocks 6 stops of light.
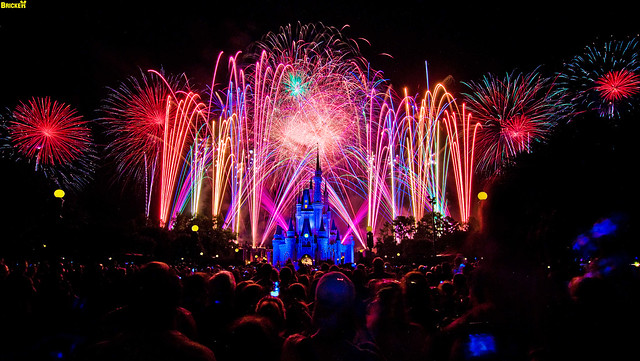
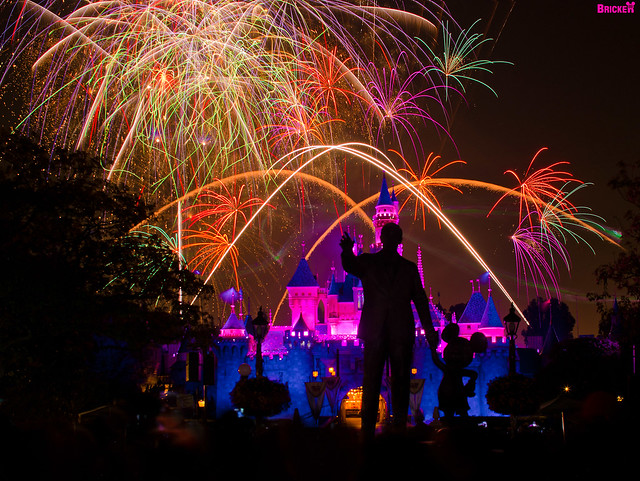
For the same reason they are popular among landscape photographers, ND filters are becoming popular among fireworks photographers: they allow longer shutter speeds, assuming the same aperture and ISO level. For example, if you were photographing the Wishes! fireworks show at the Magic Kingdom, and you found that a shutter speed of 10 seconds at f/16 and ISO 200 achieved a proper exposure, a shutter speed of 80 seconds at f/16 and ISO 200 would be the proper exposure with a ND 0.9 filter.
The big problems I found, when I first started researching ND filters, were: 1) different intensities of ND filters are ideal for fireworks as compared to landscapes, 2) ND filters can be expensive. Given these two things, I wanted to make sure I purchased the right one for my purposes!
First, I knew I would want to purchase a 77mm ND filter. This is because, although slightly more expensive than a smaller size, a 77mm filter would fit larger lenses, and I could purchase cheap Step-Up Rings to make that one filter fit all of my lenses. For this reason, I’d highly recommend looking only at 77mm ND filters, even if you don’t yet own a 77mm lens.
That said, here are the filters I considered and heavily researched:
Recommendations:
CHEAP-O® 77mm ND Fader Neutral Density Adjustable Variable Filter (ND2 to ND400) – The brand name on this isn’t actually “Cheap-O,” but it might as well be, since it’s actually a no-name filter and different sellers call it by different names. The huge benefit of this filter is that you can control its intensity, so for darker scenes, you can dial back the ND effect (thus the “variable” name). This variable neutral density filter (or Vari-ND Filter) fluctuates in price, but is generally around $15-17 shipped. To put that into perspective, the popular Singh-Ray Vari-ND Filter costs $400. In other words, you’re paying 4% of the price of the Singh-Ray filter of the same type. For only 4% of the price, you’re going to make a lot of compromises. Know that when you purchase this filter. I had long been intrigued by Vari-ND Filters, but the cost of the Singh-Ray was too much, and higher quality filters (like the Lightcraft Workshop one below) were still too much of a gamble. But for $16? Sure, why not. I could always throw it away if it stunk.
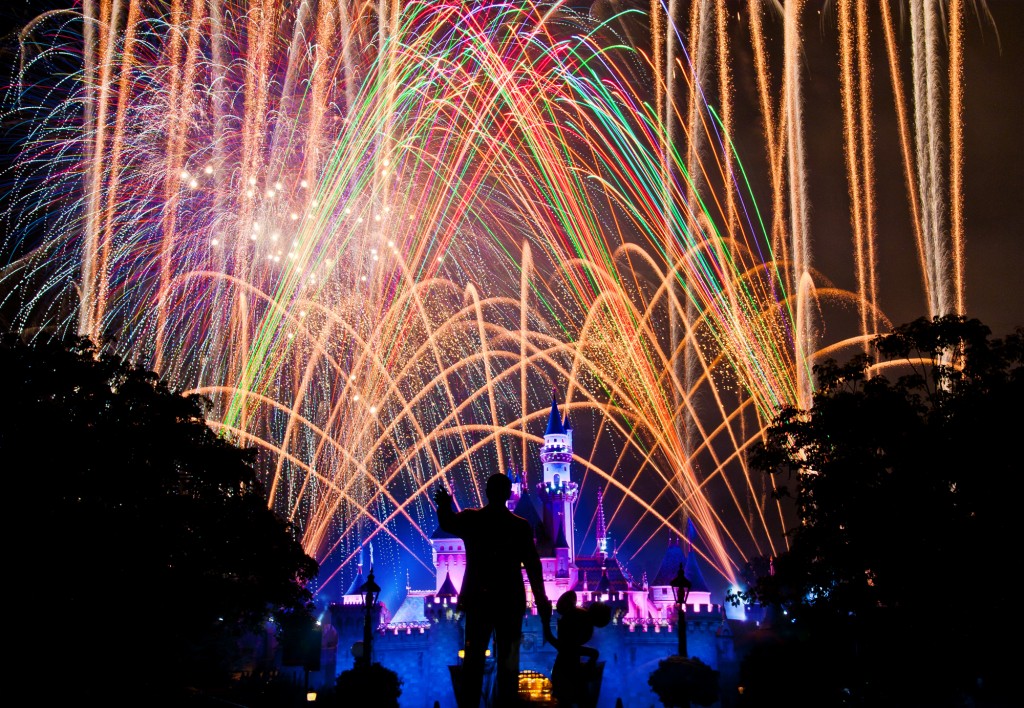
I was initially skeptical about using it during the Disneyland Magical! fireworks, as my initial tests at home demonstrated color cast and unevenness when taking photos in broad daylight. Surprisingly, loss in image quality was negligible during these tests. However, I used it for the fireworks anyway, at about 6-stop intensity. I was blown away by the results. No unevenness for fireworks and no color cast at this intensity, and a pretty sharp image overall. Not as sharp as my previous B+W filter or my current Hoya filter, but not bad…and you get what you pay for. I would not recommend this filter for daytime use, but for the price, it makes a great option for fireworks, and even allows you to try different intensities during the same show. What’s not to love about that?! Going forward, this will be my go-to filter for fireworks photography. I am really, really impressed with its performance. Oh, and did I mention the $16 price?!
If you do buy this filter–and you should–I’d highly recommend buying it from this seller on Amazon. Amazon fulfills the orders, meaning that you don’t want 4 weeks for it to show up from Hong Kong like you would if you purchased on eBay or from other Amazon sellers (it also means Prime customers get it in two days!).
12/28/2012 UPDATE: I recently used this filter to shoot fireworks with a Nikon 24-70mm f/2.8 and my Nikon D600 (my review), and still had great results. Point being: if there aren’t issues with the filter when tested against the resolving power of that camera and lens combination, it’s worth the purchase. I still don’t recommend it for daytime use unless used at low intensities.
B+W 65-066534 77mm Neutral Density 1.8-64x Filter #106 – This is the first filter I ended up purchasing–the one that I’ve used to take all of the photos on this page. Even though I paid over $100, I was so glad I got it. It’s a 6-stop filter, making it a little strong for fireworks photography, but given it’s strength, it enables fairly long daytime long exposure shots. Plus, as I discovered, with fireworks I could adjust my aperture to account for its high intensity. So in effect, my aperture became the “variable” part of the ND filter! This worked out wonderfully, as I could use apertures of around f/4-f/9 for 100 second plus fireworks photos! By contrast, before I had an ND filter, I was using apertures of around f/16-22 for much shorter exposures. These apertures made my shots soft and made the streaks of fireworks thin. This was all fixed once I got the B+W 1.8 ND filter.
Then, disaster hit. In May 2011, while unscrewing the filter after I photographed Disenyland’s “Remember… Dreams Come True” fireworks, someone bumped my arm, causing me to drop the filter. This led to more research, and caused me to purchase and go out even further on a limb and purchase a different filter…
B + W 77mm #110 3.0 (1000x) Neutral Density Filter – This is the filter I was initially going to purchase to replace the B+W 1.8, and it’s a great deal for the money (it was much more expensive in 2010, so I didn’t even consider it) now. My reason to want to purchase a more intense filter is because sometimes for daytime long exposures, I found with the B+W 1.8 that I had to stack my polarizing filter on top of the ND filter to achieve longer shutter speeds. This caused image degradation (the picture became soft) and vignetting in the corners. A 10 stop filter would allow me to take 30 second or longer shots during broad daylight! However, at 10 stops, I was concerned that the filter would block too much light for fireworks photos. So I decided to compromise…
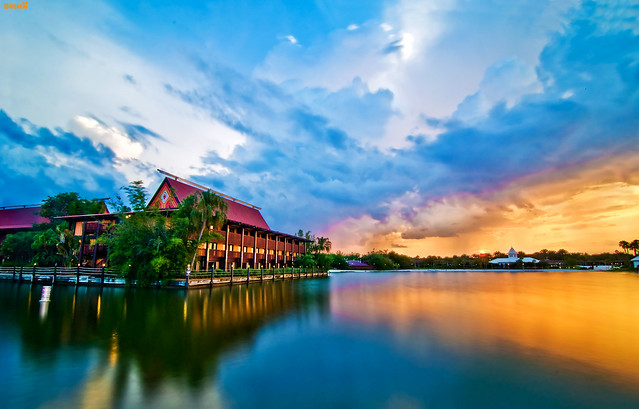
Hoya 77mm Neutral Density ND-400 X, 9 Stop Multi-Coated Filter – …and instead, I got the Hoya 9 stop ND filter. After I read a lot of reviews, I found that people were more consistently impressed with the Hoya than the B+W, which turned the photos more “warm” and is not multi-coated. Plus, it’s one stop less. I’ve had the filter for several trips to Walt Disney World and Disneyland now, and I’m absolutely loving it. I’ve found that this is the best neutral density filter for daytime landscapes, when I can hit 30 second properly-exposed photos at middle of the road apertures (f/11 to f/13). The filter produces dramatically streaked clouds, placid water, and blurred trees during the day making it a great option for creative daytime purposes. For fireworks, I’m not quite so high on it. The strength means that I often have to keep my aperture low (f/2.8 to f/4) and shutter speed high (usually at least 60 seconds, but that depends upon intensity of the fireworks bursts), which means very few photos per show and also makes for sometimes busy shots. It’s not a bad filter for fireworks by any means, and the apertures you have to use mean thick and pretty fireworks streaks, but I would prefer something a stop or two less. Overall, though, it’s probably the single best option if you only want to purchase one neutral density filter for daytime and fireworks photography. At “only” around $105 at Amazon now, this filter is an incredible deal–relative to other neutral density filters of similar quality and intensity.
Other Options:
Dolica CF-NDK77 77mm 0.3, 0.6, 0.9ND Neutral Density Filter Kit – This set of three ND filters is really popular among my friends who are photographers, and I can understand why: it’s less than half the price of any of the filters above, and for that price, you get THREE filters! By stacking these filters, you can achieve impressive long exposure shots. For me, the trade-off of soft shots and severe vignetting is not worth the savings, but if you’re on a budget, these could make a great choice!
Tiffen 77mm Neutral Density 0.9 Filter – I would definitely recommend the Dolica 3-pack over this Tiffen filter, but the quality will be a little better with the Tiffen, and you’ll save a little more money. However, if you’re looking to get into ND filters, it’s important to know that you get what you pay for.
77mm Lightcraft Workshop Fader ND Mark II – Since discovering the CHEAP-O Brand Vari-ND or Variable ND filter, I wouldn’t recommend purchasing this ND filter. At $125 it is cheap for a Vari-ND Filter, especially compared to the Singh-Ray, which runs $400, but it’s still expensive! From everything I read, the quality of the Lightcraft Workshop version is better than the CHEAP-O version, and nearly as good as the Singh-Ray version, but for a fraction of the price. I just can’t justify the increased price over the CHEAP-O.
I don’t know how, but I just boiled down days (literally) worth of research, spread across multiple years, into this article! I’ve left out a lot of details, as this is a topic I could go on and on about, but after using neutral density filters for a while, I think this is pretty solid advice, and I think my results with ND filters bear that out. So rather than getting fixated over all of the minutiae here, I’m going to stop here, keep it concise, and bank on you being able to make an informed decision with what I’ve presented. (I suppose it’s sort of a “trust me, I’ve been there” type article). If you’re purchasing a neutral density filter because you’re looking to take great fireworks photos, you might also want to check out my How To Photograph Fireworks eBook, which contains tons of beginner, intermediate, and advanced tips for DSLR and Point and Shoot camera users. It has more information than you’ll ever need to know about photographing fireworks!
If anything about this neutral density filter photography buying guide is unclear, please ask any questions you may have in the comments!
If you’re looking for other photography equipment recommendations or photography tips in general check out a few of my top photography blog posts:
Photography Buying Guide: Everything from Underwater Cameras to Software
Best Books for Improving Your Photography
5 Indispensable Tips for Better Vacation Photos
Infrared Photography Guide & Tips
Your Thoughts…
We hope this guide helps purchase the neutral density filter that’s right for you! If you have any questions, comments, or other suggestions, please share them in the comments!


I thought Disney did not allow tripods in their parks. I’m going there in July 2018, but had written off trying to pack my tripod.
Tripods that will fit in a standard backpack are allowed with no questions asked. I have a small Slik that is 27 in when completely open. No problem. Anything bigger than a selfie stick (definitely not allowed) will likely be rejected. The criterion, though is fit in a standard backpack when collapsed, so if you can find one that is 18″ in length but 6 ft when extended, it SHOULD be OK.
I always love reading your articles. Your website is one of the first we go to for Disney.
Looking to purchase my first ND filter. Narrowed down to 2: Marumi nd64 dhg mc (6 stops) and Kenko Zeta nd8 (0/9, 3 stops). Primarily for fireworks but will also look to take pictures of water.. Would you have any suggestions? Thank you in advance for any assistance.
Where was this article when I was researching before visiting Disney last year? This was exactly what I was looking for when I googled “How to take video of fireworks at night with DSLR”. I took all videos without filter and in Auto Mode, being a newbie.
Please let us know your opinion about Variable ND filter from Hoya and from B+W, as those are the ones I am researching on.
Thank you for sharing your research and experience!!
This is a great read! thanks for putting time into it.
A couple quick questions:
On those firework shots, with the long exposure, how do the people in those photos not look completely blurry?
Also, what is the main difference between a $40 filter and $400 filter?
I am thinking about getting started with this (never used one before), but the price is making we worry its to cheap?
http://www.bhphotovideo.com/c/product/1204097-REG/general_brand_gndnd6pk_84mm_solid_graduated.html
Thanks!
Its automatic markings and also stops make difficult jobs easier, as well as its up-front handles enable
for faster changes and also transformations, cutting
some time essential for many roles.
Hi Tom,
I have to tell you I really learn so much from all your posts! I am going to DW this Thanksgiving and want to take good firework pictures. I have a Nikon D3300 and I am only going to take my 18-55mm lens with me. What setting would you recommend for taking the parade and wishes fireworks at? And where would you recommend to go for the fireworks display? I have read so many places to sit and not sure what I should do? I have a tripod to use if I need it. I have never been able to get the fireworks with color. They always seem to be white! Any help you can give me would be so appreicated.
Thanks!