Mickey’s Boo-to-You Halloween Parade Tips & Photos
Mickey’s Boo-to-You Halloween Parade is held twice per night exclusively during Mickey’s Not So Scary Halloween Party at Walt Disney World. This post covers tips for the best places to view the parade, as well as taking photos. Along the way, I’ll also share some of the photos I captured during my 2016 viewings of the Boo to You Parade.
Please note that we already have a separate post consisting of Mickey’s Not So Scary Halloween Party Tips, so here we are only focusing on the Boo to You Parade. If you have other questions or want to know more about the rest of the Halloween Party, refer to that post.
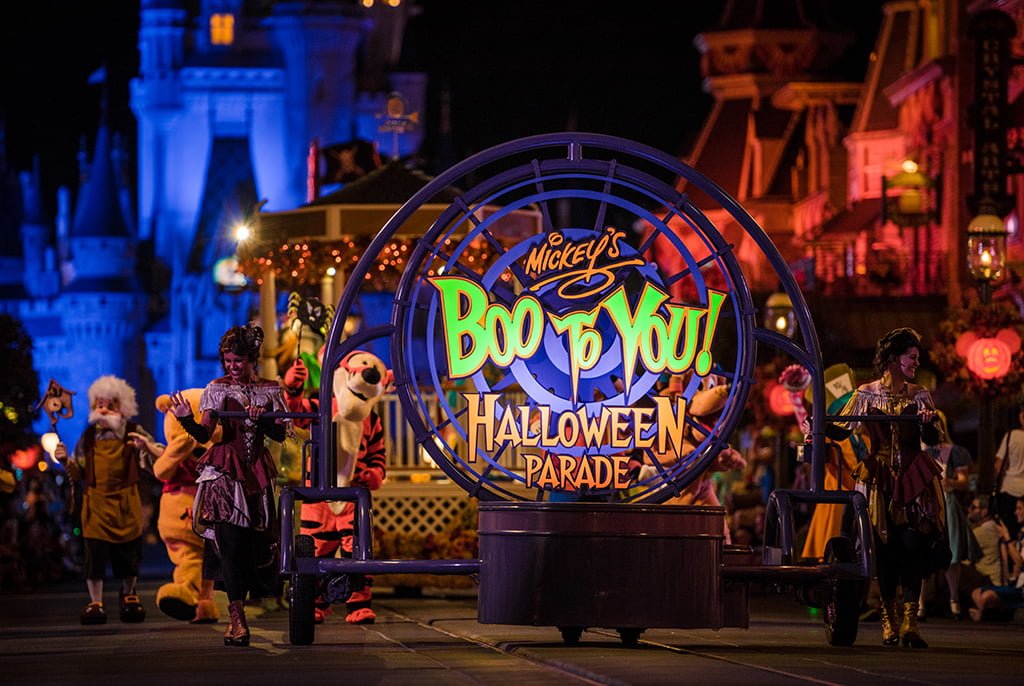
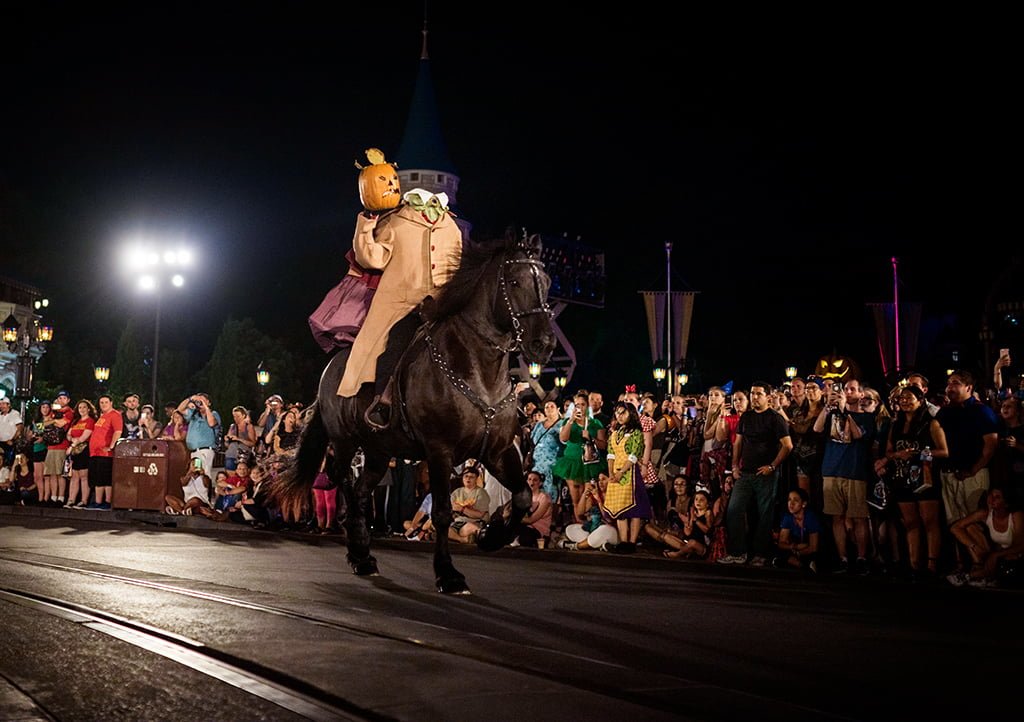
Before we get to the tips & tricks, let’s start with an overview of Mickey’s Boo-to-You Halloween Parade. There are several units in Boo to You, with the first being Mickey’s Trick-or-Treat Bash. This one has a lot of costumed characters, skewing towards those found in Fantasyland attractions and classic animated films (and, of course, Mickey and friends).
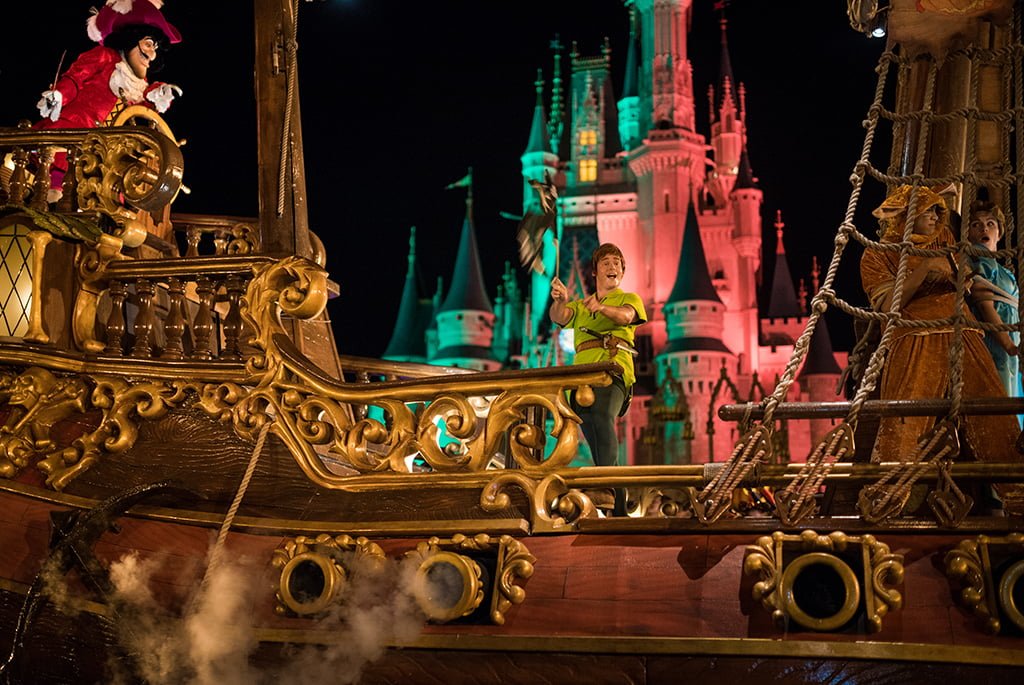
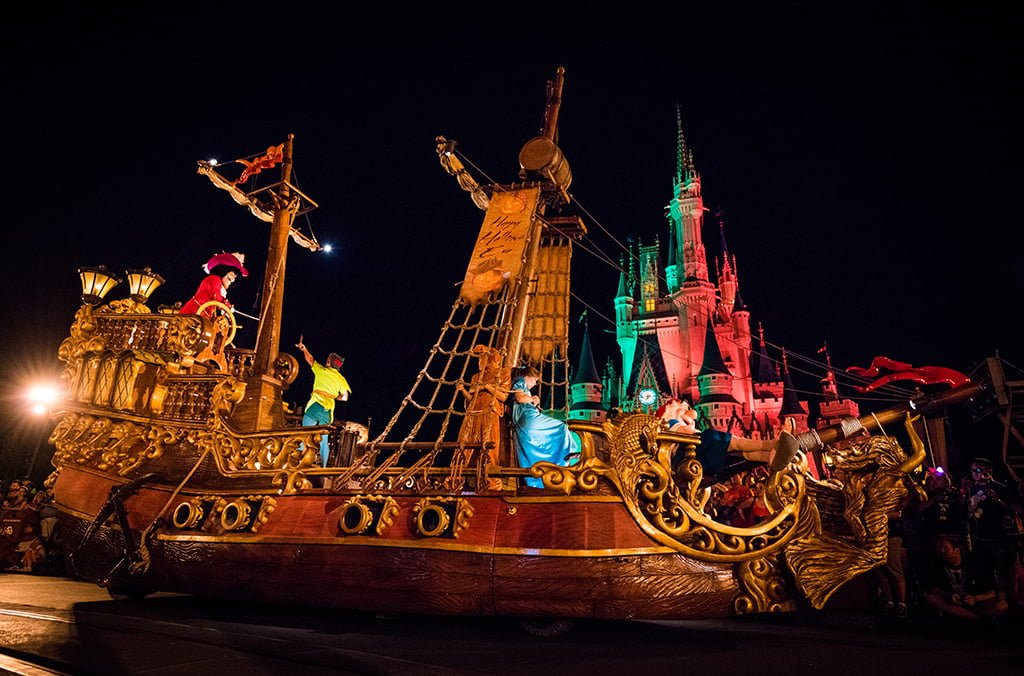
Next comes the Yo-Ho Pirate-Palooza. This unit of Boo to You contains the pirate floats, including those from Pirates of the Caribbean and Peter Pan. There are also flag-twirling pirate performers in this unit.
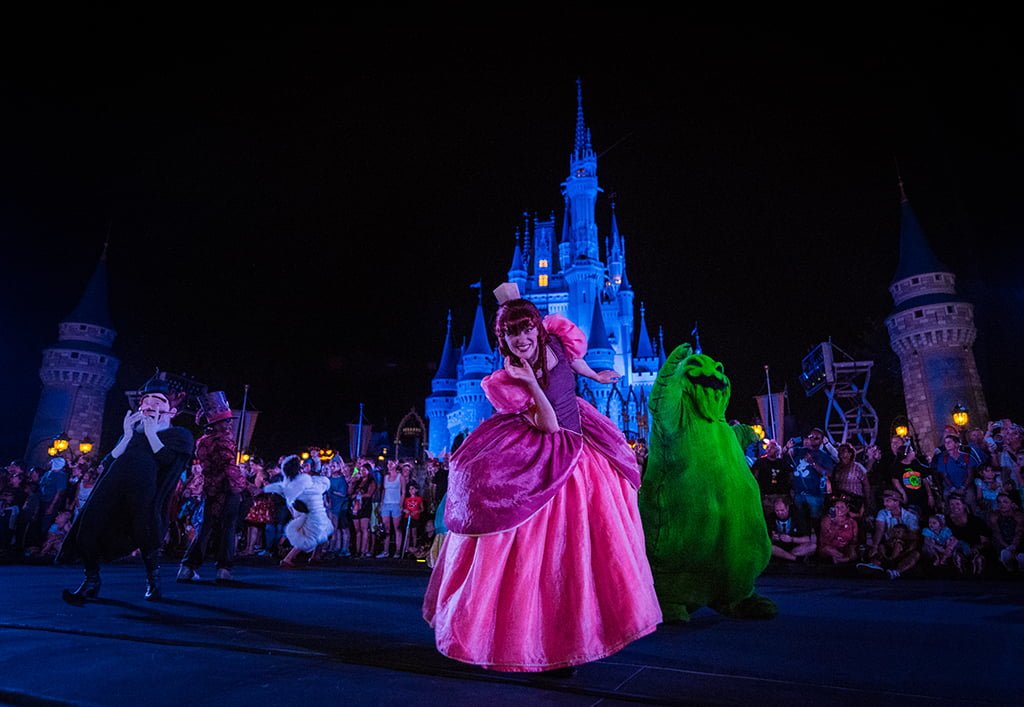
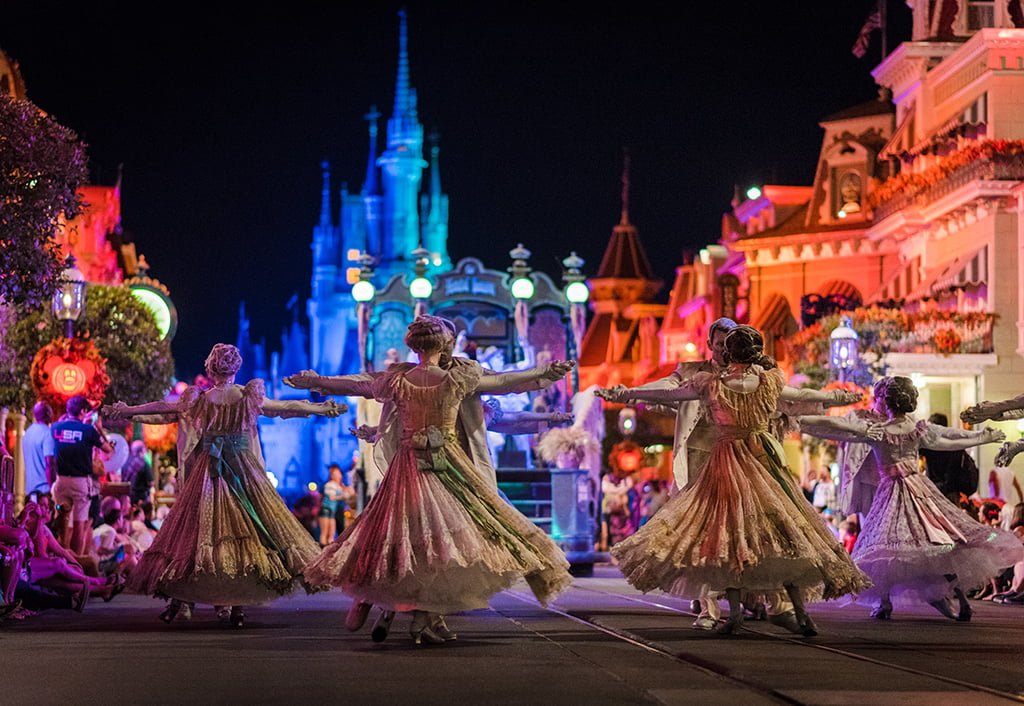
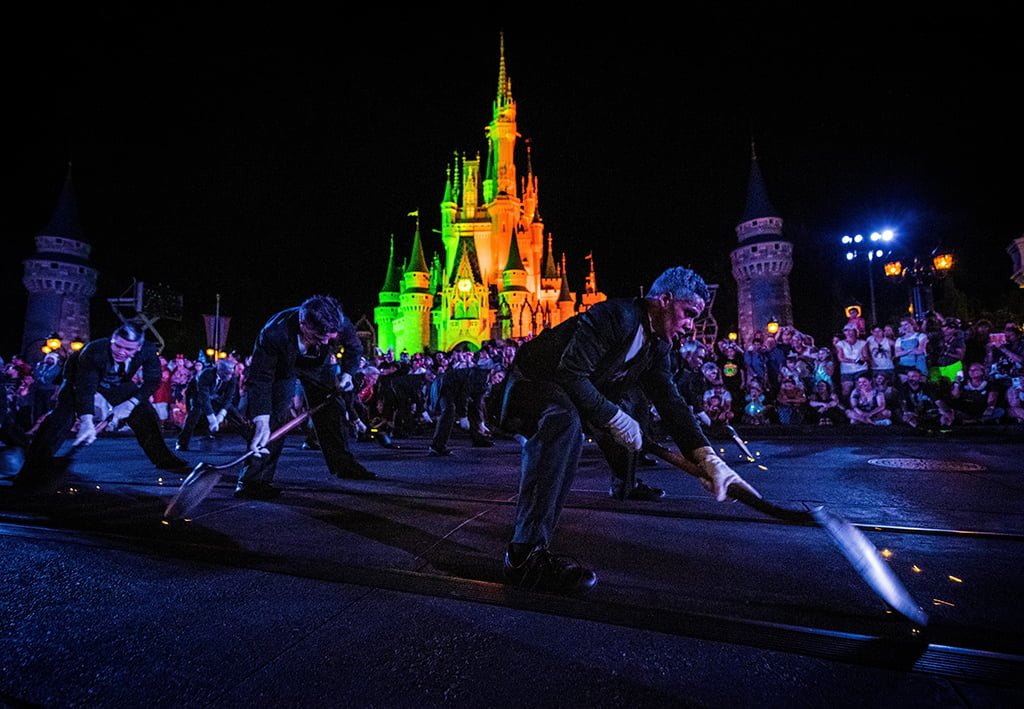
Following that is the Haunted Mansion Cemetery Soiree. Without question, this is our favorite unit in the parade, with its excellent ballroom dancer performers, hitchhiking ghosts, and gravediggers.
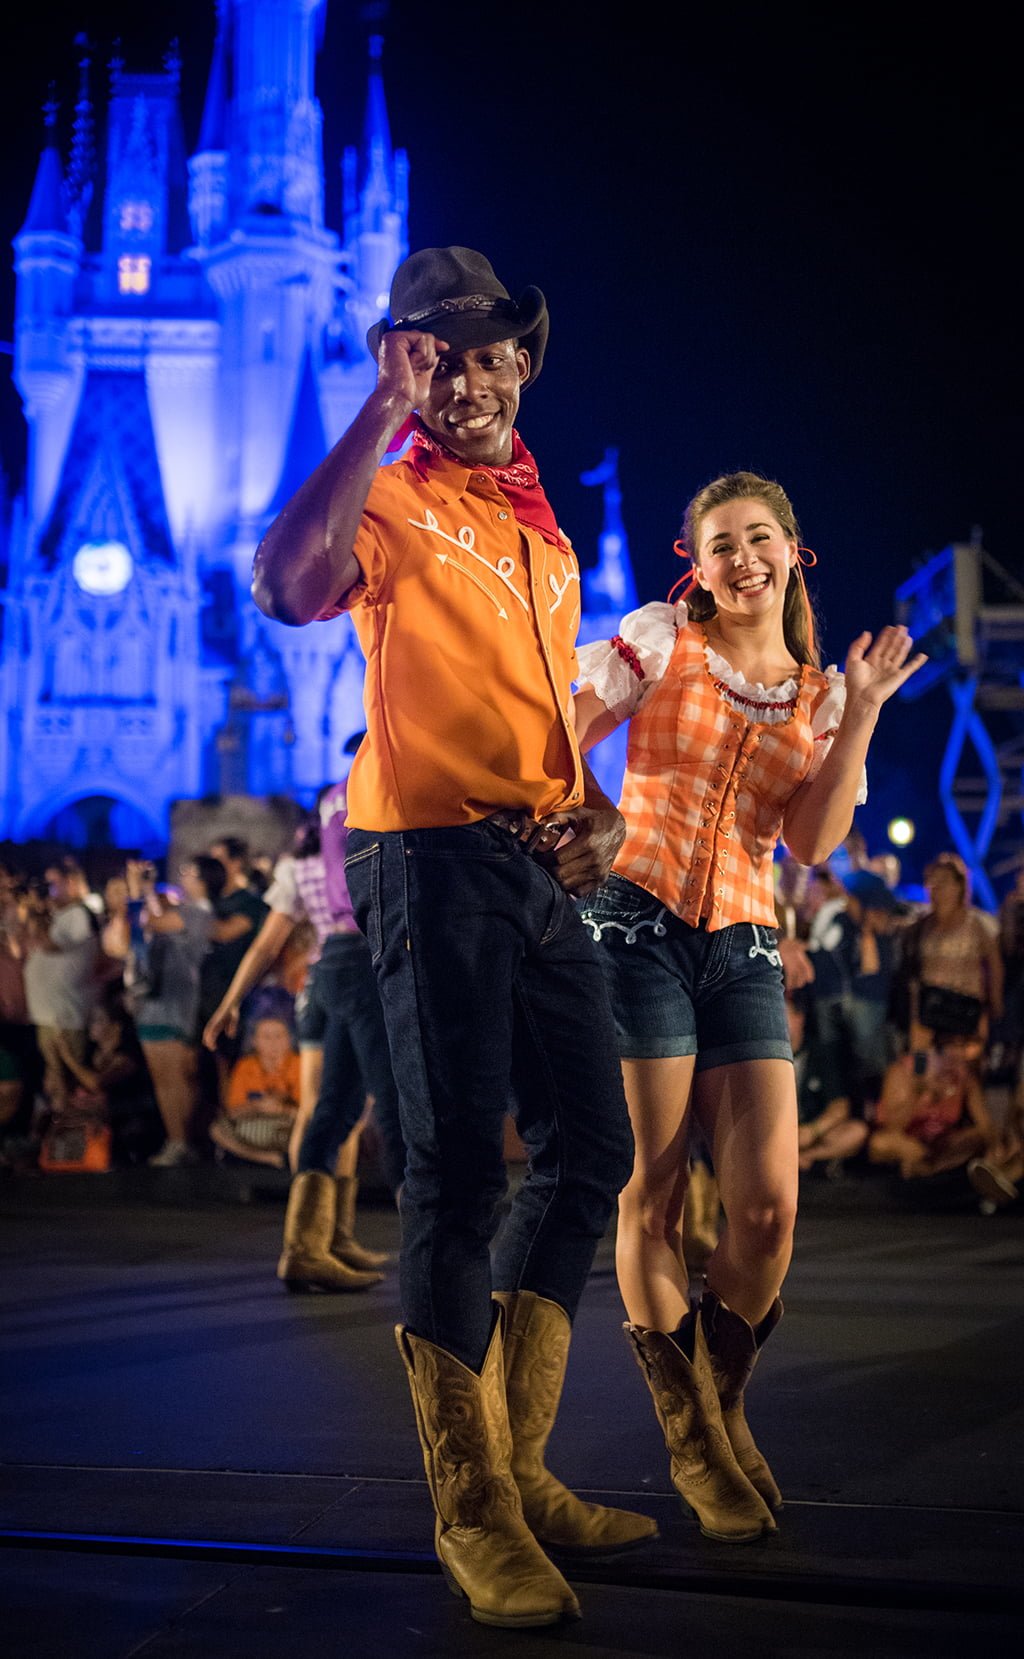
Next is the Halloween Hooten-Nanny Hoedown, which is the Frontierland section of the parade. If it weren’t for the Country Bears saving the day, this might be considered one of the Boo to You Parade’s weaker units.
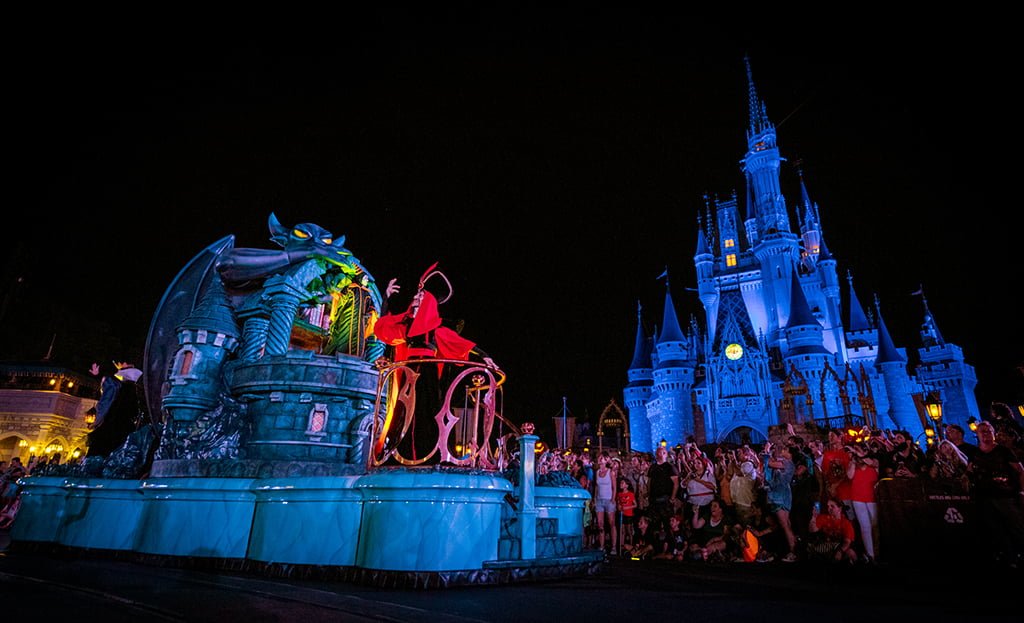
The villains come next, in the Villains Groove-A-Go-Go. The Trick-or-Treat Candy Hop (now featuring Wreck-It Ralph characters instead of Goofy) concludes the parade with another lighter unit focused on candy.
These units are all great, and the music soundtrack for the Boo To You Parade is VERY catchy. It’s available on the Disney Magic Kingdom Event Party Music CD. We play ours almost daily during the Halloween season!
Alright, now for some tips in terms of the best places for watching the Boo to You Parade…
Mickey’s Boo-to-You Halloween Parade Viewing Tips

Running twice nightly during Mickey’s Not So Scary Halloween Party, the Boo to You Parade always steps off in Frontierland and heads through Liberty Square, then down Main Street. (The route does not run in reverse for the second parade–same direction both times.)
You’ll find a lot of advice online that recommends grabbing a spot in Frontierland as a way to avoid the crowds of Main Street. Unless you attending on a really crowded evening AND don’t care much about the Boo to You Parade AND don’t care at all about taking photos of the parade, we do not recommend following this advice.
For starters, on most nights the difference between crowds in Frontierland for the parade and in less-crowded spots on Main Street are negligible. On busier nights, there is a bit of a difference, and you might be able to arrive to your spot 15 minutes later.
If you’re really concerned about crowds for the Boo to You Parade, you’re going to save a lot more time by just focusing on the second parade, which is always less crowded (although we highly recommend watching both runnings of the parade–it’s that good).
When it comes to photography, most of Frontierland and Liberty Square pose challenges because they are typically darker than Main Street. The one exception to this is if you position yourself behind a floodlight (in other words, the light is pointed at the parade route).
For this reason, we always recommend somewhere on Main Street for viewing the Boo to You Parade. The end of Main Street is my favorite location, but really, any location–again, particularly those with floodlights at your back–is going to be good. In my opinion, these are also much better for photos.
Another spot that is strategically savvy is in the Central Plaza (Hub) on the curb facing Cinderella Castle. This spot tends to fill up the earliest of any, and although I don’t think it’s the best spot for photos or view (the lighting here is incredibly harsh and contrasting), the big upside is that you can watch Hocus Pocus Villain Spelltacular before and/or after the parade from your parade spot. However, you do not want to stay in this spot for the fireworks–you’ll be too close to Cinderella Castle.
Photography Tips
Boo to You Parade is the single most frustrating “thing” to photograph at Walt Disney World. It makes Peter Pan’s Flight seem like a walk in the park, and Mickey’s Once Upon a Christmastime Parade like a real gift to photographers. Suffice to say, it really is so scary. (Note: this section is for the photo-geeks out there…if you think ISO means ‘International Organization for Standardization’ this section might not be for you. Don’t say I didn’t warn you…)
If you’ve had trouble taking photos during Mickey’s Boo-to-You Halloween Parade, you are not alone. Moreover, it’s not your fault. This is one situation where gear really does matter, and unless you have a Sony RX100, you’re probably out of luck if taking photos with your phone or point & shoot camera.
If you don’t have a DSLR, it’s probably best to either go for video or just set your camera down and enjoy the parade.
Due to the low lighting and speed with which the performers move, you need to use a wide open aperture, fast shutter speed, and sky high ISO. This is just to get the settings right on paper.
In practice, the challenge is compounded by the difficulty of your camera nailing focus on the actual subject, instead of on something off in the distance, or not at all. Oh, and don’t worry, because even if the stars align and you achieve success in all of the above regards, there’s always the chance that harsh lighting will render a photo unusable.
On an average night, my keeper rate from the Boo to You Parade is maybe around 10%, and the threshold for a “keeper” of this parade is pretty low.
I’m not even expecting all of the performers to be facing the camera, with perfect expressions and the floats looking their best. I’m just hoping something is in focus and more or less looks okay.

The first thing to keep in mind when photographing the Boo to You Parade is positioning. My list of best places for watching the parade above was written with photography in mind, but there are a few other things to keep in mind. First, when evaluating a seat before you choose it, compose a photo from the approximate area, and see whether there’s a spotlight in your frame.
If so, this will be a challenge for both metering and focus. It’s not necessarily a deal-breaker, but if you’re a novice, it can aggravate already challenging circumstances. (It’s much better to have the spotlight behind you, illuminating the performers and floats.)

Second, find a spot where the floats are moving straight towards you rather than crossing in front of you. The idea here is that things moving towards you change position slower than those crossing directly in front of you. Same idea as looking out the front wind-shield versus the side windows while driving. There’s probably some science behind this, but I don’t even begin to understand it.
In terms of general settings, I follow the exact same protocol for Boo to You as I do a difficult Disney dark ride. You can read about my settings in more depth in our Disney Dark Ride Photography Tips post.
Basically, I’m using Aperture Priority with auto ISO, a wide open aperture, (f/1.4, f/1.8, or f/2.8 depending upon the lens), my shutter speed floor set to around 1/100th to 1/200th of a second, and my ISO ceiling set as high as it’ll go. Additionally, I’ll set exposure comp to around -1, with center-weighted metering.
(Good news–even if you aren’t attending Mickey’s Not So Scary Halloween Party, or already attended this year, these tips also apply to Mickey’s Once Upon a Christmastime Parade.)
I’ve come to really appreciate prime lenses for the Boo to You Parade, with my Sigma 35mm f/1.4 and Nikon 85mm f/1.8 lenses being go-to options. If you’re planning on photographing any Disney night parades, these are great lenses to own.
I also really like using my Nikon 70-200mm f/2.8 VR, but its aperture is a problem, often leading me to slow down the shutter speed a bit and hope for the best. Quite often, that means being a little more accepting of some motion blur, but until Nikon releases a 180mm f/1.4 VR lens for under $1,000 (not holding my breath on that one), I’m sort of stuck.
The biggest “secret” I can offer when it comes to the Boo to You Parade is persistence. Every time I attend Mickey’s Not So Scary Halloween Party, I photograph the parade twice, and use two cameras each time (using my Doc Holliday “One For Each of Ya” Camera Strapâ„¢). For me, it comes down to playing the odds.
This is one scenario where the superior autofocus capabilities of my Nikon D750 are really evident (I’ve said before that the Nikon D750 is the best all-around camera for Disney photography, and I still believe that), as it is far more effective at nailing focus than my Nikon D810. While I love the D810, it’s a fairly lousy camera for the Boo to You Parade.
Well, it was until this year, when I decided to make it easier on the camera by shooting the parade with my Nikon 14-24mm f/2.8 lens. My thought process here was that even if the camera missed focus slightly, with such a wide angle lens, you wouldn’t be able to tell.
This proved correct, and several of the photos here shot with the Nikon D810 and Nikon 14-24mm f/2.8 are…let’s just say “technically imperfect.”
Between using the 14-24mm and “fudging it” a bit and using the Nikon 85mm f/1.8 for the first time, this year was actually my most fruitful ever for the Boo to You Parade. It could be one of those “even a blind squirrel finds a nut every once in a while” kind of things.
Or, it could be that I’ve finally honed my approach and am using the right equipment. The photos in this post were all photographed during the two Boo to You Parades I watched this year. In a normal year, this would be about the extent of my keepers, but this time I probably have another 40 decent-ish photos from the parade.
Either way, I still had more than 500 garbage shots, so it’s not exactly like I’m exacting boasting about my l33t skillz in mastering Boo to You Parade photography…
In the end, Mickey’s Boo-to-You Halloween Parade is incredibly frustrating to photograph. From totally missing focus when a performer hams it up for you to having a random person along the parade route enter your frame right when the gravediggers start sparking the pavement, there is always something to make you face-palm. It’s fighting through the perpetual failures and finally nailing a shot here or there that makes the whole process rewarding and fun. (I guess…maybe if you’re glutton for punishment or enjoy frustration?)
For comprehensive advice, the best place to start is our Walt Disney World Trip Planning Guide for everything you need to know!
For Walt Disney World news, tips, discount info, and free eBook downloads sign up for our free monthly newsletter.
Your Thoughts
Do you agree or disagree with our Boo to You Parade Tips? Have any suggestions for Boo to You photography? Viewing locations you like? Any other opinions on the parade? Share any questions, tips, or additional thoughts you have in the comments!
The float design is a toy box , featuring Cora’s special learning day study tour
Buzz Lightyear ride on the float and the side view are the explorers
Expect the, explorers, other toy include Rex, Slinky Dog , Mr.Potato Head, etc will also appear in this float
Tomorrowland’s “Core is cute” is developing, a new toy story float will replace the Buzz Lightyear’s planetary playset float
Where do you recommend for watching the parade for the best experience and no plans to photograph the parade. There are so many professional pictures of the parade that I just want to watch and enjoy the parade with the best spooky viewing spot. What do you think?
I’m hoping to attend a party this year (it’s been years since last visit!) I want to give my GH5 a whirl in 6k mode. ☺ï¸
After I read this post the first time, I got up the courage to look at my photos from our September eleventh and October fourth parties. Most were taken with my old Nikon D80 using the 18mm to 140mm walk around lens. I thought I was going to have great success shooting the parades shooting at ISO 3200. Because I am always afraid of missing a quick shot or getting a blurred one, I constantly use shutter speed priority. You were so right! I had my “what was I thinking moment,” as soon as I realized that the majority of the images were taken at a 5.0 aperture instead of the lens’ possible 3.5 opening. My shutter speed was much too low at 1/60th. Just as an aside, using this same set up and an increase at some parts to a shutter speed of 1/80th worked quite well for the Hocus Pocus. stage Show. I am now determined to use my Sigma 30mm F 1.4 for the Christmas parade. But I have seen the light and would like to know if you (as a full frame guy) have any recommendations for a new crop sensor camera for Disney photography. Deciding between a Nikon D7200 or a Nikon D500. Could go the cheaper way with a Nikon D3300 and buy lots of Sigma etc. lenses. Any thoughts?
If action photography is of particular interest to you, I think the D7200 (series) or D500 are definitely the better options. However, I’d also recommend getting another lens. The Sigma 30mm f/1.4 is excellent for the parades; for the Christmas parade, having something longer (perhaps an 85mm f/1.8 or 70-200mm f/2.8) also works really well–the snow turns to bokeh. What I’m saying is don’t blow your entire budget on the camera!
Thank you. Great advice. I was leaning towards the Nikon D7200 anyway. Your post may have also enlightened me about my prior film photography at WDW. I never understood why my MSEP slide photos always appeared to be so superior to anything I have done so far with a digital camera. Those slides were taken with an older Nikon film camera with Kodak Ektachrome ASA 400 slide film and processed by the old Kodak company via a mailer. I now realize that I was able to sit on the curb of the castle hub dead center while facing the train station. The parade came directly down main street facing me and my camera. Back then, I waited patiently until there was enough light to gently squeeze off a hand held shot at 1/30th of a second. Your advice about photographing the parade straight on is “right on.” Also, Frontierland is a terrible place to shoot the parade. Especially from the water side. Your right again!
Slightly picky, but your float orders are off. The parade ends with Villains, the Wreck-it-Ralph candy dancers are before Villains. it goes Opening Unit – Pirates – Haunted Mansion – Frontierland – Candy – Villains.
Great tips! I shot in similar spots, I watched 3 out of the 4 parades at the parties I was at, each in a different spot. I ended up liking Liberty Square bridge the best, even though working around the floodlight was a beast.
I like the fact that you keep talking about the number game. When it comes to these shots it really is a number game. use a large memory card and be ok with throwing away a lot of pictures at the end.
I know I posted things in the forum about shooting this parade. It is a challenge and really can be frustrating to shoot.
How high do you let your ISO go?
I’m actually not asking for the parade but I will be shooting a marching band again this spring. Disney is making noise about scheduling them at night again. Last time was a disaster. I got literally 4 not-so-decent shots. This overall post was helpful. I don’t often have to push my ISO (d750 too) over 3200 when I shoot them at football games so I haven’t really explored the capabilities much past that.
Last year I used my Canon 85mm/1.8 with my 70D for the MVMCP parade and was very happy. We will be back next month and I was considering renting the sigma 18-35/1.8. Any thoughts on which would be the better option? Also, where is your favorite spot for shooting the Christmas party parade? Thanks for the article!
Thanks for the great tips! I went this year and had a hard time with my a6000. I got a few shots I was happy with but I really wanted to get some good shots of the ballroom dancers and wasn’t real happy with any of my results. We had a change of plans and were rushed so we ended up in frontier land so that was one issue. Also the only lens I had to work with that shoots well in low light was my 50 1.8 so I was pretty limited with a such a tight focal length on the crop sensor (75mm). But I learned a lot from my experiences and your tips help, now to convince the wife we need to go back for another trip to try again!
If you can find a good spot on Main Street, the parade will be coming towards you, and the 50mm f/1.8 will be a great option. I love my 85mm f/1.8 from this location.
Thanks! I am a pretty new photographer so my struggles had a lot to do with my inexperience with night photography and getting proper focus but sure was a fun experience!
Good to hear I’m not the only one that struggles photographing this parade. This was the first year I seriously tried shooting the parade and it proved more difficult than I thought. I used a Sony a6300 and the 27-70 f/2.8 GM which focused great, but I ended up with some motion blur and pictures with a lot of noise. I definitely was “playing the odds” taking over 800 pictures of the parade. It also didn’t help that the woman next to me periscopeing the parade kept reaching her phone out in-front of my shots during the first parade.
I don’t understand the appeal of Periscope in situations like that. Why watch crappy cell phone footage of the parade when there are literally hundreds of HD/4K recordings of it on YouTube.
Instead of Aperture priority, have you ever just gone into Manual with both aperture and shutter speed set and let the ISO vary? I do this a lot for soccer photography because the fastest minimum shutter speed is 1/250 and that’s not enough. (I could just use Shutter Priority, but I like setting aperture.)
I was thinking the same thing as I do a great deal of low-light concert and gig photography. I find using full manual gets me a higher keeper rate and at least on my camera (a Fuji X-E1) I find the metering to be more accurate in full manual mode.
Yes, you absolutely could do that. I prefer Aperture Priority/Auto ISO because that allows me a bit more dynamic control. This way, when things get really dark, rather than just having an underexposed photo (at a speed that would otherwise max out your ISO), my camera responds by decreasing the shutter speed.
With the Boo to You Parade, I find that this happens quite a bit, and the results work sometimes. Granted, it would come back to bite you if if ended up dropping your shutter speed for 1/60th for the duration of the parade, but as long as you’re quick to adjust settings on the fly, it’s not a problem.
Totally one of those YMMV things, but I prefer it.
I absolutely see doing things that way. I had been looking for a way to deal with the variable stage lighting at larger concert venues. I could see it being a lot easier than changing settings on the fly constantly, even with the ease having the physical SS dial on my Fuji gives me.
When I saw the parade a few weeks ago my group sat in that spot right on the edge of the flat curb facing the castle, and while it was a good place to stick for the full complement of shows, I did experience what you’re talking about with the parade floats in particular. I was able to get pretty good shots of walking cast members in the parades such as the waltzing ghosts, but I found that stuff like the Leota tombstone was very difficult to get a good shot of.
I was happy with all my captures from my trip a few weeks ago except for Boo to You. I know where I messed up and attempted to fix it for the second parade but all my settings reset when I turned the camera off and I was back to shooting too slow. I got so caught up in the parade, I didn’t notice. I had a few keepers from when my SS was fast enough (I think 2 are in the photo of the day forum) but overall I was disappointed in the shots and mainly myself. Maybe next year.
Don’t feel bad. My first ~3 years of photographing Boo to You produced nothing but unacceptable results. Heck, I *still* look at some of my more recent Boo to You photos and wonder “what was I thinking?!” with settings.
Great tips Tom. I am off to the World this week and plan to try playing with iso-invariance while shooting the parade. The article here http://improvephotography.com/34818/iso-invariance/ has some good info. Having shot a little at home I think there is a lot of opportunity to play at the parks.
While there are a lot of situations where it can come in handy, I’d caution against relying too heavily on ISO invariance when it comes to shooting the parade. The big reason is because you will probably end up with adjusting shutter speeds to use the slowest one possible that still produces acceptable results, and it’s really difficult to tell when you’ve achieved that if you’re keeping the ISO deliberately low with the idea of adjusting in post (since your photos will be significantly darker than if you just changed ISO for the scene).