Neutral Density Filter Reviews & Buying Guide
Note: this article was originally published in September 2011 and was most recently revised in September 2013 after purchase and use of additional neutral density filters.
A few years ago, I bought my first neutral density filter. Before making the purchase, I did an inordinate amount of research (as I do with everything in my Photography Buying Guide), spending countless hours trying to determine how to get the best bang for my buck on a neutral density filter (or ND filter). I probably researched ND filters more than I researched my first camera! Since I had never before purchased such an expensive photo accessory that would get so little use, I wanted to make sure I got it right the first time. Lucky for me, the ND filter quickly paid for itself, as one of the first photos I took with the ND filter won me an Apple iPad in my university’s photo contest!
Before we get ahead of ourselves, it might be appropriate for me to explain what neutral density filters are, and why it’s an absolute necessity to have one in your camera bag. ND filters reduce the intensity of light reaching the lens, to allow longer shutter speeds or larger apertures. Unlike a polarizing filter that changes color rendition while allowing less light to reach the lens, a good ND filter gives no change in color rendition. Succinctly put, think of a neutral density filter as sunglasses for your camera lens.
As with sunglasses, different filters block different amounts of light. Neutral density filters have long been used by landscape photographers to achieve longer exposures during daytime hours to blur moving water or clouds and to blur other moving subjects. For fireworks, the most commonly used ND filter is the ND 0.9, or 3 stop filter. All ND filters follow this naming pattern; meaning a 0.6 filter blocks 2 stops of light and a 1.8 filter blocks 6 stops of light.
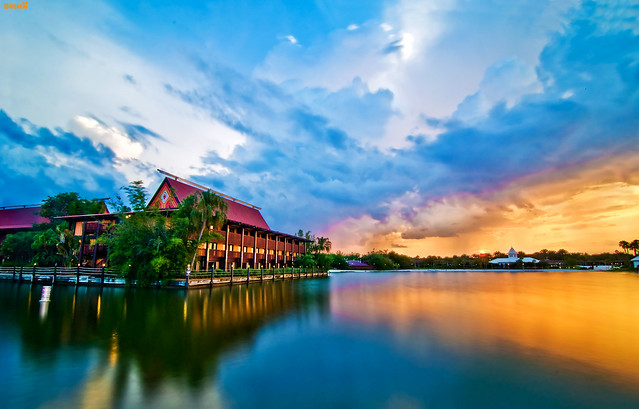
30 second sunset exposure–look at that smooth water!
For the same reason they are popular among landscape photographers, ND filters are becoming popular among fireworks photographers: they allow longer shutter speeds, assuming the same aperture and ISO level. For example, if you were photographing the Wishes! fireworks show at the Magic Kingdom, and you found that a shutter speed of 10 seconds at f/16 and ISO 200 achieved a proper exposure, a shutter speed of 80 seconds at f/16 and ISO 200 would be the proper exposure with a ND 0.9 filter.
The big problems I found, when I first started researching ND filters, were: 1) different intensities of ND filters are ideal for fireworks as compared to landscapes, 2) ND filters can be expensive. Given these two things, I wanted to make sure I purchased the right one for my purposes!
First, I knew I would want to purchase a 77mm ND filter. This is because, although slightly more expensive than a smaller size, a 77mm filter would fit larger lenses, and I could purchase cheap Step-Up Rings to make that one filter fit all of my lenses. For this reason, I’d highly recommend looking only at 77mm ND filters, even if you don’t yet own a 77mm lens.
That said, here are the filters I considered and heavily researched:
Recommendations:

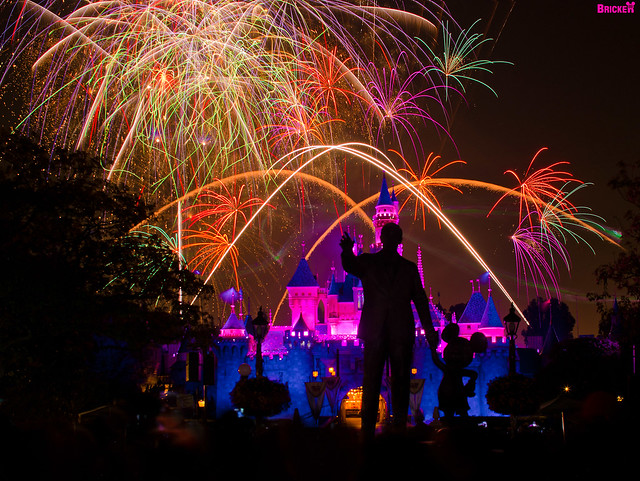
Disneyland Magical Fireworks (click to view large) – CHEAP-O® 77mm ND Filter
CHEAP-O® 77mm ND Fader Neutral Density Adjustable Variable Filter (ND2 to ND400) – The brand name on this isn’t actually “Cheap-O,” but it might as well be, since it’s actually a no-name filter and different sellers call it by different names. The huge benefit of this filter is that you can control its intensity, so for darker scenes, you can dial back the ND effect (thus the “variable” name). This variable neutral density filter (or Vari-ND Filter) fluctuates in price, but is generally around $15-17 shipped. To put that into perspective, the popular Singh-Ray Vari-ND Filter costs $400. In other words, you’re paying 4% of the price of the Singh-Ray filter of the same type. For only 4% of the price, you’re going to make a lot of compromises. Know that when you purchase this filter. I had long been intrigued by Vari-ND Filters, but the cost of the Singh-Ray was too much, and higher quality filters (like the Lightcraft Workshop one below) were still too much of a gamble. But for $16? Sure, why not. I could always throw it away if it stunk.
I was initially skeptical about using it during the Disneyland Magical! fireworks, as my initial tests at home demonstrated color cast and unevenness when taking photos in broad daylight. Surprisingly, loss in image quality was negligible during these tests. However, I used it for the fireworks anyway, at about 6-stop intensity. I was blown away by the results. No unevenness for fireworks and no color cast at this intensity, and a pretty sharp image overall. Not as sharp as my previous B+W filter or my current Hoya filter, but not bad…and you get what you pay for. I would not recommend this filter for daytime use, but for the price, it makes a great option for fireworks, and even allows you to try different intensities during the same show. What’s not to love about that?! Going forward, this will be my go-to filter for fireworks photography. I am really, really impressed with its performance. Oh, and did I mention the $16 price?!
If you do buy this filter–and you should–I’d highly recommend buying it from this seller on Amazon. Amazon fulfills the orders, meaning that you don’t want 4 weeks for it to show up from Hong Kong like you would if you purchased on eBay or from other Amazon sellers (it also means Prime customers get it in two days!).
12/28/2012 UPDATE: I recently used this filter to shoot fireworks with a Nikon 24-70mm f/2.8 and my Nikon D600 (my review), and still had great results. Point being: if there aren’t issues with the filter when tested against the resolving power of that camera and lens combination, it’s worth the purchase. I still don’t recommend it for daytime use unless used at low intensities.
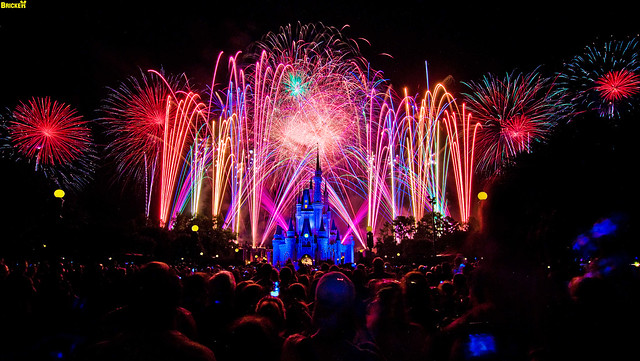
75 seconds of the Summer Nightastic fireworks at Walt Disney World. (B+W 106 filter)
B+W 65-066534 77mm Neutral Density 1.8-64x Filter #106 – This is the first filter I ended up purchasing–the one that I’ve used to take all of the photos on this page. Even though I paid over $100, I was so glad I got it. It’s a 6-stop filter, making it a little strong for fireworks photography, but given it’s strength, it enables fairly long daytime long exposure shots. Plus, as I discovered, with fireworks I could adjust my aperture to account for its high intensity. So in effect, my aperture became the “variable” part of the ND filter! This worked out wonderfully, as I could use apertures of around f/4-f/9 for 100 second plus fireworks photos! By contrast, before I had an ND filter, I was using apertures of around f/16-22 for much shorter exposures. These apertures made my shots soft and made the streaks of fireworks thin. This was all fixed once I got the B+W 1.8 ND filter.
The last good shot taken with my B+W 1.8 filter. 🙁
Then, disaster hit. In May 2011, while unscrewing the filter after I photographed Disenyland’s “Remember… Dreams Come True” fireworks, someone bumped my arm, causing me to drop the filter. This led to more research, and caused me to purchase and go out even further on a limb and purchase a different filter…
B + W 77mm #110 3.0 (1000x) Neutral Density Filter – This is the filter I was initially going to purchase to replace the B+W 1.8, and it’s a great deal for the money (it was much more expensive in 2010, so I didn’t even consider it) now. My reason to want to purchase a more intense filter is because sometimes for daytime long exposures, I found with the B+W 1.8 that I had to stack my polarizing filter on top of the ND filter to achieve longer shutter speeds. This caused image degradation (the picture became soft) and vignetting in the corners. A 10 stop filter would allow me to take 30 second or longer shots during broad daylight! However, at 10 stops, I was concerned that the filter would block too much light for fireworks photos. So I decided to compromise…

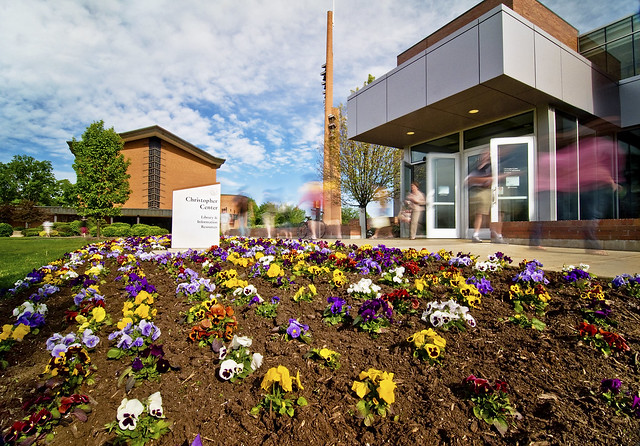
The Hoya ND400 excels during daytime long exposures!
Hoya 77mm Neutral Density ND-400 X, 9 Stop Multi-Coated Filter – …and instead, I got the Hoya 9 stop ND filter. After I read a lot of reviews, I found that people were more consistently impressed with the Hoya than the B+W, which turned the photos more “warm” and is not multi-coated. Plus, it’s one stop less. I’ve had the filter for several trips to Walt Disney World and Disneyland now, and I’m absolutely loving it. I’ve found that this is the best neutral density filter for daytime landscapes, when I can hit 30 second properly-exposed photos at middle of the road apertures (f/11 to f/13). The filter produces dramatically streaked clouds, placid water, and blurred trees during the day making it a great option for creative daytime purposes. For fireworks, I’m not quite so high on it. The strength means that I often have to keep my aperture low (f/2.8 to f/4) and shutter speed high (usually at least 60 seconds, but that depends upon intensity of the fireworks bursts), which means very few photos per show and also makes for sometimes busy shots. It’s not a bad filter for fireworks by any means, and the apertures you have to use mean thick and pretty fireworks streaks, but I would prefer something a stop or two less. Overall, though, it’s probably the single best option if you only want to purchase one neutral density filter for daytime and fireworks photography. At “only” around $105 at Amazon now, this filter is an incredible deal–relative to other neutral density filters of similar quality and intensity.
Long exposures like this during broad daylight were tough with the B+W 1.8.
Other Options:
Dolica CF-NDK77 77mm 0.3, 0.6, 0.9ND Neutral Density Filter Kit – This set of three ND filters is really popular among my friends who are photographers, and I can understand why: it’s less than half the price of any of the filters above, and for that price, you get THREE filters! By stacking these filters, you can achieve impressive long exposure shots. For me, the trade-off of soft shots and severe vignetting is not worth the savings, but if you’re on a budget, these could make a great choice!

78 Seconds worth of Disneyland fireworks–one of my favorite photos, ever.
Tiffen 77mm Neutral Density 0.9 Filter – I would definitely recommend the Dolica 3-pack over this Tiffen filter, but the quality will be a little better with the Tiffen, and you’ll save a little more money. However, if you’re looking to get into ND filters, it’s important to know that you get what you pay for.

Another 30 second long exposure at sunset!
77mm Lightcraft Workshop Fader ND Mark II – Since discovering the CHEAP-O Brand Vari-ND or Variable ND filter, I wouldn’t recommend purchasing this ND filter. At $125 it is cheap for a Vari-ND Filter, especially compared to the Singh-Ray, which runs $400, but it’s still expensive! From everything I read, the quality of the Lightcraft Workshop version is better than the CHEAP-O version, and nearly as good as the Singh-Ray version, but for a fraction of the price. I just can’t justify the increased price over the CHEAP-O.
I don’t know how, but I just boiled down days (literally) worth of research, spread across multiple years, into this article! I’ve left out a lot of details, as this is a topic I could go on and on about, but after using neutral density filters for a while, I think this is pretty solid advice, and I think my results with ND filters bear that out. So rather than getting fixated over all of the minutiae here, I’m going to stop here, keep it concise, and bank on you being able to make an informed decision with what I’ve presented. (I suppose it’s sort of a “trust me, I’ve been there” type article). If you’re purchasing a neutral density filter because you’re looking to take great fireworks photos, you might also want to check out my How To Photograph Fireworks eBook, which contains tons of beginner, intermediate, and advanced tips for DSLR and Point and Shoot camera users. It has more information than you’ll ever need to know about photographing fireworks!
If anything about this neutral density filter photography buying guide is unclear, please ask any questions you may have in the comments!
If you’re looking for other photography equipment recommendations or photography tips in general check out a few of my top photography blog posts:
Photography Buying Guide: Everything from Underwater Cameras to Software
Best Books for Improving Your Photography
5 Indispensable Tips for Better Vacation Photos
Infrared Photography Guide & Tips
Your Thoughts…
We hope this guide helps purchase the neutral density filter that’s right for you! If you have any questions, comments, or other suggestions, please share them in the comments!
Hello Tom,
I just purchased a Sony a57 and have been doing some research on ND filters. Found your blog this week and appreciate the great, non-technical, article (and pictures), which confirmed some other reviews I have read about the Hoya ND-400X, 9 Stop Multi-Coated Glass Filter.
I will be ordering it from Amazon this week and looking forward to some great results. Although these filters are more expensive than the “Cheap-O,” I always think it is best to spend a little more for better quality best results. My philosophy is “buy once & cry once!”
Thank you & best regards.
Yeah, the Cheap-O is definitely not my main filter. It offers great utility for fireworks, but as mentioned, I probably wouldn’t use it outside of fireworks.
Thank Tom!
Ever since I got exposed to long exposure, I have been researching ND filters! You article has cleared most of my questions!
Awesome, glad to have helped!
Hello, great information!!
I was looking at a few ND filters as well. It seems SRB has a new variable ND filter for $40 ish. Do you think this would fall into the same category as “el cheapo”?
They also have a wide line of $20ish square ND filters that are compatible with Cokin. Any chance you looked into these? Curious on the comparison of this product with that of Cokins.
Finally, they also sell the HiTech 8 stop ND square. Looks like a good ND filter for the price of $70ish I think?
I’d love to get the highest quality filters, but as I do a lot of pretty rough long term travel as a backpacker, my gear gets seriously trashed. Luckily the body and lens usually can handle, but filters seem to get pretty mangled….so looking for a compromise.
Thanks for all the info. Great stuff!!
Sorry, I can’t really help with the filters about which you’re asking, at least not yet. But now I have a list of other filters to research! My guess would be that any variable ND filter that costs $40 would be in the same category. That is to say it wouldn’t be of the same quality as the $400 ones. It might be worse than the el Cheapo, but I doubt it would be considerably better.
Once you’re getting into the $70-80 range, I would seriously look at the better brands. You’re only $20-30 away from some B+W and Hoya filters at that price. Personally, I’d just go with the brand names or the really cheap filters. In your case, since you beat up the gear, I’d go the cheap route.
Very informative and nicely laid out! 🙂 I am also a first-time filter buyer researching into various options and types so your article is much appreciated. Cheers!
Very useful. Thanks
Perfect timing,Tom. Been “thinking” about ND but ignorance blocked action.
just ordered a Hoya and a “no name” 77 and adapter from Amazon. I shoot two Canons, one has LifePixel IR filter.
Well written and appreciated.
Ed
Glad it was helpful! Which IR Canon do you use? What did you think of LifePixel? I’m not in the market for another IR camera, just curious.
is fix ND any better than the variable ND
No clue what “fix ND” is. Sorry!
My guess is a “fix ND” is a Fixed ND that cannot be adjusted vs. a variable one that can. If so I don’t know if you could say that one is better than the other but a variable ND does use two pieces of glass vs. one. Any time you put a piece of glass in front of a lens the more issues you can have. I have both and really don’t notice much differance between them. I use my variable when I need slight adjustments and use the Fixed 9 stop for large shutter adjustments. I like the variable because I can just twist is slightly and not have to take screw off one filter and screw on a new one all the time. I really hate taking filters on and off. I did try and use 2 polarizing filters stacked on top of each other for a cheep variable ND before I actually bought a real variable. I had pretty good results with it. Some color shifting occured that was kind of odd. I did not like this in certian situations but one of those color shifted photos of mine actually got picked up by a book publisher and sold for not bad of a fee, so I guess it worked out in the end. I guess in the end it really doesn’t matter what type of filter you use because it really matters what type of shot you are taking and who is viewing that photo that makes the most differance. I think these reviews give a great overall picture of what is out there and how they can be used. I usually point people here when they ask me the same questions.
Ah, makes sense. You sold an image with your homebrew vari-ND filter? Congrats! I remember you were looking for one of these around the same time I originally was. I only wish there was a post like this back then when we were doing our research. I put many, many hours (luckily they were all during class! ;)) of research into my first ND filter purchase.
Awesome, thanks for the reviews. Just ordered a “no-name” filter from Amazon… going to play with it this upcoming weekend at Holiday World and Kings Island. We’ll see if I can grab some worthwhile nighttime photos. Wondering how it will work with neon and other amusement park lighting schemes… should be fun to play with!
Tom,
Thanks for putting out this info. As a newbie, I have some really basic questions about the ND filters.
Are they only useful for landscape, fireworks and other fairly stationary objects or can they be used for normal family type photos?
Why does using a filter result in a longer shutter speed?
Thanks.
Love the website.
Mike,
ND filters do not change your shutter speed, they allow you to shoot using a longer shutter speed than normal. Imagine shooting a waterfall in bright light where you want to blur the motion of the water. You’d probably want to shoot at around a 1/2 second or longer. Without a ND filter, this would likely result in an overexposed image. The ND filter solves this problem.
Great Advice thanks! I’ve been obsessively looking at ND filters for months now. Any thoughts on graduated ND filters?
Thanks for this very informative article! I just purchased a Hoya based on your recommendation. You’re photos are fantastic. Thanks!
Hope you enjoy it!
Another choice is the Lee Big Stopper filter. Very nice, 10 stops of darkness! I checked into the Fader and it is less expensive, but I don’t think it’s as good as the Singh-Ray filter by any stretch. In fact, it seems to reduce sharpness of images. It seems to be for video, rather than still, which could explain a few things. For a variable, you may also want to look at the Heliopan filters. Even more expensive than the Singh-Ray, but just wonderful stuff.
Nice suggestions. Some of the stuff you’re mentioning costs serious money. Fine for a professional photographer making money off the craft, but for someone like me, they’re too much. I’d much rather use a static ND filter and have my aperture become the “vari” aspect. Not the same, I know, but it’s a workable option.
Fantastic article with well thought out and articulated reasons for a good quality ND filter.
Tom – the photos in this post are stunning! I particularly like the Polynesian one and Spaceship Earth. Excellent work!
I will sometimes use my lens hood simply for protection. Will I have to stop this practice if using even a small steo-up ring?
I am a beginner, and looking into ND filters. This article was a great help. Thank you.
ND filters are something I will keep in my bag going forward. It completely changes how you can take pictures; absolutely wonderful. Listen to Tom though and go big! I got “properly” sized filters for my camera, and then I bought a lens with a different sized front end. Oops. Another couple hundred bucks in filters on my list…
excellent explanation and timeous given that this is a subject i am currently researching. I am happy to spend biggish money but want to know I am making a wise investment. This blog has gone a long way to doing that.
Very useful article! I purchased the 3 Dolica filters in January last minute before our trip to WDW and they worked out well. They were very inexpensive and since I hadn’t used them before I wasn’t out a lot of money if I wasn’t happy. I’ve put your Hoya filter on my wishlist though for sure!
Great info. Am doing research on these as well looking to purchase one. This is very useful!